Step 1: Configure the AI server
This first step consists of declaring, at the SquashTM instance level, the AI server that will be used for generation.
Prerequisites
- An account with administrator rights.
- A SquashTM Ultimate 💎 license.
- A valid API key with the chosen provider (Anthropic, OpenAI, Mistral AI, Azure OpenAI, Google Vertex AI, or a custom provider).
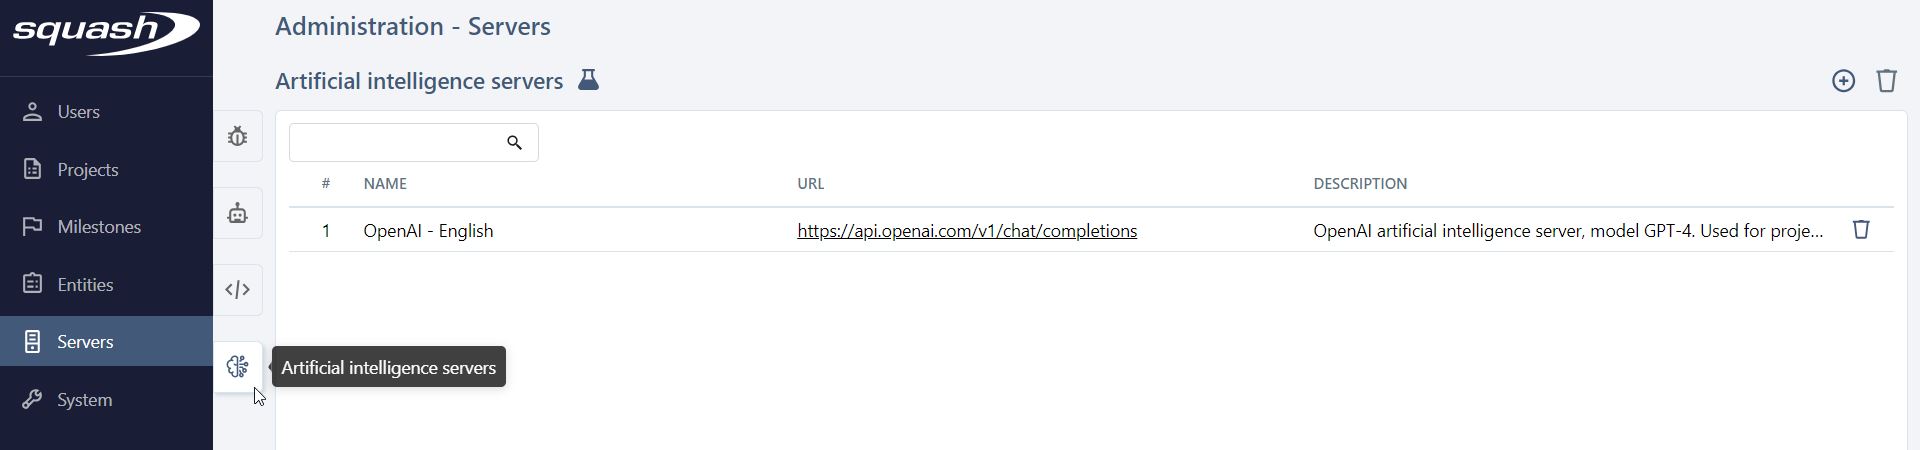
Access the AI servers page
Go to Administration > Servers, then click the Artificial Intelligence servers anchor ![]() .
.
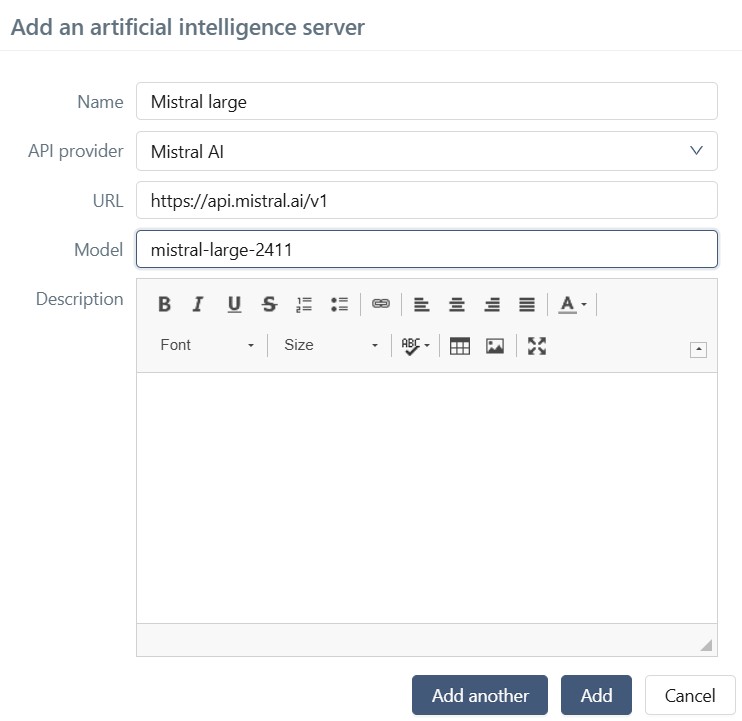
Add a new server
Click the Add  icon at the top of the table.
Fill in the mandatory fields:
- Name: label that will appear in the selection list at project level;
- API provider: Anthropic, OpenAI, Mistral AI, Azure OpenAI, Google Vertex AI, or Custom;
- URL: root URL of the provider's endpoints (a default value is suggested for each native provider);
- Model: the exact identifier of the model to use, as documented by your provider (the reference page provides links to each catalog).
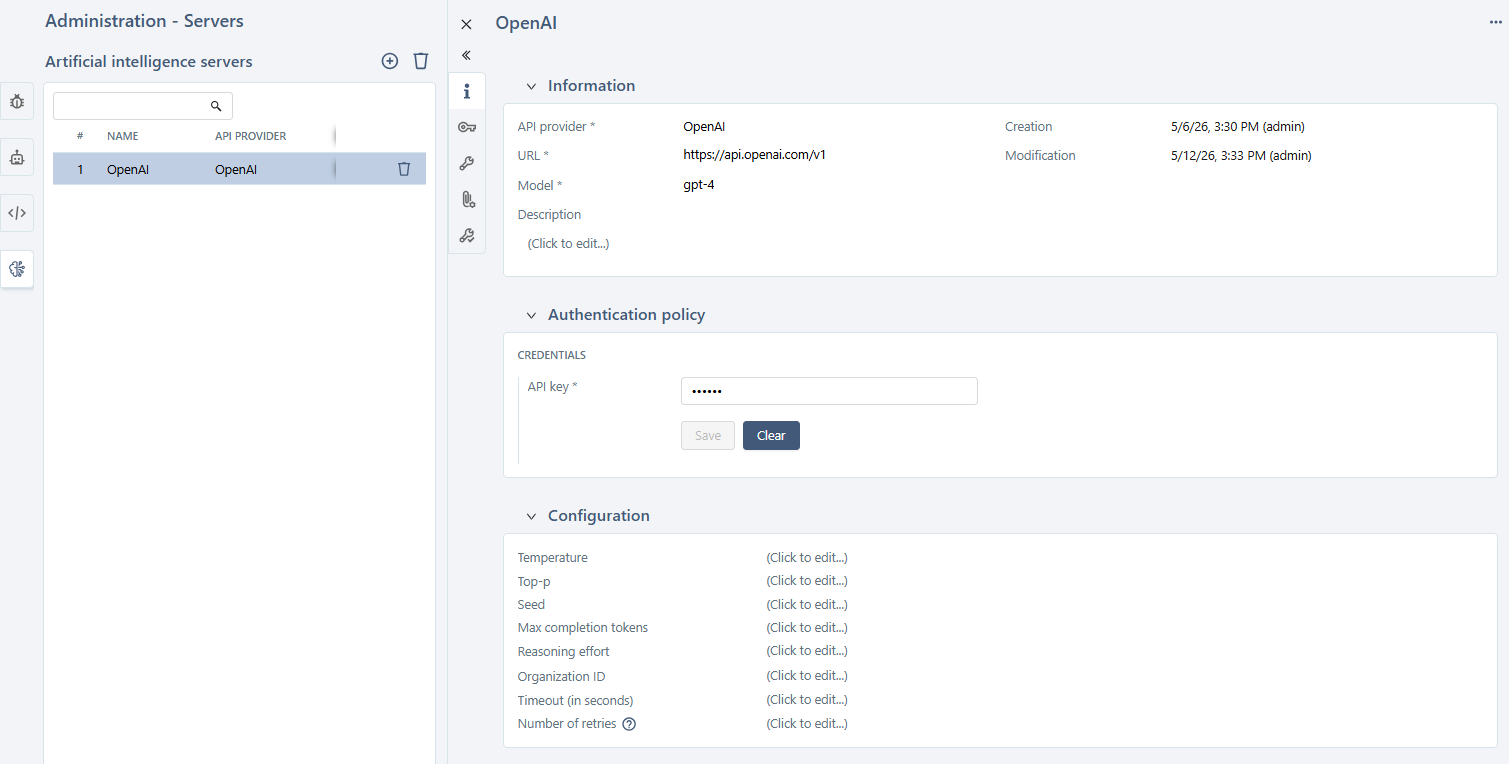
Complete the configuration
Click the # or the Name of the server to open its configuration page and finalize it:
- fill in your API key;
- adjust the model parameters (Temperature, Top-p, Max tokens, etc.) if needed;
- adjust the request parameters (Timeout, Number of retries, etc.) if needed.
Parameters per provider
Each provider exposes different parameters and applies its own default values. For the full list and links to each API's documentation, see Manage Artificial Intelligence servers.
Context document formats and sizes
The server page also includes a Document context limits panel that lets you define the allowed file formats and the maximum total size of documents that testers may attach during a generation. For details, see Document context limits.
Specific case: custom server
If your provider is not in the native list but exposes a chat completion API, choose the Custom provider. Configuring a custom server requires filling in two mandatory parameters: the Payload template and the JSON path of generated text.
Technical configuration
Setting up a custom server requires knowing the JSON format expected by the target API (request body, HTTP headers, response body). Refer to the provider's documentation before starting.
Recommended procedure:
- Identify the chat completion endpoint to use, along with the expected request and response body formats (provider documentation).
- Fill in the URL of this endpoint in the server's URL field.
- Configure the HTTP headers required for authentication (typically
Authorization: Bearer {{apiKey}}or equivalent). TheContent-Typeheader is automatically added by SquashTM. - Write the payload template in Handlebars. The
messagesandapiKeyvariables are injected by SquashTM, and helpers (isSystem,isUser,isModel,convertToJsonString) are available. See the OpenAI and Gemini examples in Configure custom Artificial Intelligence servers. - Define the JSON path of generated text to indicate to SquashTM where to retrieve the response within the JSON returned by the API (for example
choices[0].message.contentfor an OpenAI-style API).
Example: configure a server with an OpenAI-compatible API
For an endpoint compatible with OpenAI's chat/completions API, a minimal configuration would look like:
- URL:
https://api.example.com/v1/chat/completions; - HTTP header 1: name
Authorization, valueBearer {{apiKey}}; Payload template:
{
    "model": "my-model",
    "messages": [
        {{#each messages}}{
            "role": "{{#if (isSystem role)}}system{{/if}}{{#if (isUser role)}}user{{/if}}{{#if (isModel role)}}assistant{{/if}}",
            "content": {{convertToJsonString content}}
        }{{#unless @last}},
        {{/unless}}{{/each}}
    ]
}
JSON path of generated text:
choices[0].message.content.
For complete examples (OpenAI and Gemini), see Write templates.
Validate the template before the first send
Before testing the connection to the server, use the [Test the payload template] button to verify that your Handlebars template produces valid JSON. See Validate the payload template.
Limitations on context and images
For Custom servers:
- adding context documents by testers is not available. Only requirements can be added as context.
- images are not supported: all images contained in the requirements are ignored during generation.
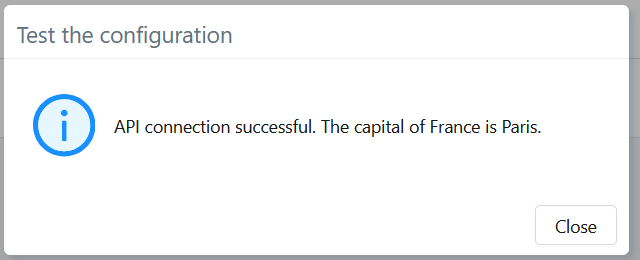
Configuration test
Before moving to the next step, check that SquashTM can communicate with the server from the Configuration test block.
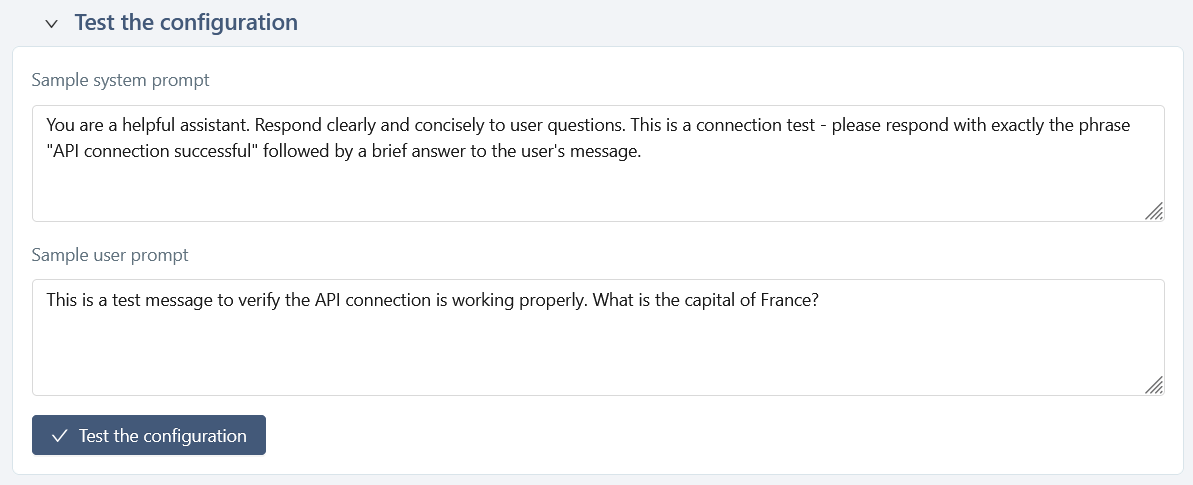
Run the test: if everything is correct, you get a response from the AI.
In case of failure, the panel displays the raw error message returned by the API. The most common causes are:
- invalid or missing API key;
- incorrect model name;
- incorrect URL;
- timeout or network issue.
Unavailable for SquashTM Cloud
For security reasons, error details are not accessible to SquashTM Cloud users when the URL used is not the provider's default URL.
What you have accomplished
- An AI server is declared at the instance level;
- the connection to the provider is validated by the configuration test;
- this server is now available in each project's configuration.