Prepare SquashTM
Automated tests repository
To add CI/CD results to SquashTM, you must have automated tests.
In this example, we use a Robot Framework test suite.
What this test suite does:
This Robot Framework test suite validates login rules. It contains two test cases:
- Valid Login Passes: Tests a valid login (
valid_login) that meets all requirements (correct length, no spaces). This test is expected to pass. - Invalid Login Fails: Tests an invalid login (
invalid login) that violates the rules (contains a space). This test is expected to fail.
The suite demonstrates how automated tests can have both passing and failing results, which will be reflected in SquashTM after integration.
Authentication setup
To follow this guide, you need at least:
- For project setup: Administrator privileges are required to create projects
- For publishing test results: An account with execution permissions
For this guide, we'll use an API token with the built-in administrator account for demonstration purposes.
Creating an API token
You can create an API token with read and write permissions, either from the web interface or via API:
From the web interface:
Learn how to create and manage API tokens in the Personal API Tokens documentation.
From the API (optional):
You can create a token by sending a POST request with basic <login:password> authentication to /api/rest/latest/tokens:
{
  "name" : "token read write",
  "permissions" : "READ_WRITE",
  "expiry_date" : "2026-12-01"
}
You can retrieve the token from the response body.
Basic Authentication required
To create a token via the API, Basic Authentication must be enabled. If it's not enabled, create the token from the web interface instead.
Save Your API Token
Important: API tokens are only displayed once at creation time (web interface) or in the API response. Make sure to copy and save your token immediately. If you lose it, you'll need to generate a new one.
Production Environments
In production, create a dedicated technical user account with minimal permissions (only those required to run tests in the Executions workspace).
Use this account's API token for CI/CD authentication to follow security best practices.
Configure project, test case, and execution plan in SquashTM
In SquashTM, prepare the project so CI/CD results can be mapped and displayed.
You can either do this from the web interface or use the API.
To create a project, you'll need administrator privileges.
From the web interface
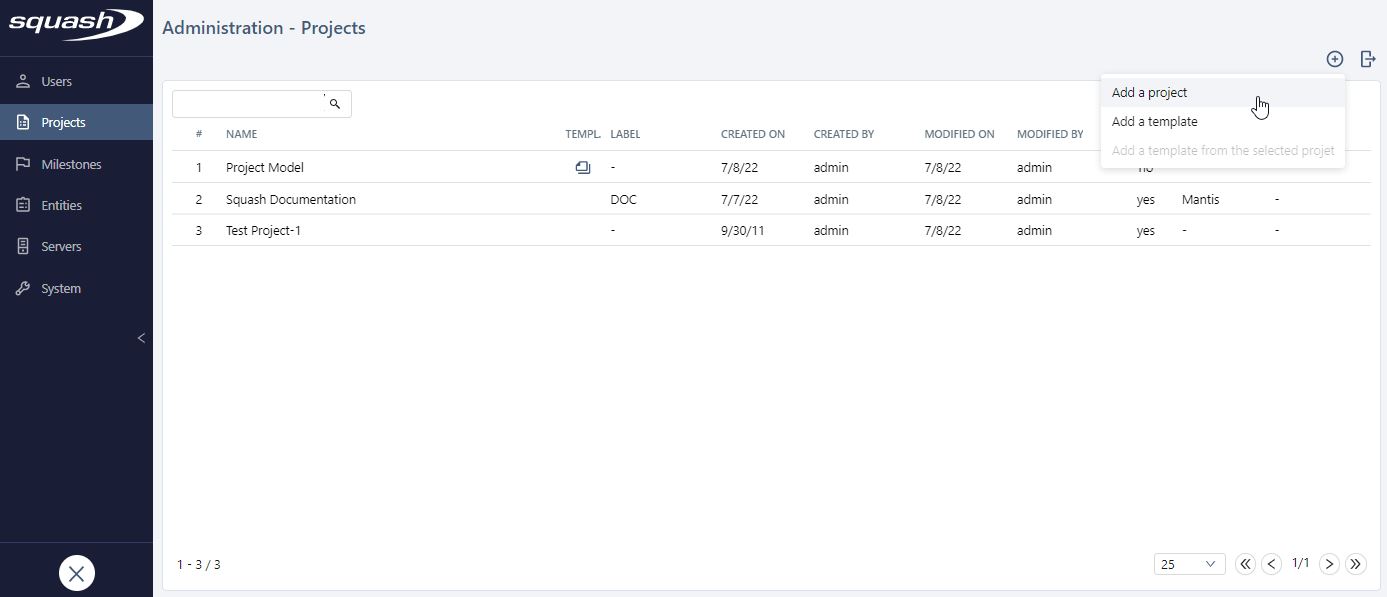
Step 1: Create a project
Go to Administration > Projects and add a project. 
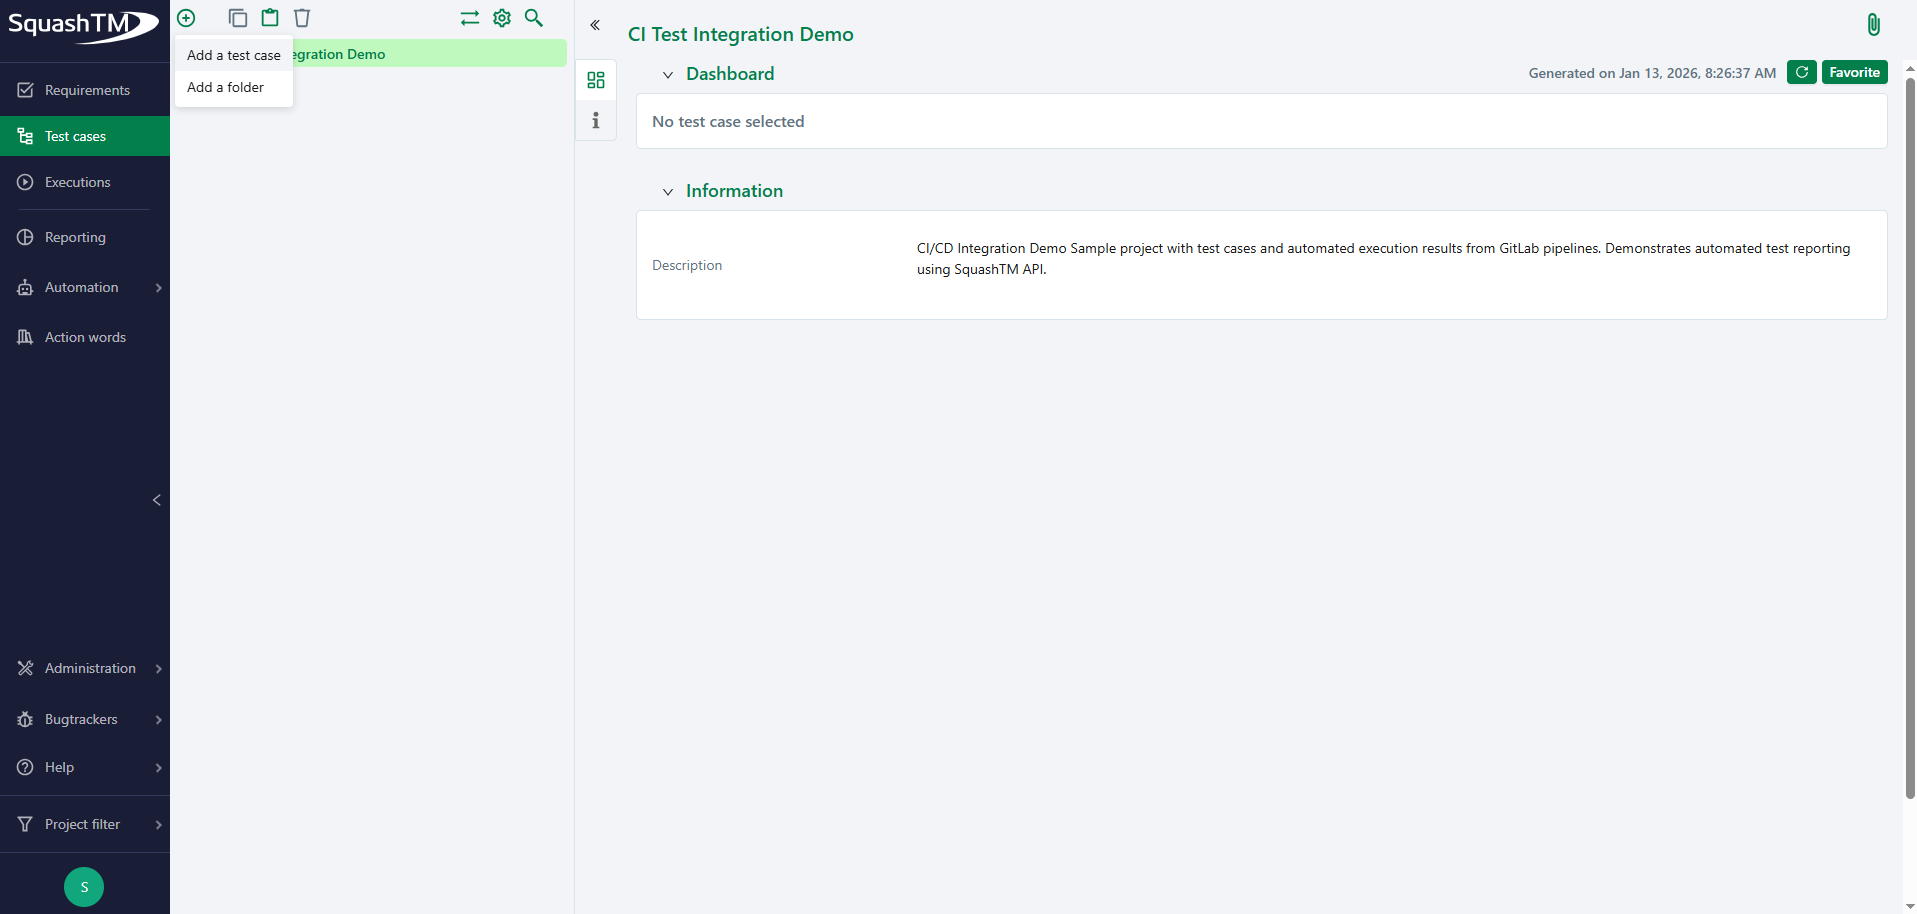
Step 2: Create a test case
Go to the Test Case workspace and add a test case in the project you just created.
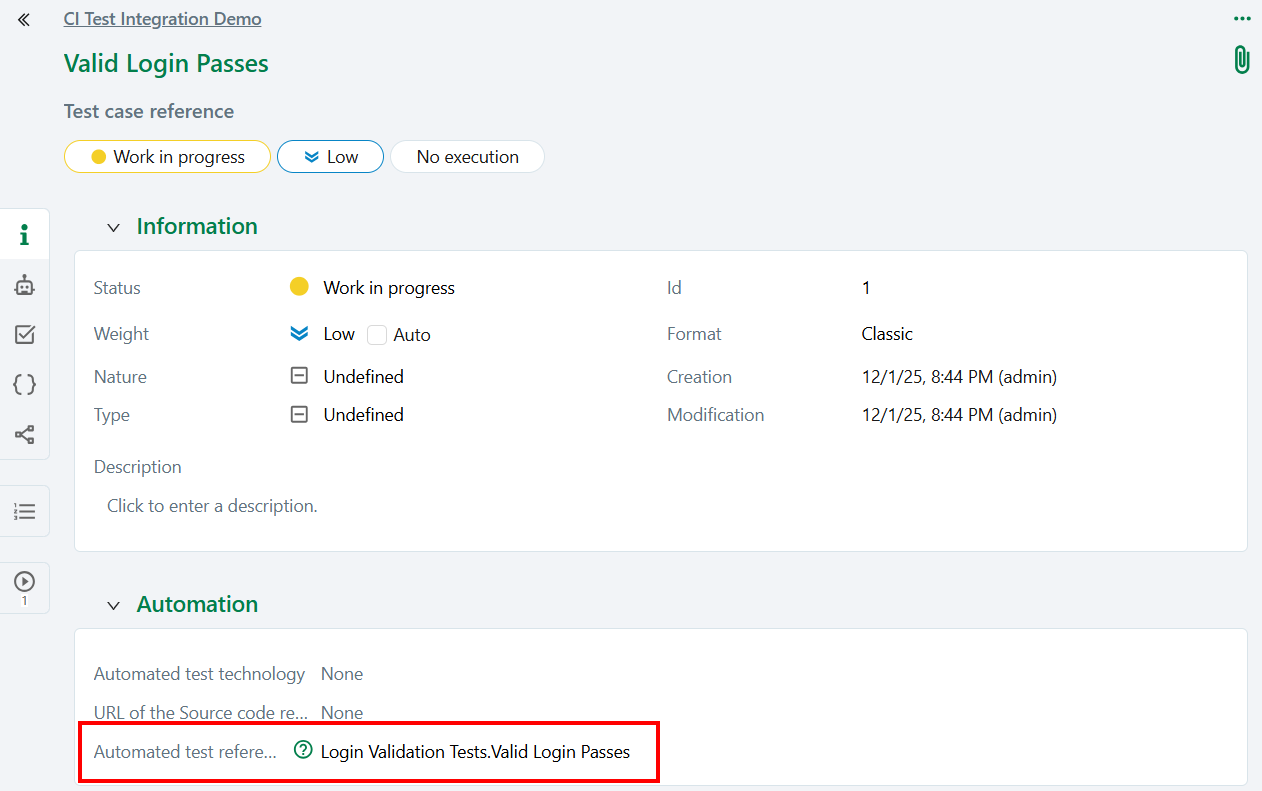
Fill in the automated test reference field.
Critical: Automated Test Reference
The automated test reference is the key mapping mechanism that links automated test results to SquashTM test cases. This field is essential for the CI/CD integration to work correctly.
How it works:
- When your CI/CD pipeline runs automated tests, the parser generates a reference for each test result
- SquashTM uses this reference to match incoming test results with the corresponding test cases
- If the references don't match exactly, test results will be ignored by Squash.
In this guide, the reference format is: <SuiteName>.<TestName> (e.g., Login Validation Tests.Valid Login Passes)
In this example, we use the test suite name and test name, separated by a dot.
For example: Login Validation Tests.Valid Login Passes
Multiple tests in your suite
The example Robot Framework test suite contains two test cases. Create a second test case in SquashTM with the reference "Login Validation Tests.Invalid Login Fails" to match the second automated test.
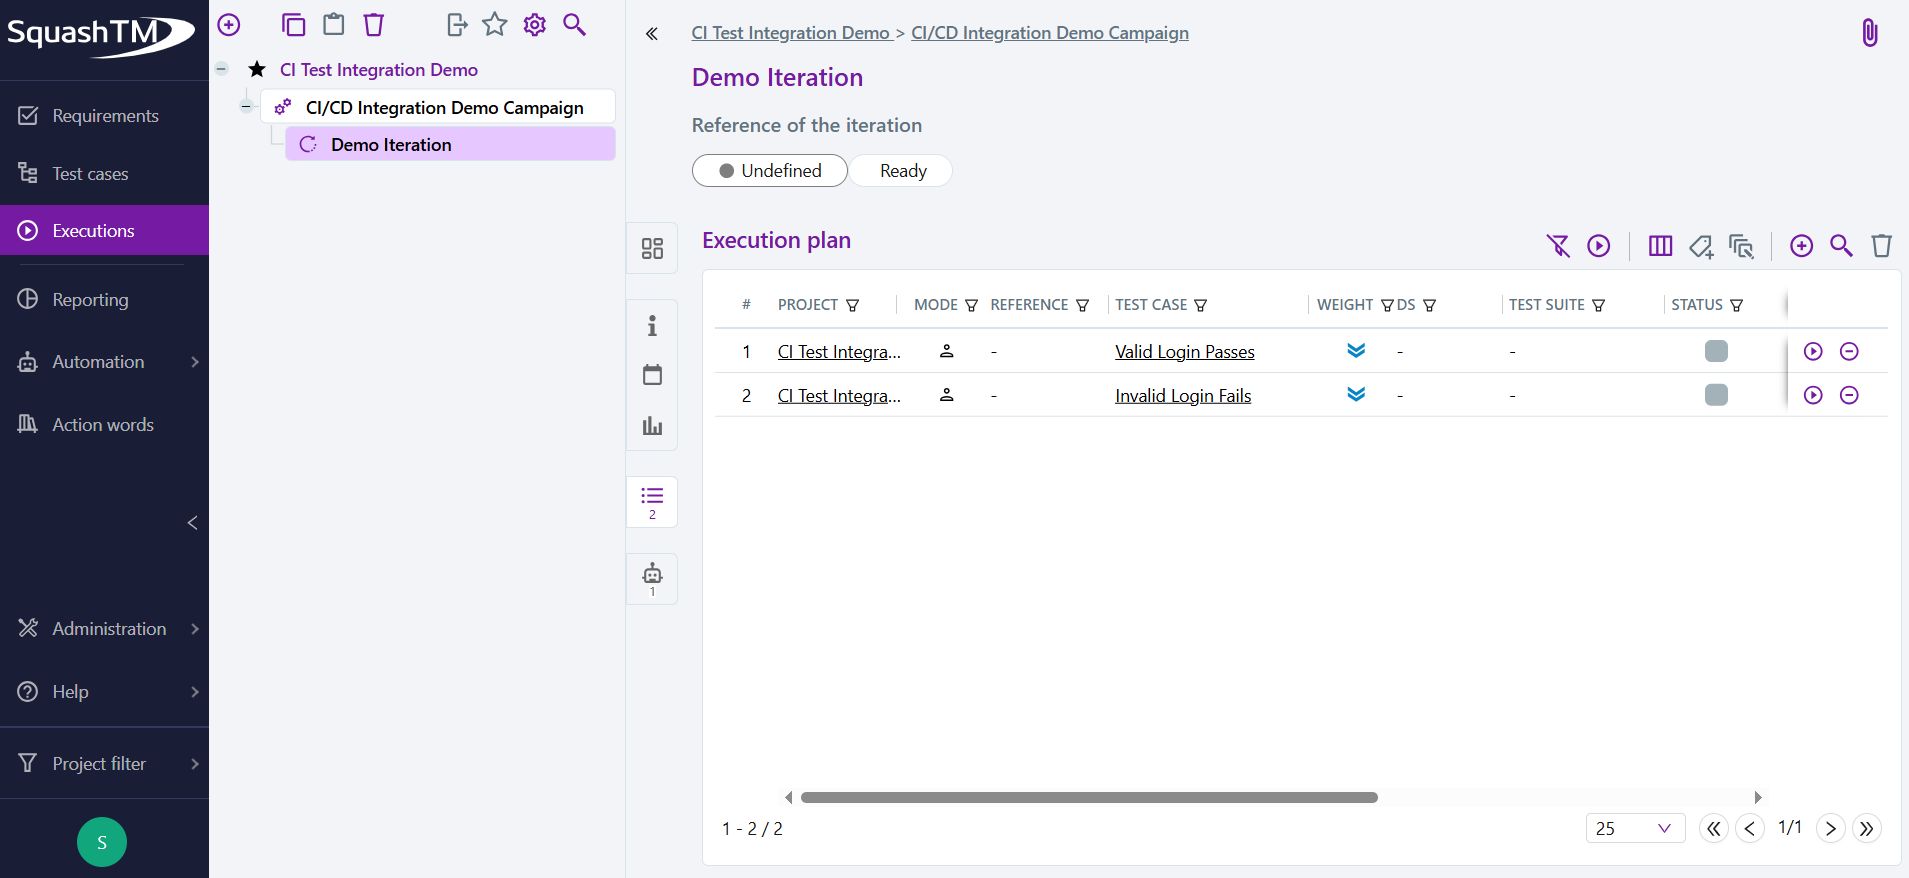
Step 3: Add the test case to an execution plan
Go to the Executions workspace, add a campaign in the project you just created.
Add an iteration in the campaign.
Add the test(s) you just created to the iteration's execution plan by clicking on the  button, then drag and drop the test cases to the execution plan table.
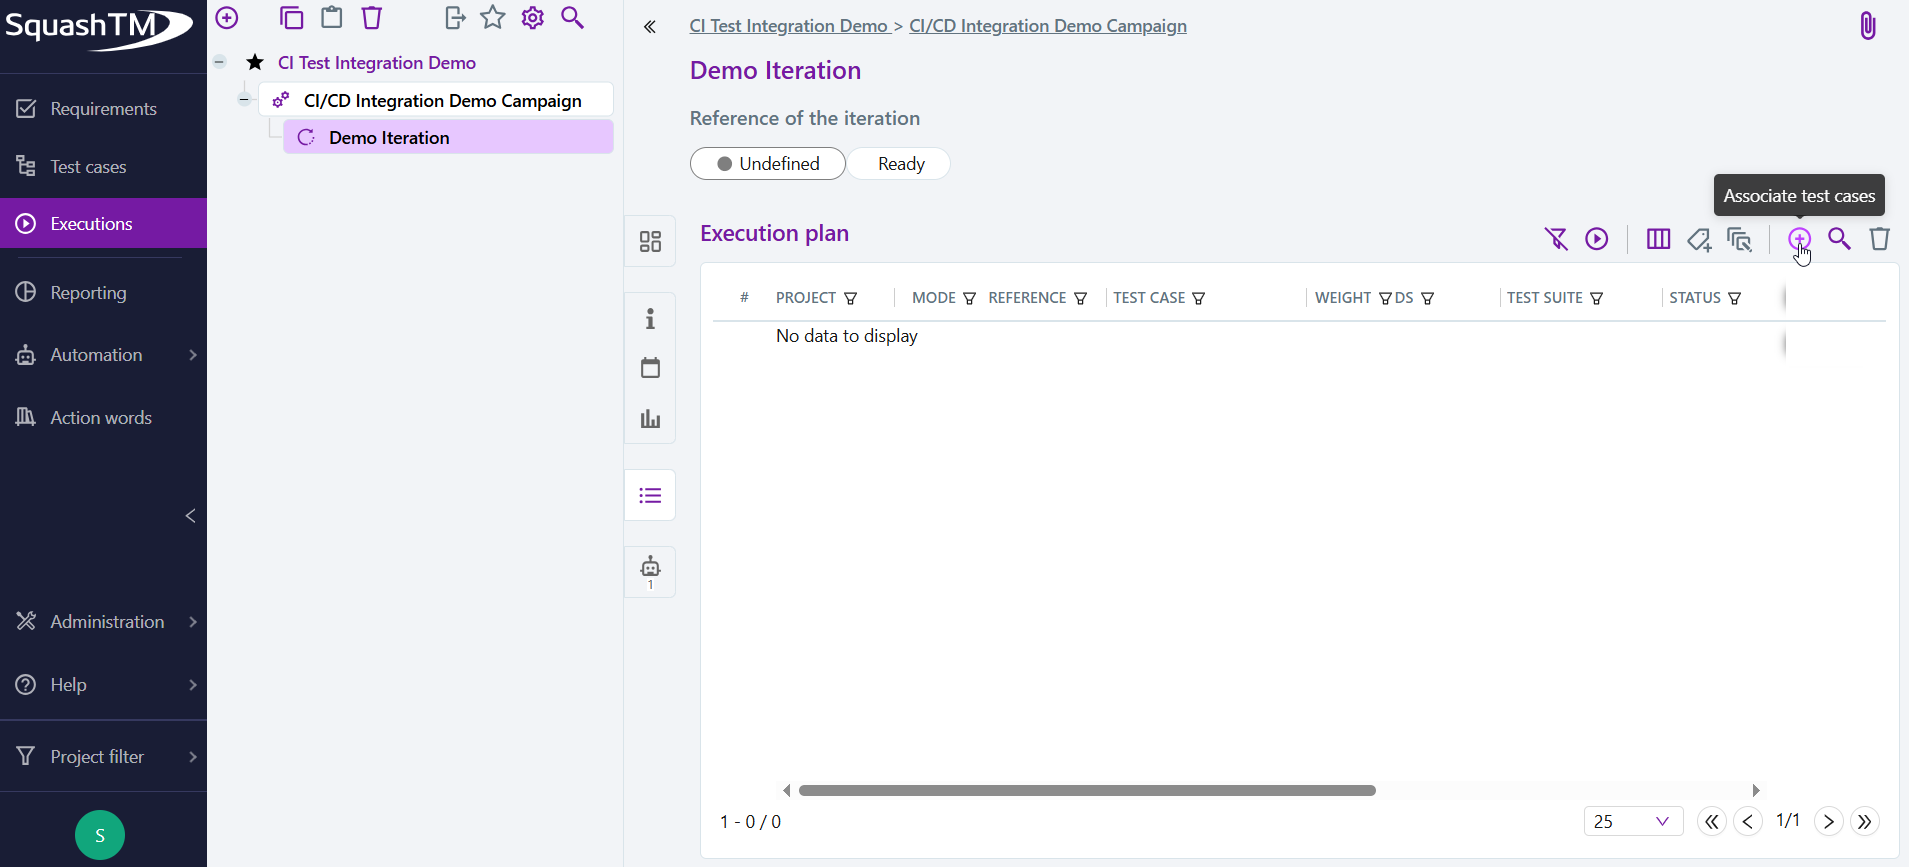
In this example, we then have an execution plan with our two previous test cases:
From the API
Prerequisites for API usage
- Authentication: You must be authenticated to use the API (see the prerequisites for authentication setup).
- API REST Admin Plugin: To create a project using the API, you must have the API REST Admin plugin installed in SquashTM and a Premium 👑 or Ultimate 💎 license. If you have a Community license, you can create a project using the web application.
Step 1: Create a project
With administrator privileges, you can create a project by sending a POST request to /api/rest/latest/projects.
For example:
{
  "_type" : "project",
  "name" : "CI Test Integration Demo"
}
You can retrieve the project ID from the response body.
Step 2: Create a test case
You can create test cases by sending a POST request to /api/rest/latest/test-cases.
The automated test reference field must be filled in. This will be used by SquashTM to map the automated execution results to the corresponding test case. In this example, we use the test suite name and test name, separated by a dot.
{
  "_type" : "test-case",
  "name" : "Valid Login Passes",
  "parent" : {
    "_type" : "project",
    "id" : 1
  },
  "automated_test_reference": "Login Validation Tests.Valid Login Passes"
}
You can retrieve the test case ID from the response body.
Step 3: Add the test case to an execution plan
First, you need to create a campaign in the project you just created.
You can create a campaign by sending a POST request to /api/rest/latest/campaigns.
{
  "_type" : "campaign",
  "name" : "CI/CD Integration Demo Campaign",
  "parent" : {
    "_type" : "project",
    "id" : 1
  }
}
You can retrieve the campaign ID from the response body.
Then, you need to create an iteration in the campaign.
You can create an iteration by sending a POST request to /api/rest/latest/campaigns/{campaign_id}/iterations.
{
  "_type" : "iteration",
  "name" : "Demo Iteration",
  "parent" : {
    "_type" : "campaign",
    "id" : 1
  }
}
You can retrieve the iteration ID from the response body.
Finally, you can add the test case to the iteration's execution plan by sending a POST request to /api/rest/latest/iterations/{iterationId}/test-plan.
{
  "_type" : "test-plan-item",
  "test_case" : {
    "_type" : "test-case",
    "id" : 1
  }
}
Add the second test case
Repeat this API call with the ID of the second test case (id: 2) to also add it to the execution plan.
What you've accomplished
You're all set! Your SquashTM environment is now ready to receive CI/CD test results.
What you have now:
- A project with test cases that have automated test references
- An execution plan (iteration) to track test executions
- An API token for authentication
Next steps
What you'll learn in the next steps:
- How to configure your CI/CD to run automated tests and produce xUnit reports
- How to parse the report and build the SquashTM JSON payload
- How to publish results to SquashTM via the API
What you'll need:
- Your SquashTM public URL
- Your API token
- The iteration ID of your execution plan
- The automated test reference format used in your test cases (e.g.,
SuiteName.TestName)
Proceed to: Run automated tests in CI/CD