OpenID Connect plugin configuration
OpenID Connect plugin adds a new authentication entry point to SquashTM. SquashTM behaves as a Service Provider only. The Identity Provider is an external tool such as Google, GitLab, Microsoft, or Okta.
OpenID Connect relies on the OAuth 2.0 protocol associated with a JSON Web Token (JWT).
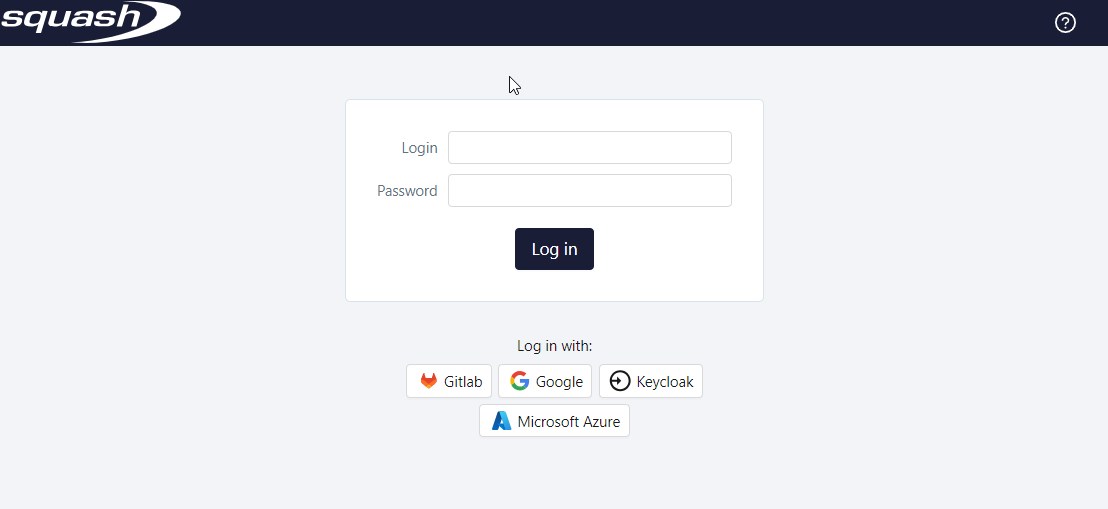
This plugin does not replace the login form which remains the authentication entry point by default in SquashTM. As such, users can keep on authenticate themselves through the Login and Password fields.
Quick plugin configuration
Prerequisites
OpenID Connect plugin requires:
- SquashTM version 6.0 at least;
- a valid Premium or Ultimate license;
- to have downloaded the security.openid.connect-X.Y.Z.RELEASE plugin.
This documentation gives some examples with Google, GitLab, and Okta IdPs, but other applications can be used as identity Provider: Microsoft Azure, Keycloak, GitHub…
Creating or registering of the application in the IdP.
It is required before starting any configuration attempt in SquashTM to create the app in the IdP. Here are the links to the documentation pages describing the steps to follow for Google, GitLab, and Okta:
- Create an application with Google Cloud Console following the documentation provided by Google;
- Create an application with GitLab following the documentation provided by GitLab;
- Create an application with Okta following the documentation provided by Okta.
Configuration in SquashTM
Activate the plugin by adding the following property in the
squash.tm.cfg.propertiesfile which is located in theconffolder of SquashTM. If it already exists, simply add theopenid-connectprofile to the already existing profiles, separated by a comma.spring.profiles.include=openid-connectPlace the
security.openid.connect-X.Y.Z.RELEASE.jarplugin in thepluginsfolder of SquashTM;Add and modify the
squash.tm.cfg-openid-connect.propertiesconfiguration file of the plugin in theconffolder of SquashTM. The desired configurations are carried by that file.
Fill in the properties file
OAuth2 properties
OAuth2 properties regarding the setup of an IdP follow this naming pattern:
spring.security.oauth2.client.[provider_or_registration].[idp_name].[property]
The name of the IdP can be defined freely, this value is displayed on the connection button on the standard SquashTM connection page. Spaces must be replaced with _.
There are two types of properties of the configuration of an IdP: properties with so-called "provider" information and those with so-called "client" information.
- "provider" properties: those properties start with
spring.security.oauth2.client.provider; - "client" properties: those properties start with
spring.security.oauth2.client.registration.
Those properties match the information provided by the IdP following the registration of the application.
Depending on the chosen IdP, all configuration properties will not be required. In particular for Google, Okta, GitHub, and Facebook IdPs, they can be omitted.
To avoid configuration mistakes, it is recommended to inquire about the minimal configuration required for the selected IdP or to fill in all properties. For more information regarding the available properties, refer to the documentation available directly in the properties file squash.tm.cfg-openid-connect.properties embedded in the plugin.
Add properties with information from "the provider"
Some examples:
Google
Google does not require any of those properties to be filled.
Info
Google provider's infos are directly embedded into the plugin, therefore it is not necessary to add them.
GitLab
spring.security.oauth2.client.provider.gitlab.authorization-uri=https://gitlab.com/oauth/authorize
spring.security.oauth2.client.provider.gitlab.token-uri=https://gitlab.com/oauth/token
spring.security.oauth2.client.provider.gitlab.user-info-uri=https://gitlab.com/oauth/userinfo
spring.security.oauth2.client.provider.gitlab.jwk-set-uri=https://gitlab.com/oauth/discovery/keys
spring.security.oauth2.client.provider.gitlab.issuer-uri=https://gitlab.com
Okta
spring.security.oauth2.client.provider.okta.authorization-uri=
spring.security.oauth2.client.provider.okta.token-uri=https://{yourOktaDomain}/oauth2/default/v1/token
spring.security.oauth2.client.provider.okta.user-info-uri=
spring.security.oauth2.client.provider.okta.jwk-set-uri=
spring.security.oauth2.client.provider.okta.issuer-uri=
Add properties with information from "the client"
Some examples:
Google
spring.security.oauth2.client.registration.google.client-id= {client id}
spring.security.oauth2.client.registration.google.client-secret= {client secret}
spring.security.oauth2.client.registration.google.authorization-grant-type.authorization_code{optional}
spring.security.oauth2.client.registration.google.redirect-uri= https://{yourSquashDomain}/squash/oidc/code/google
spring.security.oauth2.client.registration.google.scope= {scope}
spring.security.oauth2.client.registration.google.client-name= {IdP name} {optional}
GitLab
spring.security.oauth2.client.registration.gitlab.client-id= {application id}
spring.security.oauth2.client.registration.gitlab.client-secret= {secret}
spring.security.oauth2.client.registration.gitlab.authorization-grant-type=authorization_code
spring.security.oauth2.client.registration.gitlab.redirect-uri= https://{yourSquashDomain}/squash/oidc/code/gitlab
spring.security.oauth2.client.registration.gitlab.scope= {scope}
spring.security.oauth2.client.registration.gitlab.client-name= {IdP name} {optional}
Okta
spring.security.oauth2.client.registration.okta.client-id= {client id}
spring.security.oauth2.client.registration.okta.client-secret= {client secret}
spring.security.oauth2.client.registration.okta.authorization-grant-type=client_credentials
spring.security.oauth2.client.registration.okta.redirect-uri= https://{yourSquashDomain}/squash/oidc/code/okta
spring.security.oauth2.client.registration.okta.scope= {scope}
spring.security.oauth2.client.registration.okta.client-name= {IdP name} {optional}
Everything related to spring.security.oauth2.client.provider.XXX.YYY is located in each IdP's OpenID Connect .well-known file
Everything related tospring.security.oauth2.client.registration.XXX.YYY is specific to the SquashTM application provided in the IdP
XXXis to be defined by yourself to differentiate the different IdPs;YYYare the minimum parameters to be able to connect SquashTM to the OpenID Connect IdP.
Focus
The redirect-uri property specifies the URL where the IdP will send the authentication response. It should match the following format: https://{yourSquashDomain}/squash/oidc/code/{IdP name}.
This URI must be configured in both SquashTM and the IdP.
Recommended properties
user-name-attribute
Adding the user-name-attribute property enables to determine which value is used as login for a user in SquashTM.
Beware, this value must be unique. If an already existing user has an identical login to the value send by the IdP, it will log onto the already existing user. If that value does not match any login, a new user is created.
Recommended configuration of this property:
spring.security.oauth2.client.provider.[idp_name].user-name-attribute=mail
oidc.access.whitelist
Some IdPs do not provide the possibility to filter users allowed to access the application. This property enables to define a white list of domain names or user's email allowed to connect to SquashTM.
The elements from the list must be separated by commas and must not contain any spaces:
oidc.access.whitelist=@domain_name.com,@domain_name.fr
Warning
The oidc.access.whitelist property cannot be used with an IdP which does not know or provide the user's email, as it is the case with Microsoft Azure.
Connection operation
Users can both log in through the IdP as well as the default login form.
For users to be able to log in to SquashTM with OpenID Connect, they must be present in the IdP and be authorized to log in. Only users from domain authorized by the application and by the white list defined in SquashTM can log in with this IdP:
- If the user is not authorized to log in by the application, an error message from the IdP is displayed;
- If the user is authorized to log in by the application but is not by the white list configured in SquashTM, an error message is displayed directly in SquashTM;
- If the user is authorized to log in by both the application and the white list, the user can log in:
- The user already has an account in SquashTM with an identical login: when connecting, he/she gets authorizations associated with this account;
- The user does not have a user account in SquashTM: during the first connection, a user account is automatically generated in SquashTM but no authorization is granted;
Subsequently, authorizations must be granted by an administrator in SquashTM.