Install SquashTM License and Plugins
Install SquashTM Plugins
There are two ways to install plugins in SquashTM:
By using the plugin files embedded in SquashTM distribution
- Retrieve the plugin in the
squash-tm/plugin-filesfolder; - Move or copy the folder corresponding to the plugin to be installed to the following folder:
- for Linux tarball:
/opt/squash-tm/plugins; - for Windows:
C:\<rep>\squash-tm\plugins;
- for Linux tarball:
- In Linux, give read permission to the squash-tm user for the
.jarfiles; - If it is a commercial plugin, make sure that:
- the license file
squash-tm.licis in the folderlicense; - the SquashTM Premium plugin is present in the folder mentioned above in step 2;
- the license file
- Restart SquashTM for the plugins installation to be taken into account.
By downloading the plugins
- Download the plugin from the Downloads page;
- Extract the plugin;
- Select all the
.jarfiles it contains and put them in the following folder:- for Linux tarball:
/opt/squash-tm/plugins; - for Windows:
C:\<rep>\squash-tm\plugins;
- for Linux tarball:
- In Linux, give read permission to the squash-tm user for the
.jarfiles; - If it is a commercial plugin, make sure that:
- the license file
squash-tm.licis in the folderlicense; - the SquashTM Premium plugin is present in the folder mentioned above in step 3;
- the license file
- Restart SquashTM for the plugins installation to be taken into account.
Info
Plugins can also be put in subfolders of the plugins folder.
Info
The list of installed plugins can be directly viewed in SquashTM by a functional administrator in the system information.
Once installed, some plugins can operate right away, such as API or reporting plugins. Other plugins need to be configured in the server or in SquashTM Administration workspace.
Learn more
To learn more about configuring plugins in the server, please read Configuring plugins. For other configurations, please read the Administrator Guide.
Install the Commercial License
The use of SquashTM commercial plugins is determined by the presence of a license file: squash-tm.lic. This file is mandatory to start SquashTM with commercial plugins.
This file is given to the client by the SquashTM Support Team following the formalization of a new license or a renewal.
The license file is unique to each client. It contains the following information:
- expiration date;
- number of users;
- list of the authorized commercial plugins according to the license(s) you have.
You can use this license file for production instances as well as preproduction instances.
To install the license file in SquashTM:
- In SquashTM's
pluginsdirectory, create a subdirectory entitledlicense - Put the file
squash-tm.licgiven to you by the SquashTM Support Team in that subdirectory; - Restart SquashTM.
The license file controls the number of active users in SquashTM. When the maximum number of users is exceeded, a message appears to alert the administrators. If this number is exceeded by more than 20%, the creation of new users is blocked.
Two months before the license's expiration date, a message alerts the administrators. Beyond this date, the message will alert all the users. If the license is still not renewed two months after the expiration date, SquashTM shuts off. You will then have to uninstall the commercial plugins to be able to restart SquashTM.
Install Xsquash for Jira Data Center
Xsquash is an additional component available on the Atlassian Marketplace for Jira Data Center that reinforces the integration between SquashTM and Jira. It displays SquashTM test cases and executions directly in Jira issues that were synchronized in SquashTM via Xsquash4Jira.
Info
The data is displayed in Jira via SquashTM's REST API. This plugin does not write in the Jira database.
This plugin requires at least Jira Data Center 8.4+.
Learn more
For more information on how to configure the Xsquash4Jira plugin, please visit the page Configure Xsquash4Jira in SquashTM.
To install the Xsquash plugin on Jira Data Center, please follow these steps:
- Log into Jira as an administrator;
- Go to Jira Administration and click on Manage Apps. The Atlassian Marketplace for Jira appears;
- Search for Xsquash in the Marketplace. The search results include the app versions that are compatible with Jira;
- Click on [Install] to download and install the app;
- Click on Close in the dialog window.
Xsquash must be configured for it to work.
Learn more
For more information on how to configure the Xsquash plugin, please visit the page Configure Xsquash in Jira.
Install the Xsquash Cloud app in Jira Cloud
Xsquash Cloud (Forge) is an application available on the Atlassian Marketplace
This app is only available if you have a commercial license.
Warning
- Xsquash Cloud (Forge) is compatible with SquashTM 14 and later versions.
- Xsquash Cloud (Forge) requires a SquashTM Premium license 👑 or a SquashTM Ultimate License 💎.
- Xsquash Cloud (Forge) versions are independent from SquashTM versions. Compatibility details are available in the release notes of each application version.
Info
The data is displayed in Jira via SquashTM's REST API. This app does not write in Jira Cloud's database.
Learn more
For more information on how to configure the Xsquash4Jira plugin, please visit the page Configure Xsquash4Jira in SquashTM.
Install Xsquash Cloud
You can access the application directly by clicking here, then install it by clicking [Get it now].
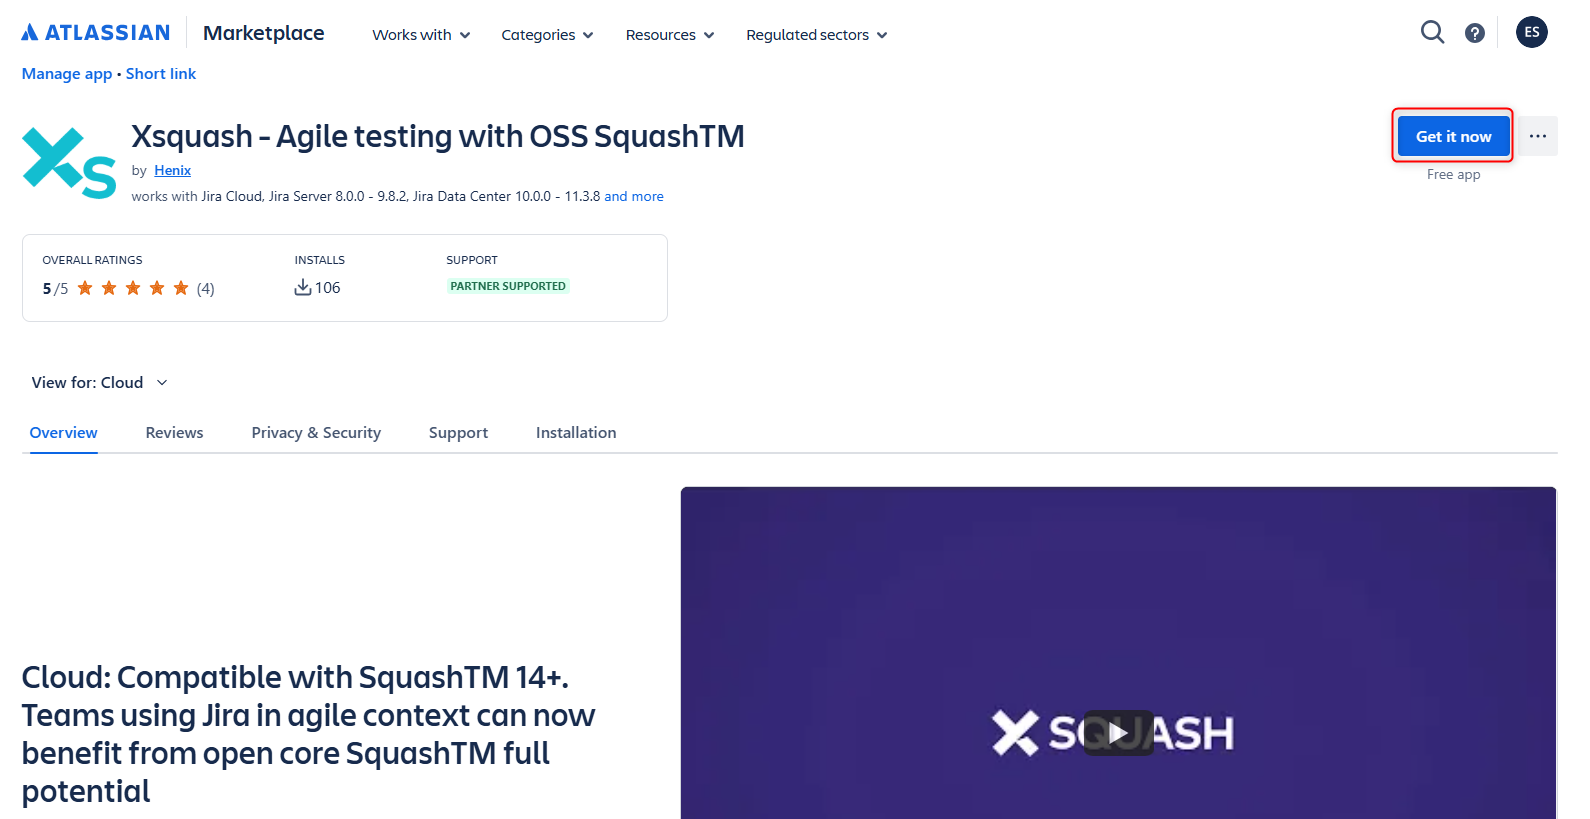
You can also follow this procedure:
- Log in to your Jira Cloud instance with an administrator account;
- In the left-hand menu, expand [Apps], then click [Explore more apps];
- Enter "Xsquash" in the search bar, then click [Search];
- Click on the Xsquash application;
- Make sure the Cloud version is selected;
- Click [Get it now];
- Then follow the installation steps to add the application to your Jira Cloud instance.
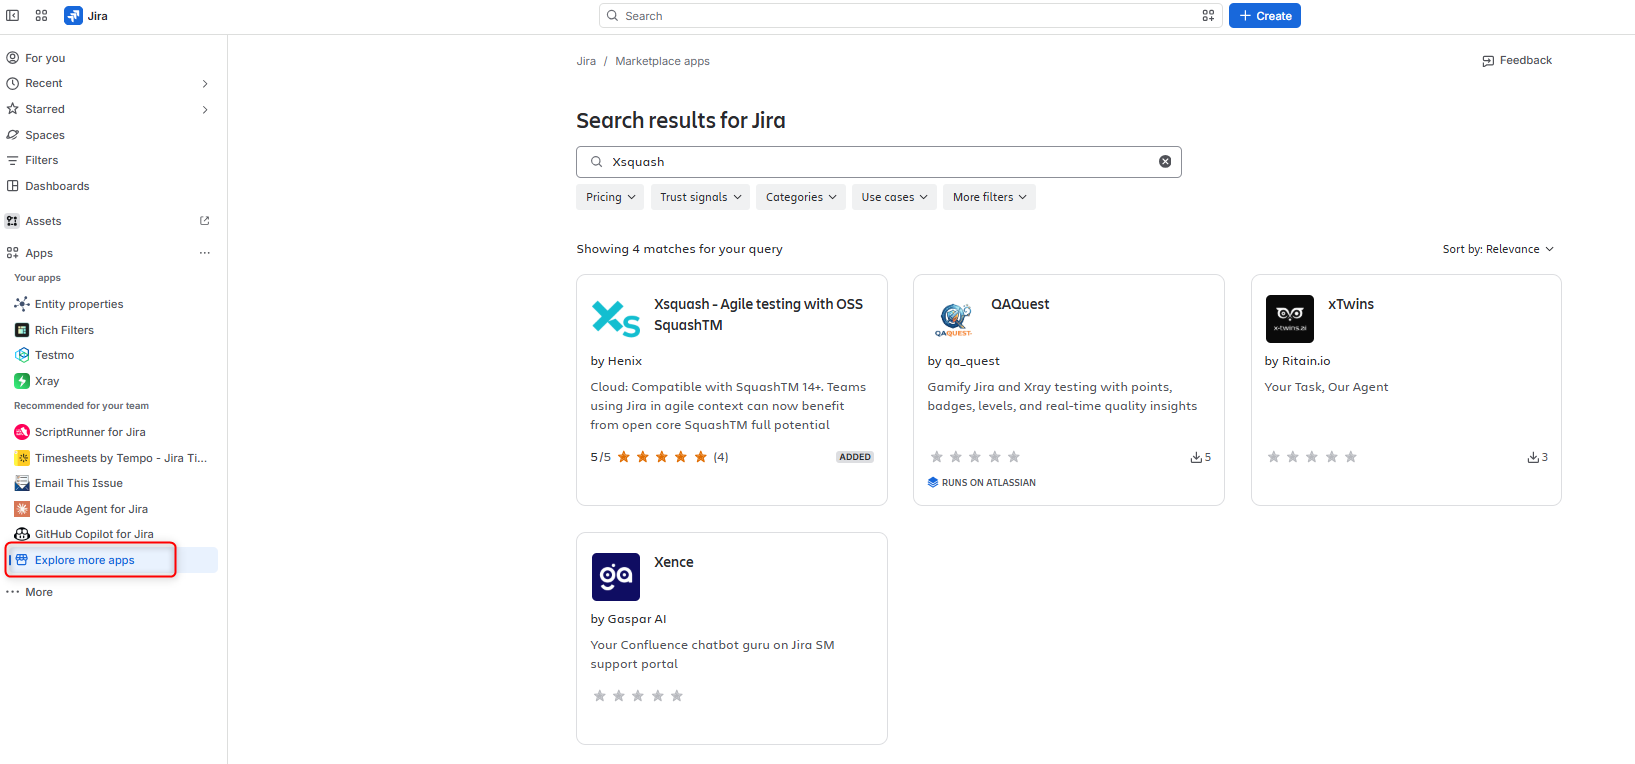
You must then configure the app in order to use it.
Learn more
For more information on how to configure the Xsquash Cloud app, please visit the page Configure Xsquash Cloud in Jira Cloud.
Network flows to open for an On-Premise installation
If your SquashTM instance is hosted On-Premise (on your own network), certain network flows must be opened to allow communication between Xsquash Cloud and your SquashTM instance.
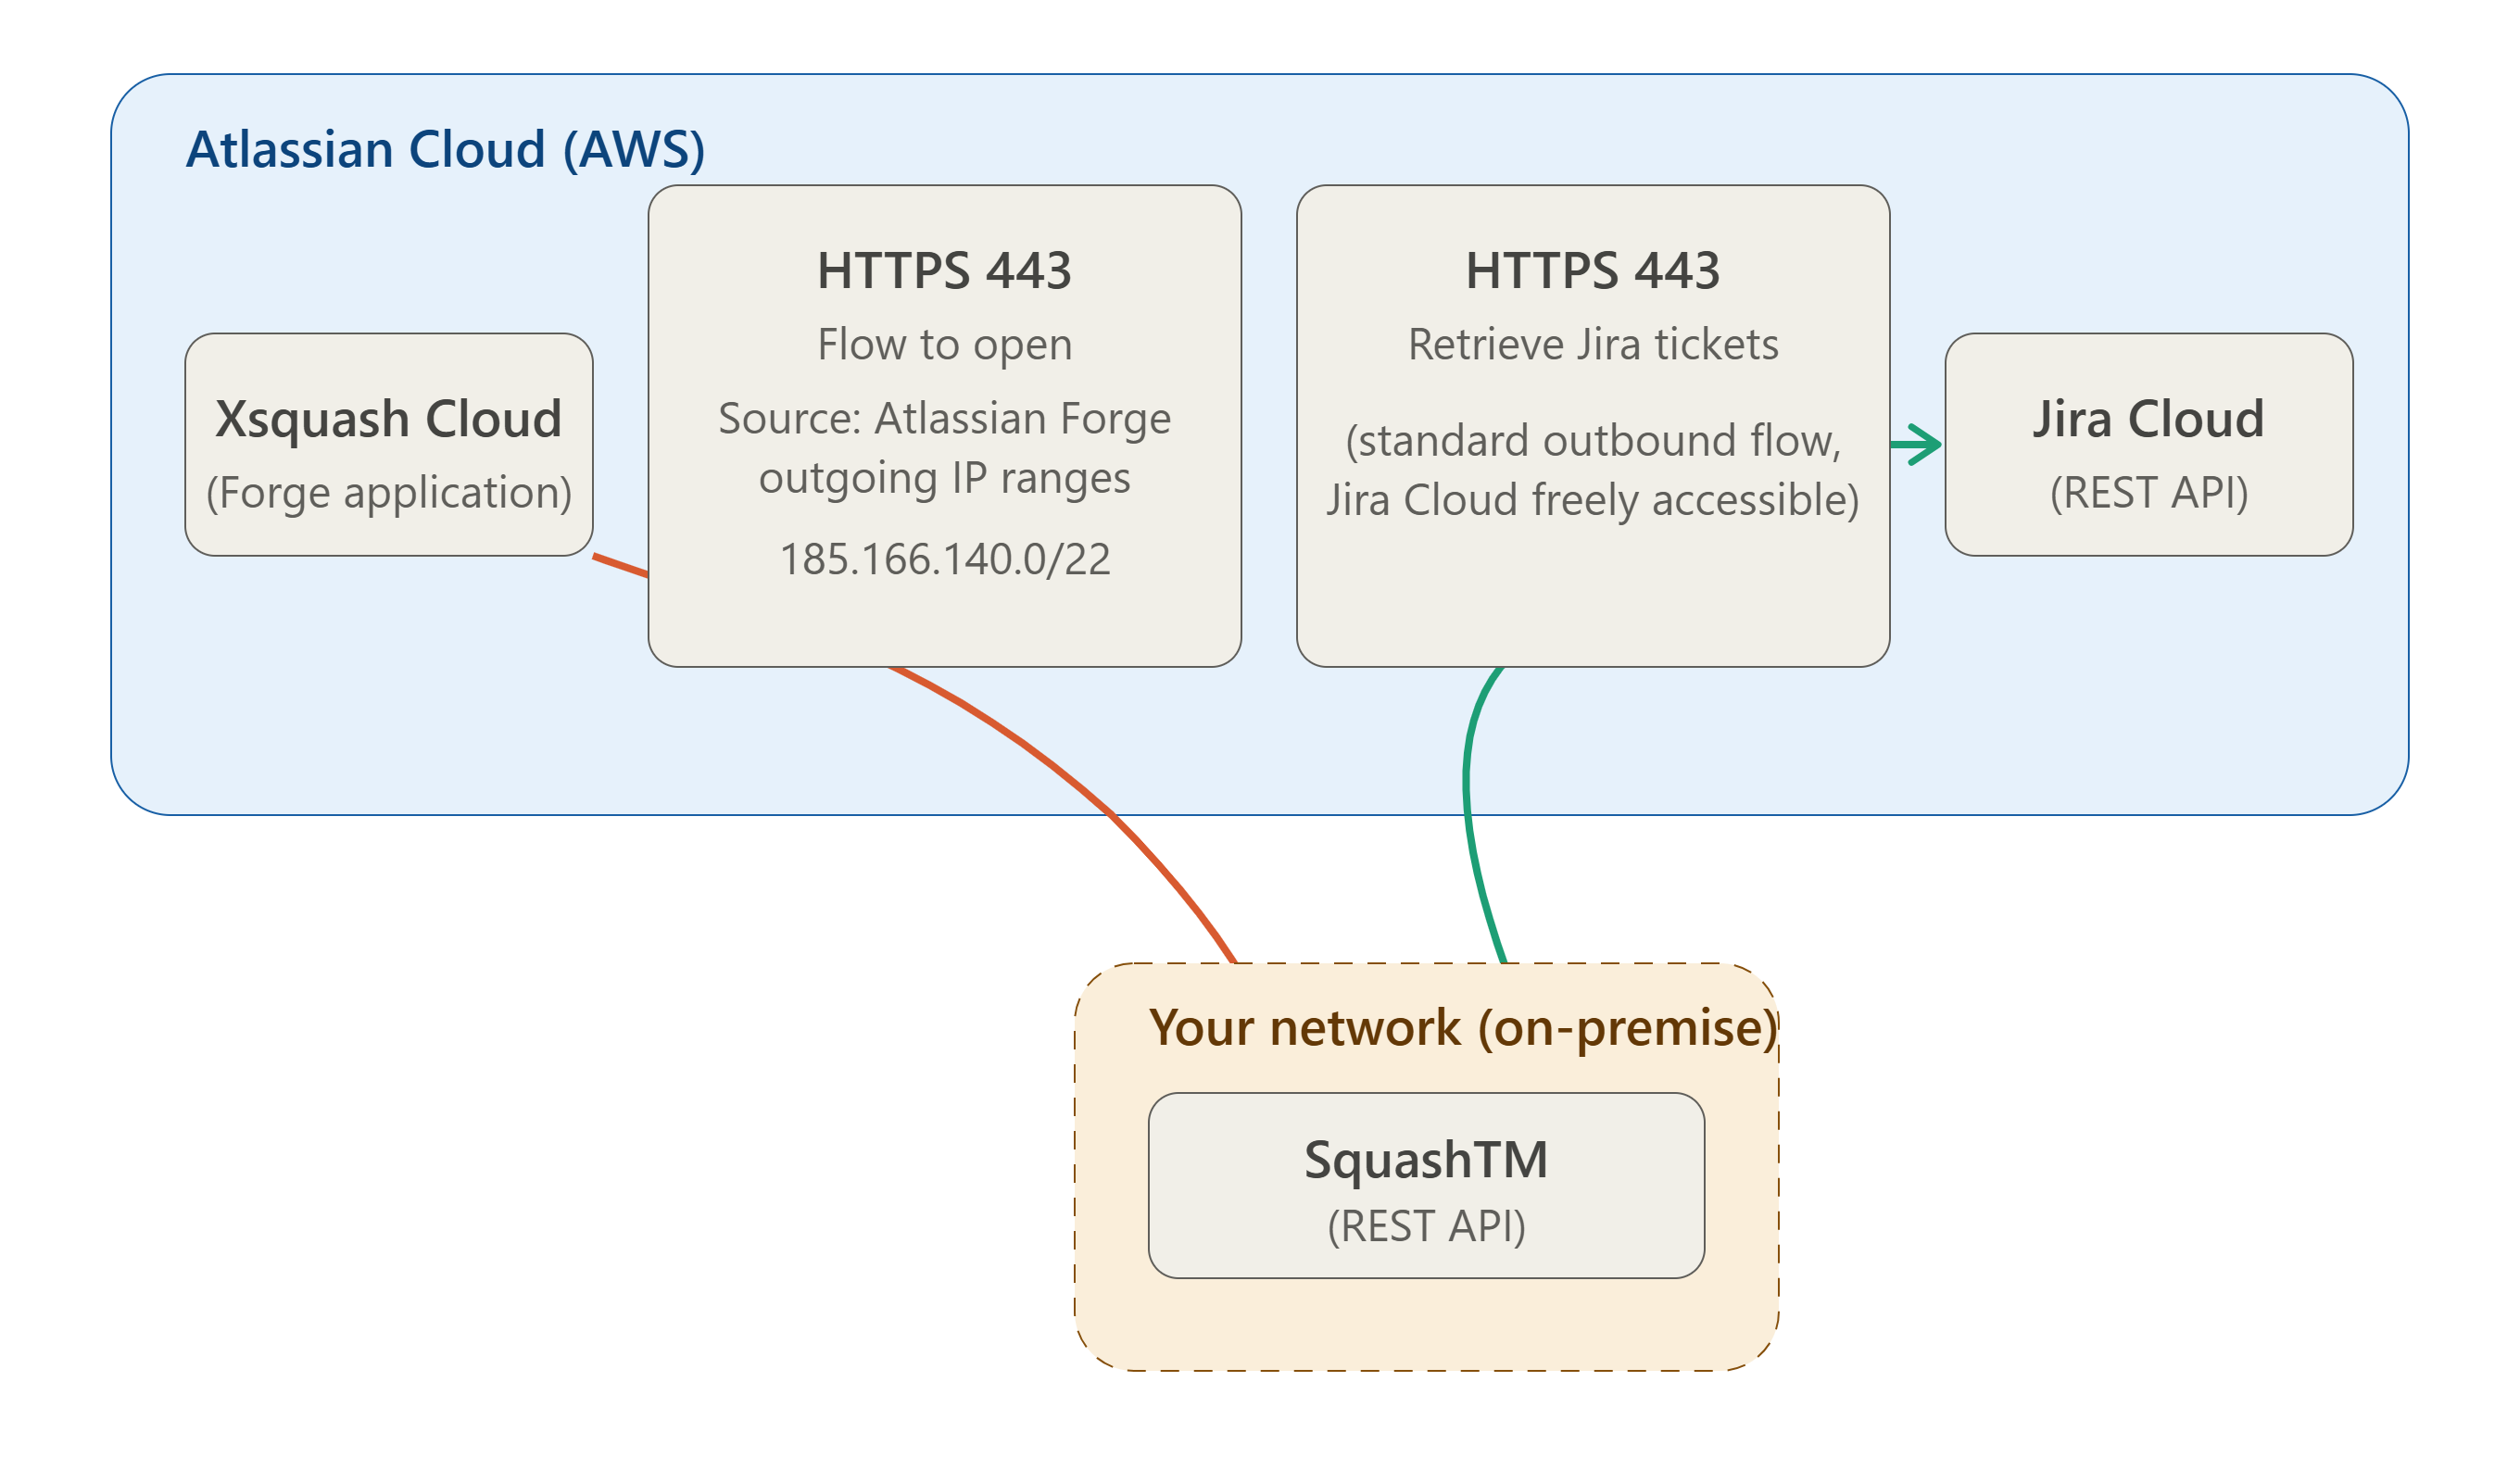
- Xsquash Cloud (Forge application), hosted on the Atlassian Cloud infrastructure (AWS), sends requests to your SquashTM instance (REST API) over HTTPS (port 443). This flow must be opened inbound on your network, from the outgoing IP ranges used by Atlassian Forge.
- SquashTM (REST API) in turn sends requests to Jira Cloud (REST API) over HTTPS (port 443) in order to retrieve Jira issues. This is a standard outbound flow, as Jira Cloud is freely accessible.
IP ranges
- The outgoing IP range to allow corresponds to the Europe zone: 185.166.140.0/22.
- The full list of IPs likely to be used by Atlassian Forge is available on the page IP addresses and domains for Atlassian cloud apps.
Learn more
For more information on configuring the Xsquash Cloud application, please refer to the dedicated page Configure Xsquash Cloud on Jira Cloud.
API access requirements for Xsquash Cloud
Xsquash Cloud retrieves test case and execution data via SquashTM's REST API. The endpoints specified in this OpenAPI specification must be accessible from the server hosting your Jira instance.
Additionally, Xsquash Cloud checks this endpoint at installation time to verify connectivity: /api/rest/latest/docs/api-documentation.html. This page must also be accessible from the Jira server.