Configure a Project
To configure a project, in the Administration workspace, click on the Projects submenu. Click on your desired project to display its consultation page.
Info
Only an administrator or project leader can configure a project.
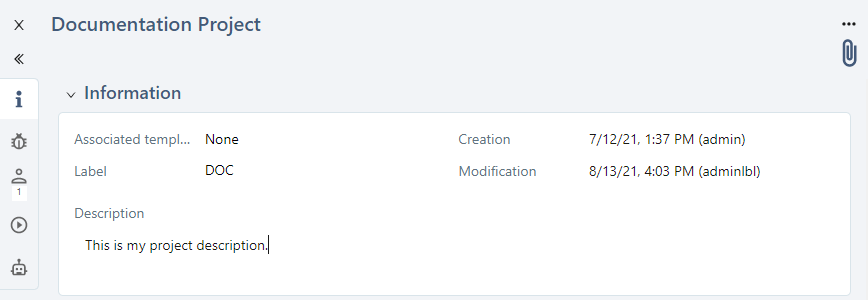
The Information anchor  enables you to set and view the project's overall data.
Configure a Bugtracker
You can configure the link with the bugtracker from the Bugtracker anchor  .
.
To configure a bugtracker for a project, the corresponding server must be declared beforehand by an administrator in the Servers submenu. Then, you can select the bugtracker in a drop-drown list to associate it with the project.
In the Name of the project field, enter the name of the project as it is configured in the third-party tool. Make sure that the name is spelled correctly, with the correct uppercase and lowercase letters. In this field, you can associate multiple projects if you want. When reporting issues, you can choose the project in which the issue must be reported.
![]()
Info
For some bugtrackers such as GitLab and Azure DevOps, the Name of the project field is replaced by Project path:
- for GitLab, you must enter the project path as it appears in the URL, and replace the spaces by
-, e.g.<group-name or owner-name>/<sub-group-name>/<project-name>; - for Azure DevOps, you must enter the project path and keep the spaces, e.g.
<organization-name>/<project name>.
Focus
During the execution, if the name of the project entered does not exist, or if it is spelled incorrectly, an error message appears when you report an issue.
Learn More
To learn more about how to create a bugtracker server, please visit the page Manage bugtrackers and synchronization servers.
Configure an Artificial Intelligence server
Info
This feature is only available with an active Ultimate license.

You can associate an artificial intelligence server with a project, in order to generate test cases from a requirement. To do this, select the server to associate from the drop-down list.
Info
To learn more about configuring an artificial intelligence server, please visit the page Manage an artificial intelligence server.
Manage Project permissions
You can manage a project's permissions from the Clearance anchor  . You can give permissions to users or teams on the project.
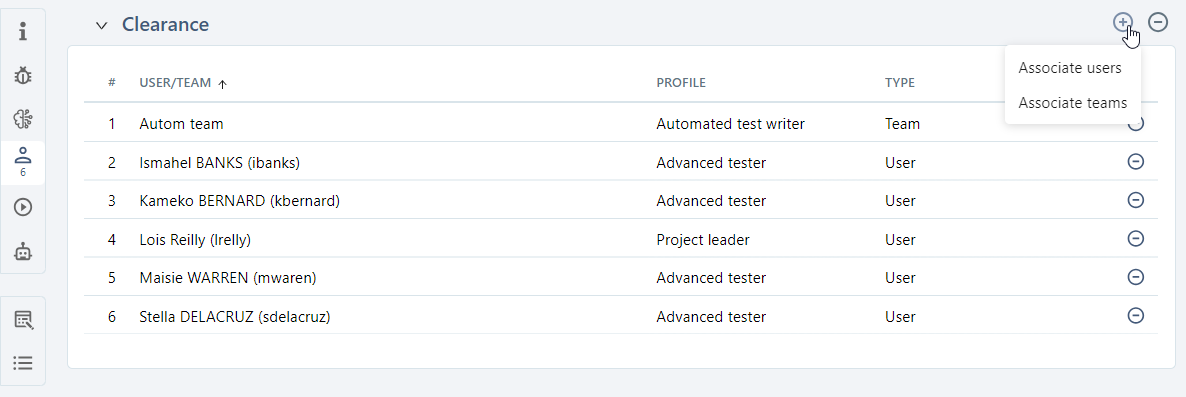
The button ![]() enables you to remove one or multiple permissions on the project.
enables you to remove one or multiple permissions on the project.
You can edit user or team profiles directly in the table by clicking on their profile.
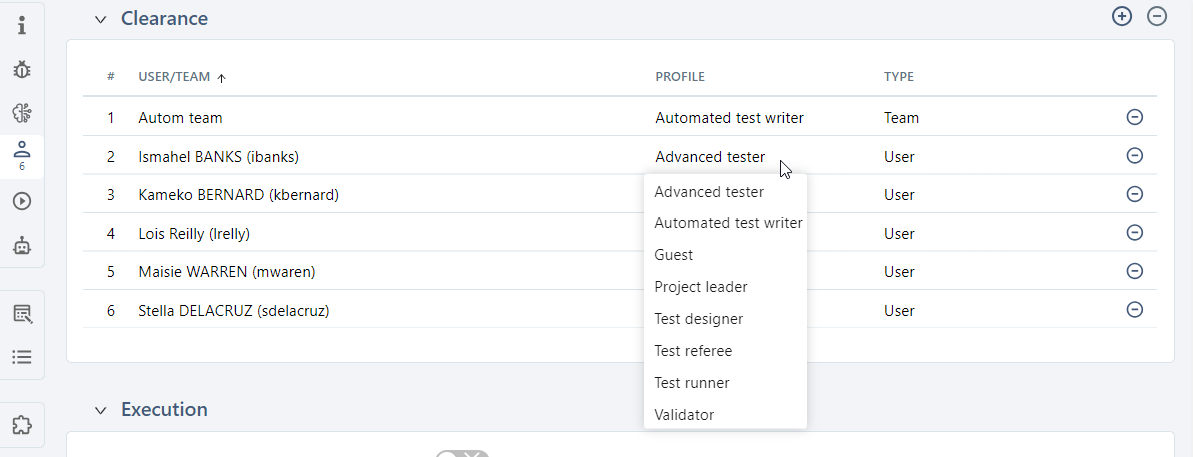
A user or team can have different profiles for different projects.
Learn More
To learn more about different profiles and permissions of Squash workspaces, please visit the page Give permissions.
Define Execution preferences
To activate some features regarding test case executions, click on the Execution anchor  :
:
- Authorize the modification of test cases during their execution;
- Activate/Deactivate the execution status "Untestable";
- Activate/Deactivate the execution status "Settled".
Only the status "Untestable" is activated by default.

Configure the Project's Automation
The project's configuration for test automation is described in a dedicated page.
Customize the Project
Custom Fields
You can manage custom fields from the anchor Custom fields  .
.

To associate custom fields with a project, you must first create them in the Administration workspace > Entities.
In the table, you can see the custom field's name, type, whether it is optional or mandatory, and the entity with which it is associated.
To associate a custom field with the project, click on the button ![]() . In the pop-up, select the entity and the custom field you want to associate. From there, you can associate multiple custom fields to one entity.
. In the pop-up, select the entity and the custom field you want to associate. From there, you can associate multiple custom fields to one entity.
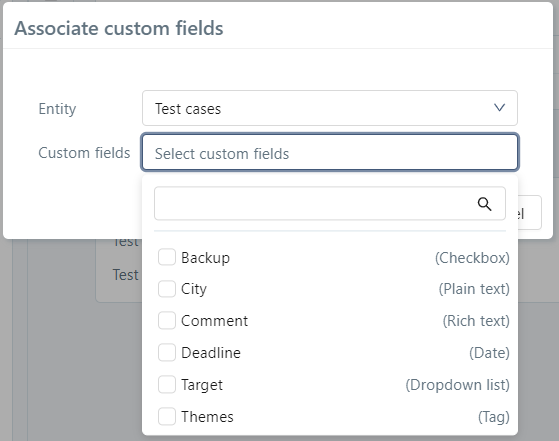
One custom field can be associated with multiple entities. Custom fields can be associated with:
-
in the Requirements workspace:
- requirement folders;
- requirements.
-
in the Test case workspace:
- test case folders;
- test cases;
- test steps.
-
in the Execution workspace:
- campaign folders;
- campaigns;
- iterations;
- test suites;
- executions;
- execution steps.
To dissociate one or multiple custom fields for a project, click on the button ![]() .
.
Learn More
To learn more about how to create a custom field, please visit the page Manage Custom Fields.
Information Lists
You can manage information lists from the Information lists anchor  .
.

To associate information lists with a project, you must first create them in the Administration workspace > Entities.
An information list can be associated with the Category field of requirements, and Nature and Type fields of test cases. Once the list is associated with the project, in your desired workspace, the values of the field you have chosen will be those of the information list. If you have assigned icons to the values of the list, they will appear in the object's Information block.
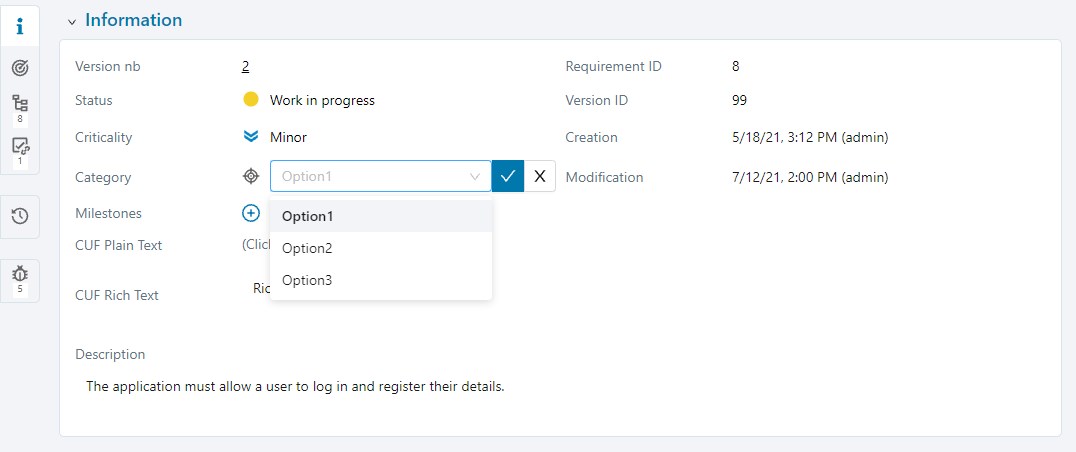
When an information list is associated with a project, the values previously entered are not saved. The default value of the selected list will appear in the field for all the relevant objects.
Learn More
To learn more about how to create information lists, please visit the page Manage information lists.
Associate Milestones to a Project
You can associate milestones to a project from the Milestones anchor  .
.

Info
To associate a milestone with a project, the milestone's status must be "Planned", "In progress", or "Finished".
Associate Milestones with the Button [+]
You can associate one or multiple milestones (already created) via the button ![]() . From the associate pop-up, you can use the search feature. Milestones are organized by scope.
. From the associate pop-up, you can use the search feature. Milestones are organized by scope.
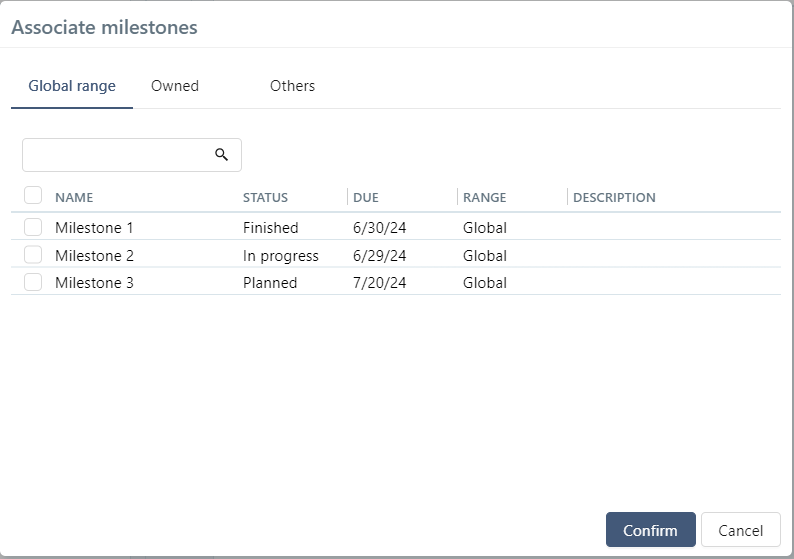
Associate Milestones with the [Create] Button
If the milestone is not created yet, you can still create it directly from the block using the [Create] button at the top of the table. From the Add a milestone pop-up, you can then directly associate the milestone you created with the project by clicking on the [Create and associate] button. The created milestone's default status is "In progress".
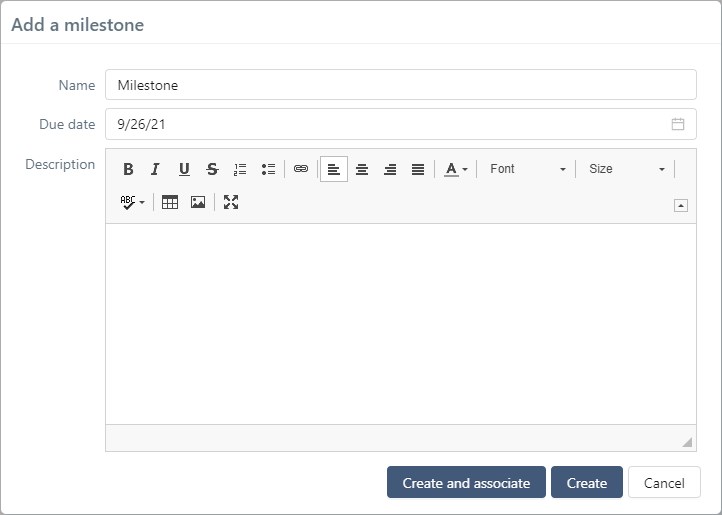
Dissociate Milestones
To dissociate one or multiple milestones from a project, click on the button ![]() available at the end of each row or above the table.
available at the end of each row or above the table.
After it has been dissociated, the milestone is no longer associated with the project nor the project's objects. The Used column indicates if the milestone is associated with objects of the project.
Learn More
To learn more about how to create milestones, please visit the page Manage a Milestone.
To learn more about how to associate a milestone with an object, please visit the page Associate a Milestone with an Object.