Cross-project Library Features
Creating an Object
Select an item (project, folder, object) in a workspace's library. Hover on the [Add] button  . The list of all the objects you can add appears. You can then add a folder to all workspaces, or/and add an object to one specific workspace only. Depending on the item selected, some items on the list can be grayed out.
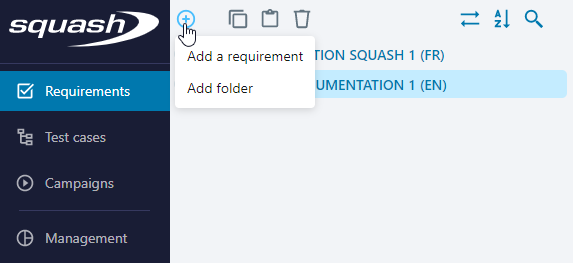
Click on an option on the list. A create pop-up window opens. In that window, enter at least a value in the "Name field" to be able to create the object. If there are any required customized fields that are linked to the object, they also appear. Complete them to create the object.
This "create" pop-up allows you to add an array of objects. It resets every time you click on the [Add another] button, which allows you to quickly add objects. Every time you add an object, the library updates itself automatically. The object then appears at the root of the item you have selected.
In the Reporting workspace, clicking on certain create options gives you access to a setup page:
- The Select attribute page to "Add a chart";
- The Select a report page to "Add a report";
- The Select attribute page to "Add a custom export".
Once you have selected the attributes or the report, you can then add the object you have created. You can then access the object from the Reporting workspace, at the root of what you have selected.
Deleting an Object
You can access the [Delete] button both in the library and in certain tables.
When one or multiple items are selected, in a continuous or discontinuous manner, the [Delete] button is active. When you have selected an item that cannot be deleted, the button is grayed out (for example a project or requirement which status does not allow you to delete it). It is also possible to delete the item you have selected by using the keyboard shortcut Suppr.
In the library, deleting an object or a folder deletes everything it contains. For example, deleting a test case folder deletes all the test cases it contains, and deleting a campaign deletes all its iterations and the executions they contain.
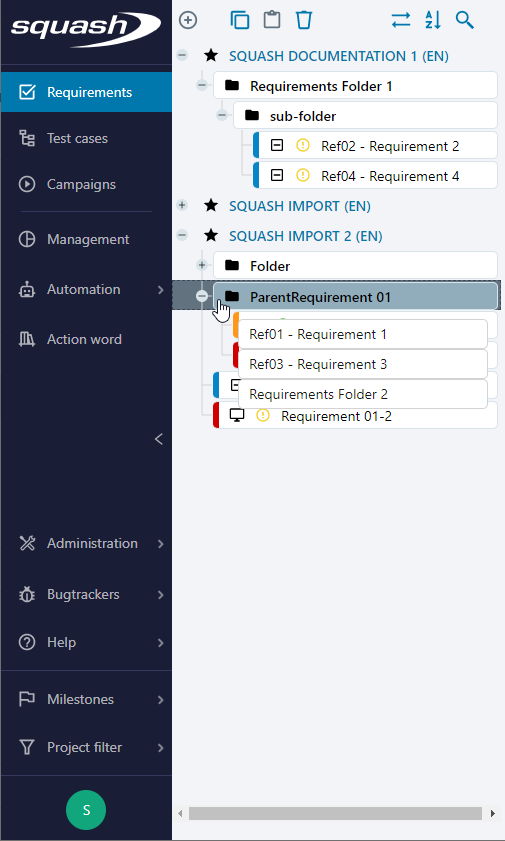
This rule does not apply when deleting a parent requirement. If a parent requirement is deleted, the child requirements it contains will appear at the deleted parent requirement's previous location.
Warning
Anything you delete is permanently lost and there is no way to recover what you have deleted. Generally speaking, we recommend that you be careful about the profiles and clearances you grant users. We also recommend that you regularly save the portfolio (export and/or save the database) in order to be able to partially or completely recover what you have deleted.
It is recommended that you create a "Trash" folder per project and per space to move any items to be deleted before a final deletion.

Copy/Pasting an Object
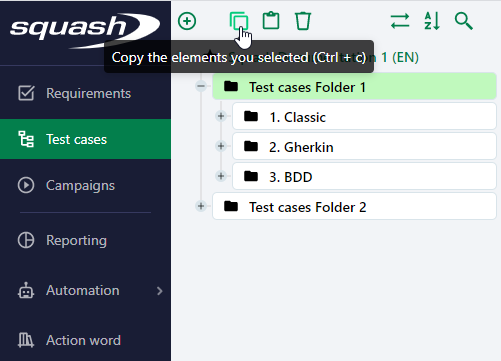
When one or multiple items are selected, in a continuous or discontinuous manner, the [Copy selected items] button  is active. When you have selected an item that cannot be copied (for example a project), the button is grayed out.
You can also copy a selected item by using the keyboard shortcut Ctrl+C.
is active. When you have selected an item that cannot be copied (for example a project), the button is grayed out.
You can also copy a selected item by using the keyboard shortcut Ctrl+C.
When the items have been copied, you must select a destination directory to activate the [Paste] button  :
:
- You can copy items within the same project or in another project;
- If two projects have the same setup, the elements attributes remain unchanged;
- If two projects have different setups, default values of the fields or customized lists' are attributed to the pasted items;
- The copied items are kept in the memory and can be pasted in different locations within the tree;
- When the selected item cannot be copy-pasted in the target item, the button is grayed out. For example, a folder cannot be copy-pasted in a requirement; a test case cannot be copy-pasted in another test case or in another iteration within the project.
You can also copy-paste a selected item by using the keyboard shortcut Ctrl+V.

Focus
When copy-pasting an object of the Campaign workspace, executions present in the execution plans will not be kept.
Moving an Object
You can move a selection of items within the same project or to another project. To do this: 1. Select one or multiple items, in a continuous or discontinuous manner by using the [Maj]+click or [Ctrl]+click keys. 2. Drag and drop the selected items in the location marked by a visual indicator.
When you move an object from one project to another:
- If the two projects have different setups, every field's value is kept as it was before except for customized fields, customized lists, and milestones;
- If the two projects have the same setups, their values are also kept as they were before for customized fields, customized lists, and milestones;
- Every link to the object is kept: links between two requirements, links between a requirement and a test case, test case call, etc.;
- When the selected item contains an item that cannot be moved, a target location cannot be seen.
Focus
When the library is in sequential order, the target position of the moved items becomes their permanent position.
Setting the library display
Organizing the Library
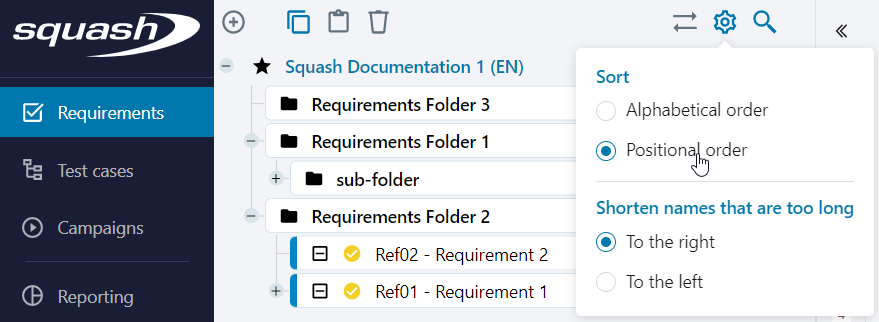
The [Settings] button  allows you to choose the objects' display order in the Requirements, Test Cases, and Campaigns workspaces' libraries.
This order is specific to each workspace and to each user.
allows you to choose the objects' display order in the Requirements, Test Cases, and Campaigns workspaces' libraries.
This order is specific to each workspace and to each user.
The alphabetical order displays the objects in alphabetical order according to their reference (when it exists), and then their name.
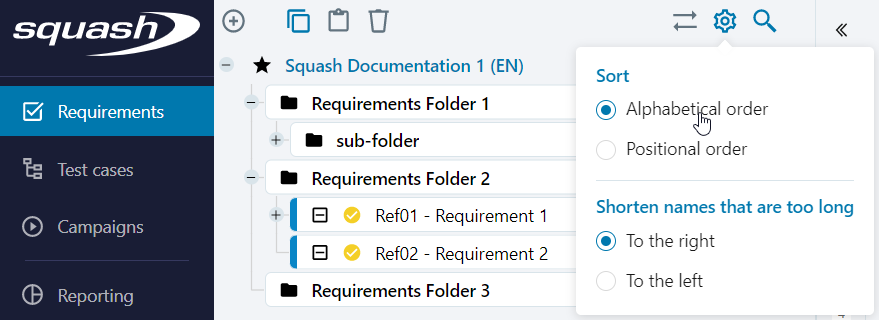
The positional order allows you to define the order in which the objects are displayed. For this, you can organize the objects according to each other in the library by using the drag and drop function.
Displaying the truncated names in the Library
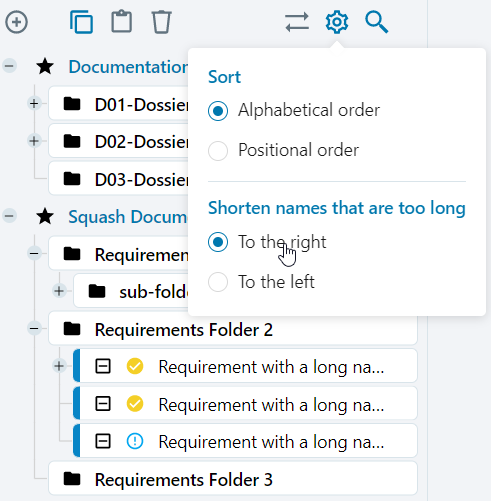
The [Settings] button also allows you to choose which part of the object's name are truncated if they don't have enough space to be fully displayed in the library.
By default, and in most cases, the right part of the names is truncated, the end is not displayed.
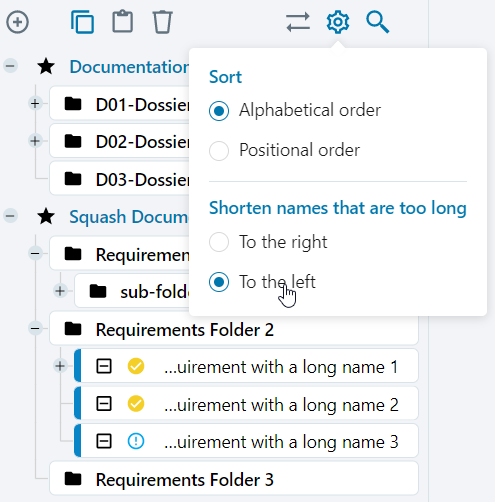
However, when the repository contains several objects that have names that only differs with the last characters, it can be useful to truncate the beginning of the names, to the left, to easily distinguish them.
Importing/Exporting an Object
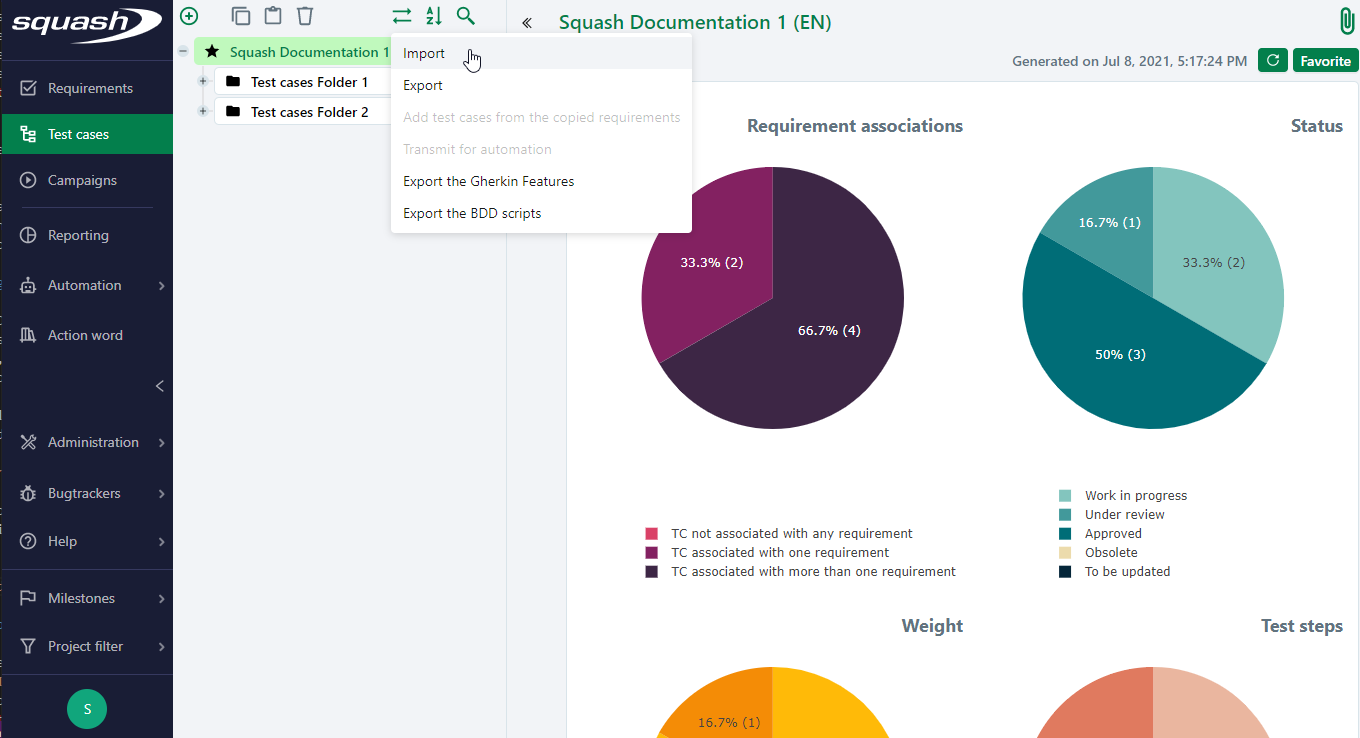
In the Requirements, Test cases, and Campaigns workspaces, when hovering the [Import/Export]  button, there is a sub-menu from which you can access the import-export functionalities.
Importing an Object
The import function allows you to mass import a tree of items in the Requirements or Test Cases workspaces. It is also possible to import items from a same file into different Squash projects.
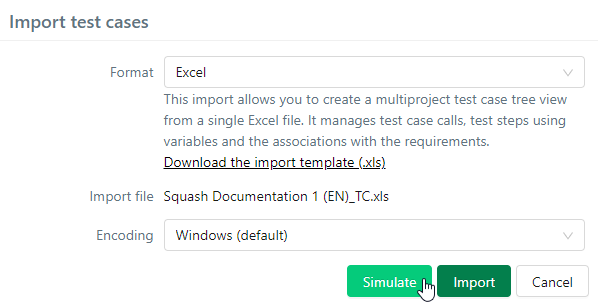
To import a tree of requirements or test cases in the Excel format:
- Click on "Import";
- In the Import pop-up, download the import template;
- Complete the Import file;
- Choose the Import folder from the pop-up;
- Simulate the import. This step allows you to verify that the import file is fitting;
- Import the file;
- Once the file is imported, the tree is updated.
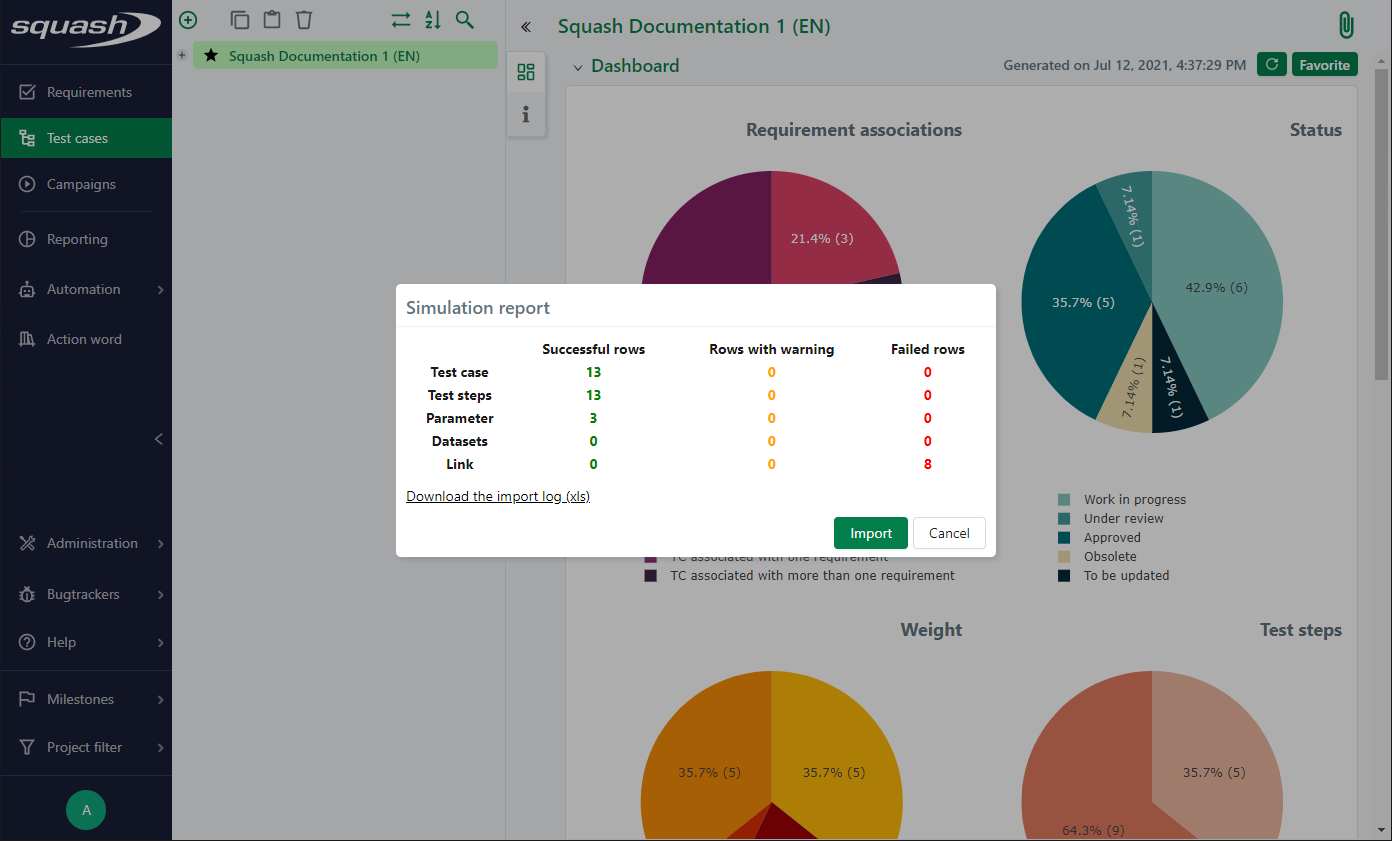
At the end of the practice and/or the import, a report appears and shows:
- the rows successfully treated: no error was encountered, the objects are imported as they are in the file;
- the rows treated but with a warning: the objects were imported, but some items can be missing or may have been modified;
- the failed rows: the objects were not imported due to an incomplete or incorrect entry in the import file;
- a downloadable assessment that details the errors found.
You can also import test cases in a .zip format:
- The same procedure as for the Excel format applies;
- For this format, you must select a destination project.
En savoir plus
To complete an import file, consult these two pages: Completing a requirements import file and Completing a test case import file
Attention
The import of campaigns, iterations or suites is not available.
Exporting
The export function allows you to mass export items from the Requirements and Test Cases workspaces. It works when you select one or multiple items, in a continuous or a discontinuous manner, from one or several projects.
To export a requirements tree or test cases in the Excel format:
- Select items in the tree (projects, folders, or objects);
- Click on the "Export" option;
- In the pop-up window, choose the export format. The XLS format matches the requirements for an import whereas the CSV matches the ones for data mining;
- Name the exported file;
- Choose the exporting options. The "Keep the intended format for rich texts" option allows you to keep the HTML tags for rich text fields (ex: the "Description" text field) and thus keep their formatting for a future import;
- Click on [Export] to download the document.
Export in the Campaigns workspace works differently. It works only if one single campaign is selected and it is declined under three forms: simple, standard, or full.
To export a campaign in the Excel format:
- Select a campaign
- Hover on this button

- Choose one of the three available export formats.
- The file is directly downloaded in a .CSV format on your computer.
En savoir plus
For more details on campaigns exports, consult the Exporting a campaign's data page.
Generating a Dashboard
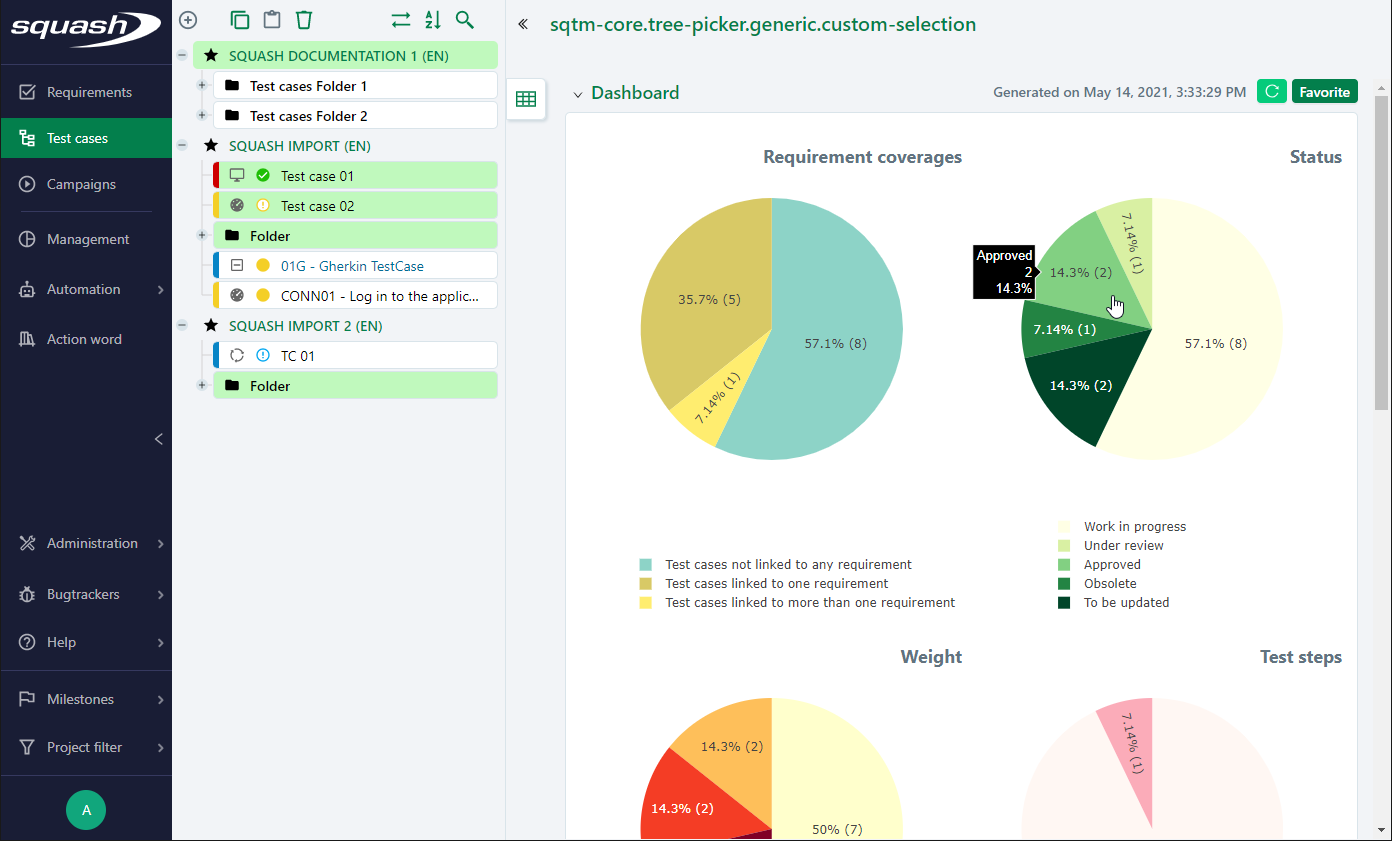
On a workspace's library, you can see a default dashboard when you select a project, a folder, or multiple items. Default dashboards have a selection of graphs that mark the progress in terms of redaction, coverage, and validation.
When you hover on one part, an infotip shows you the part's criteria, its number of items, and the percentage it represents in comparison with the total number of items selected.
Clicking on a part leads you to the search results related to that part's criteria. The perimeter corresponds to the items selected and the criteria specific to the graph and the part are pre-selected.
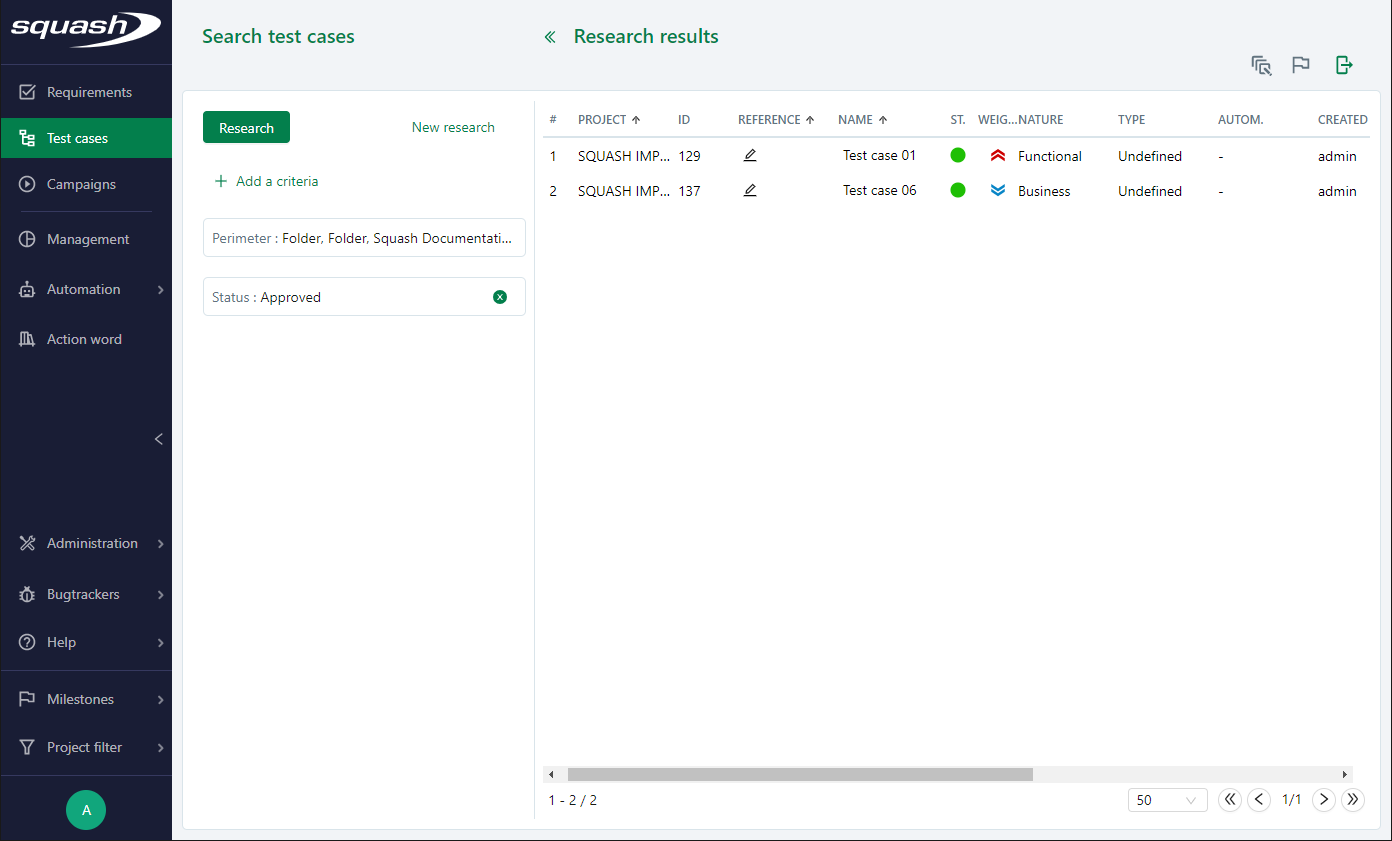
You can now refine your search and use all search features.