Cross-app Features
Within each workspace, Squash TM allows you to perform general actions on the objects consultation page.
Modifying Object Fields
Every Squash TM object has various attributes that are represented in fields of different types. When you hover on a field's value, a visual indicator shows you that it can be modified either through an underlined value, a pencil icon, or a color frame.
To modify an attribute, click on the field's value, enter a new value, and validate your entry ([Confirm] button or [Enter] key). For some field types, you can also click out of the field to validate your entry.
Here are the app's different types of fields:
- Simple text: unformatted text on a single line;
- Checkbox;
- Date: allows you to select a date in the calendar or to enter it manually in a dd/mm/yyyy format;
- Drop-down menu;
- Numerical field;
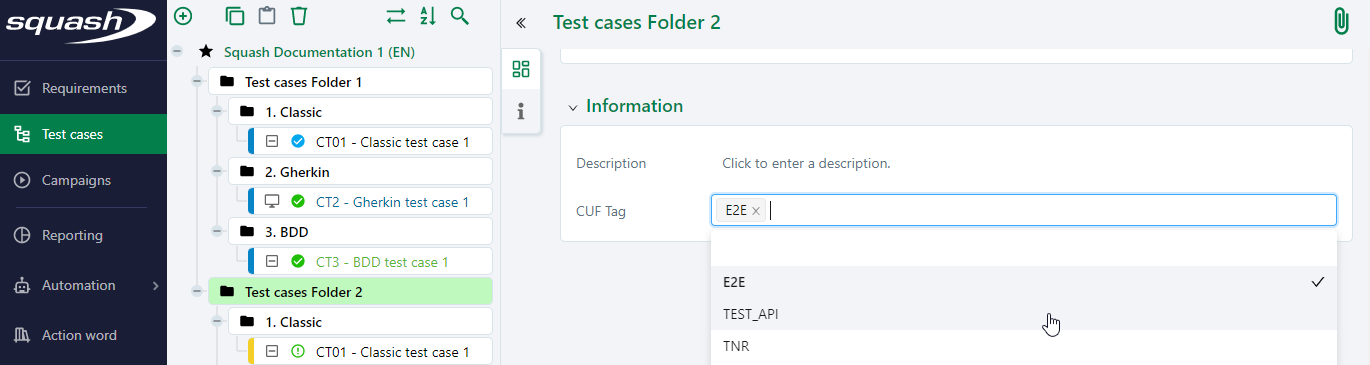
- Tag: allows you to enter one or multiple values in tag format, with autocompletion;
- Rich text: formatted text on several lines.
Rich Text Fields
Rich text fields can contain several lines of text. They allow you to format your text, insert tables, images, or links.
The formatting is kept during exports. However, for the files to be correctly generated, you must follow some rules when inserting elements in rich text fields.
Inserting a Table
To insert a table in a rich text field:
- Click on the [Table] icon in the rich text field's toolbar

- Enter the table's properties: number of lines and columns, advanced properties;
- Click on [OK].
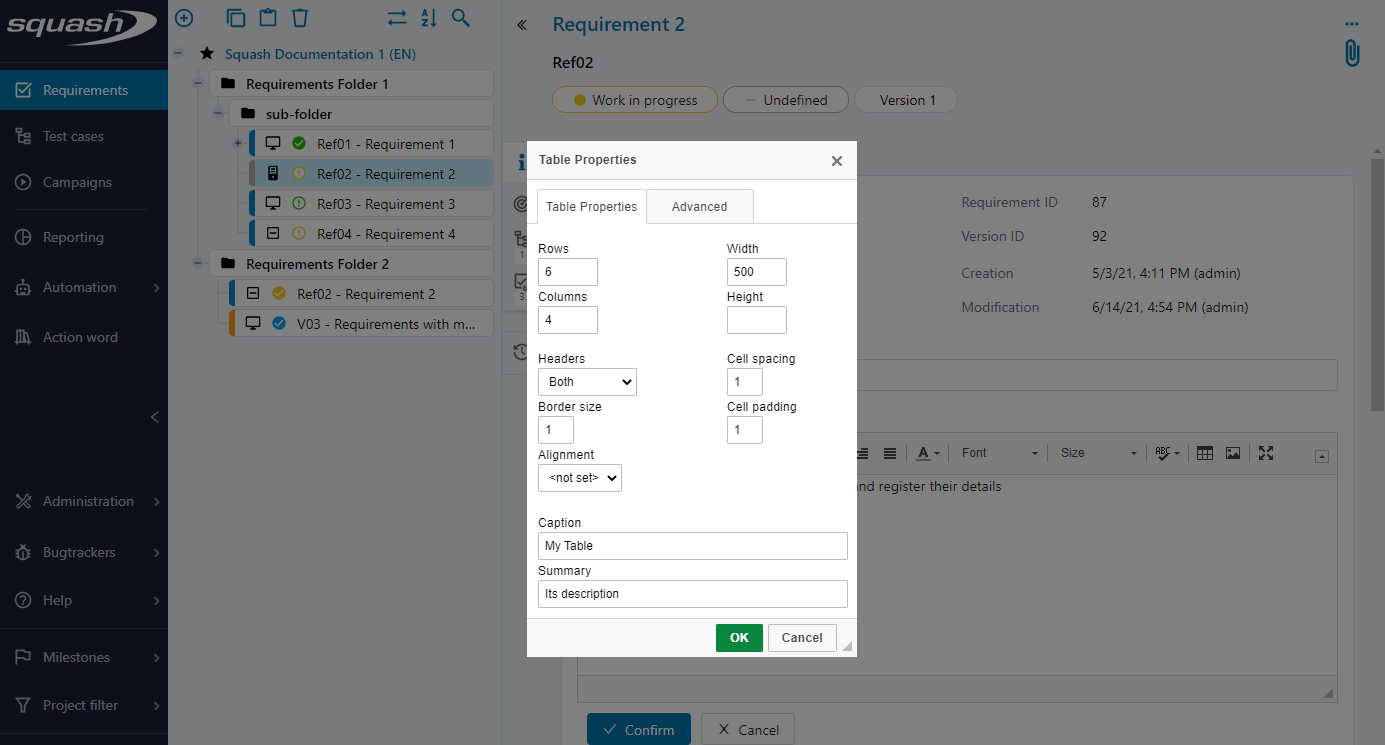
The table is inserted and ready to be filled in.
Inserting a Link in a Rich Text Field
To insert a link in a rich text field:
- Select the string of characters on which the link will be inserted;
- Click on the [Link] button

- Enter the link and its properties: type, opening mode, infotip, advanced properties;
- Click on [OK].
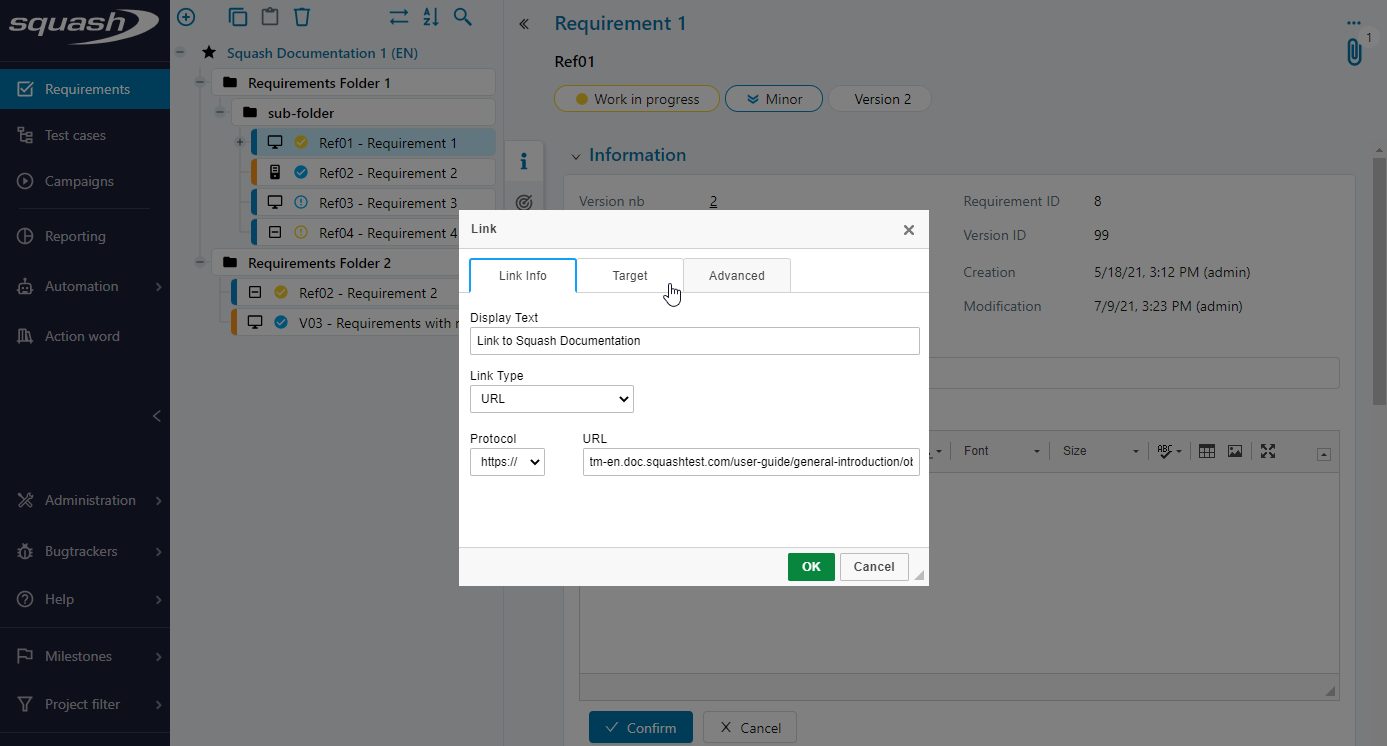
Now you can access the link just by clicking on it.
Inserting an Image in a Rich Text Field:
To insert an image in a rich text field:
- In the rich text field editing mode, click on the icon [Image]

- Enter the image url and its properties: alternative text, size, infotip, advanced properties;
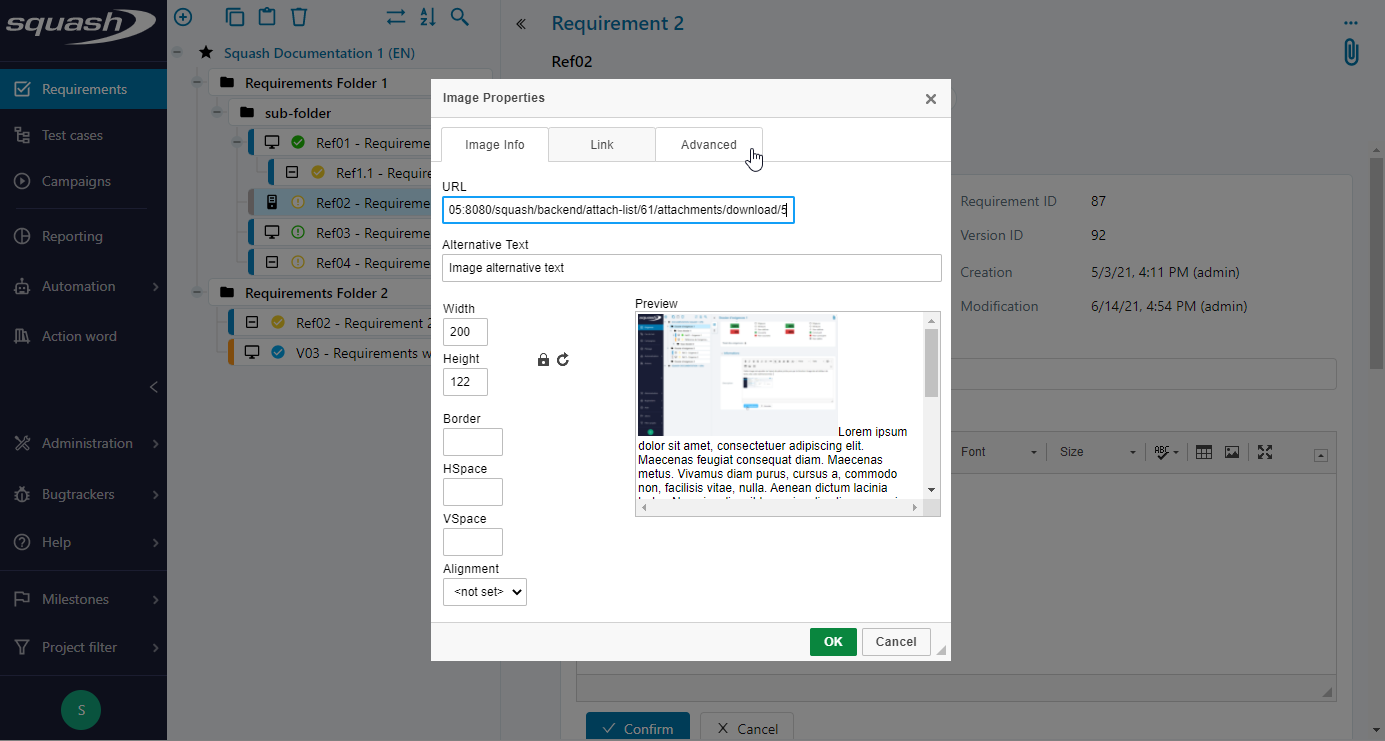
- Click on [OK]
The image appears in the rich text field with the properties previously defined.
Info
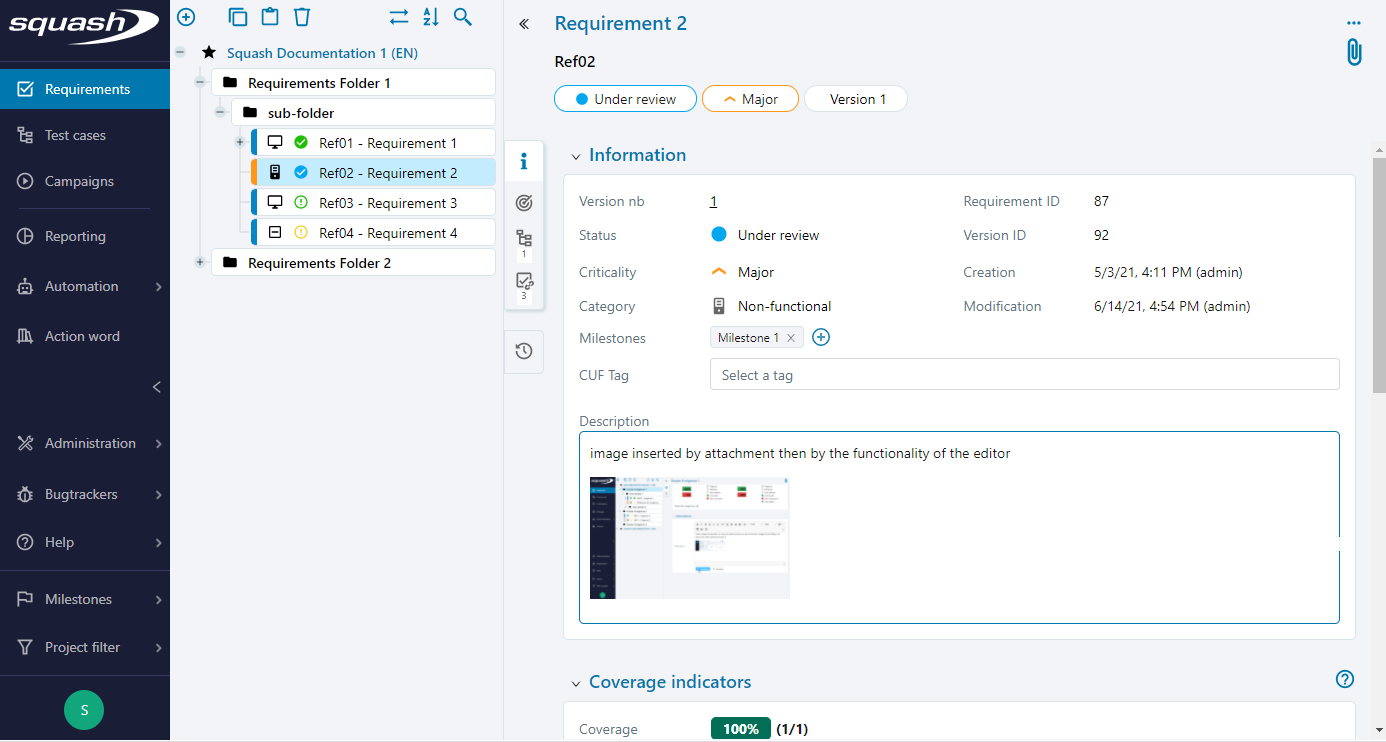
To add an image locally stored in the user's computer, you must first follow these steps before inserting the image in the text field:
- On the element's consultation page, add the image as an attachment by clicking on the icon

- Get the image's url by doing a right-click on the image's name, then copy the link's address.
Tables Operating
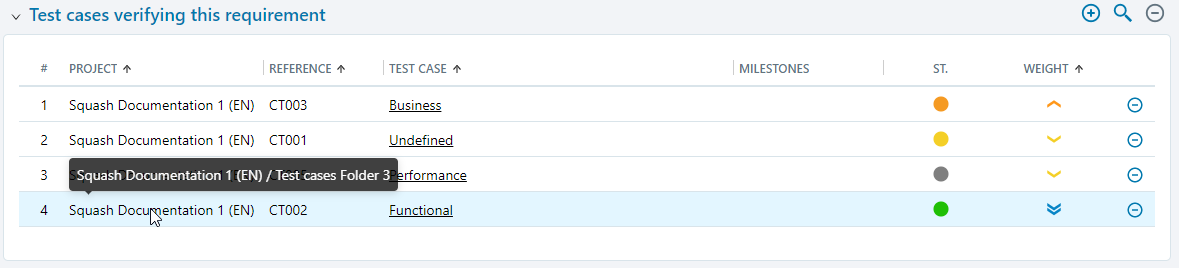
Links between items (Requirements-Requirements, Requirements-Test cases, Execution plan-Test case) are formalized in tables. If the user has the authorization, they can:
- add a linking via the button

- search for one or multiple objects and link them via the button

- delete a linking via the button
 available at the end of each row
 - delete multiple selected linkings via the button available on top of the table
- view the position in the repository of the linked object by hovering the "Project" column
- access level 2 of an object page by clicking on a link on the object's name.
The tables are sorted by default. You can modify the sorting by clicking on the column's heading. The arrow pointing up indicates an alphabetical or chronological sorting, and the arrow pointing down a reverse sorting.
Info
For some tables, it is possible to:
- apply filters, for example on execution plans, by clicking on the icon [Filtre]
 of the columns
 - manually resize the columns, in particular for execution plans and search results. The resizable columns can be identified by a pipe
- export their content in a csv file by clicking on
 . Known issues, users and projects can be exported. It is possible to export all the displayed rows or the selected rows.
Linking/Unlinking Objects
Squash TM allows you to link objects: two requirements, a requirement to a test case, or a test case to an execution plan. There are 3 ways to link objects:
Linking Two Requirements Using the Requirements Workspace Library
On a requirement's consultation page, you can, via a drag and drop, link a library requirement to the requirement you are viewing. These requirements then appear in their respective Linked Requirements columns.
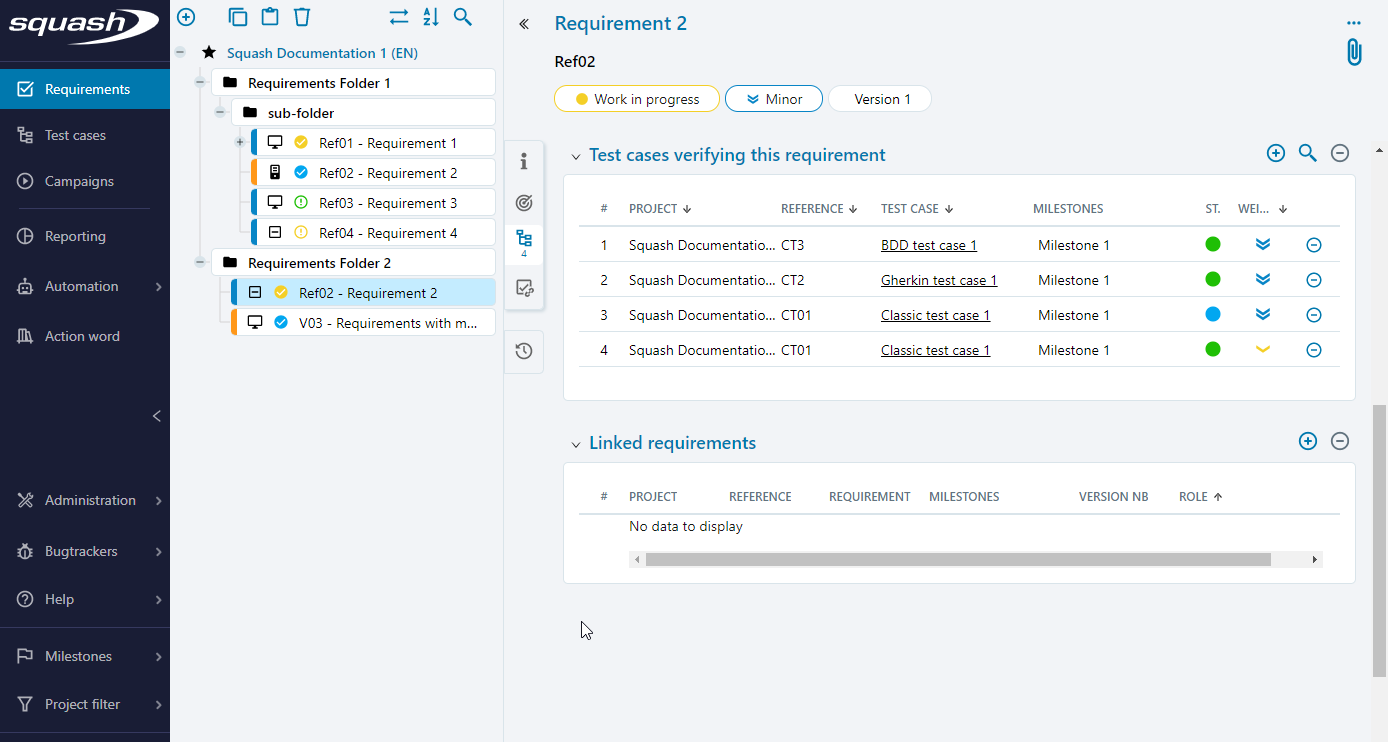
Linking Two Objects Using the Linking Library
On the consultation page of a requirement, test case, or execution plan, you can access the linking library by clicking on the table's button You can link the two objects via a drag and drop from the linking library to the consulted object. The links then appear in their matching column.
Linking Two Objects Using the Search Function
From a linking table, a Test case verifying this requirement, Requirements verified by this test case, or an Execution plan, the button allows you to search for objects: all or some of the results can be linked via the buttons  and
and  .
.
Info
In an Execution plan, it is possible to access the direct search function and the test case search function via their requirements. The search feature is based on the requirements criteria. The results it shows are the test cases linked to requirements that match the chosen criteria.
Unlinking Objects
In Squash TM's different tables, you can delete a link via the button available at the end of each line for a simple unlinking or via the button available on the top of the table for a multiple unlinking (using a multiple selection).
Adding/Deleting an Attachment
Adding an Attachment
On the consultation page of an object (folder, requirements, test cases, test steps, campaign, iteration or suite), you can add attachements via the icon . Then, drag and drop your attachment in the dedicated box from your local files.
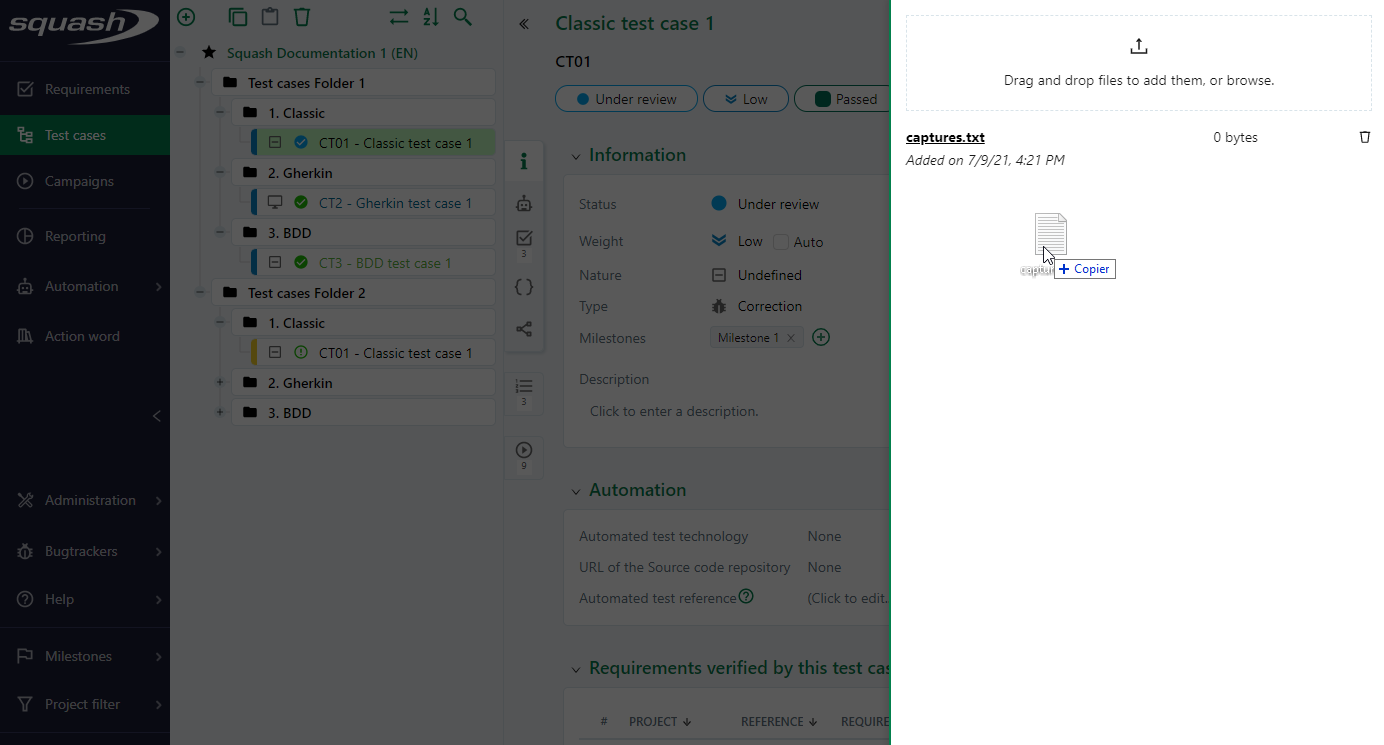
This section allows you to consult the attachments information (name, size, and date added), and to download them.
Info
By default, accepted files types are: txt, doc, xls, ppt, docx, xlsx, pptx, odt, ods, odp, pdf. This list can be modified by an Admin to add or delete extensions. By default, the maximum size for an attachment is 400000 bytes. This size can also be modified by an Admin.
Deleting an Attachment
In the attachments section, you can delete attachments via the button  available at the end of each line.
Searching for an Object
By clicking on the button available on the top of Requirements, Test cases, and Campaigns libraries, you can open a search page that is unique to each workspace. By default, the search perimeter is the one of the project filter.
The section on the left of the results page allows you to define a search perimeter and to add search criteria that are specific to the workspace's objects.
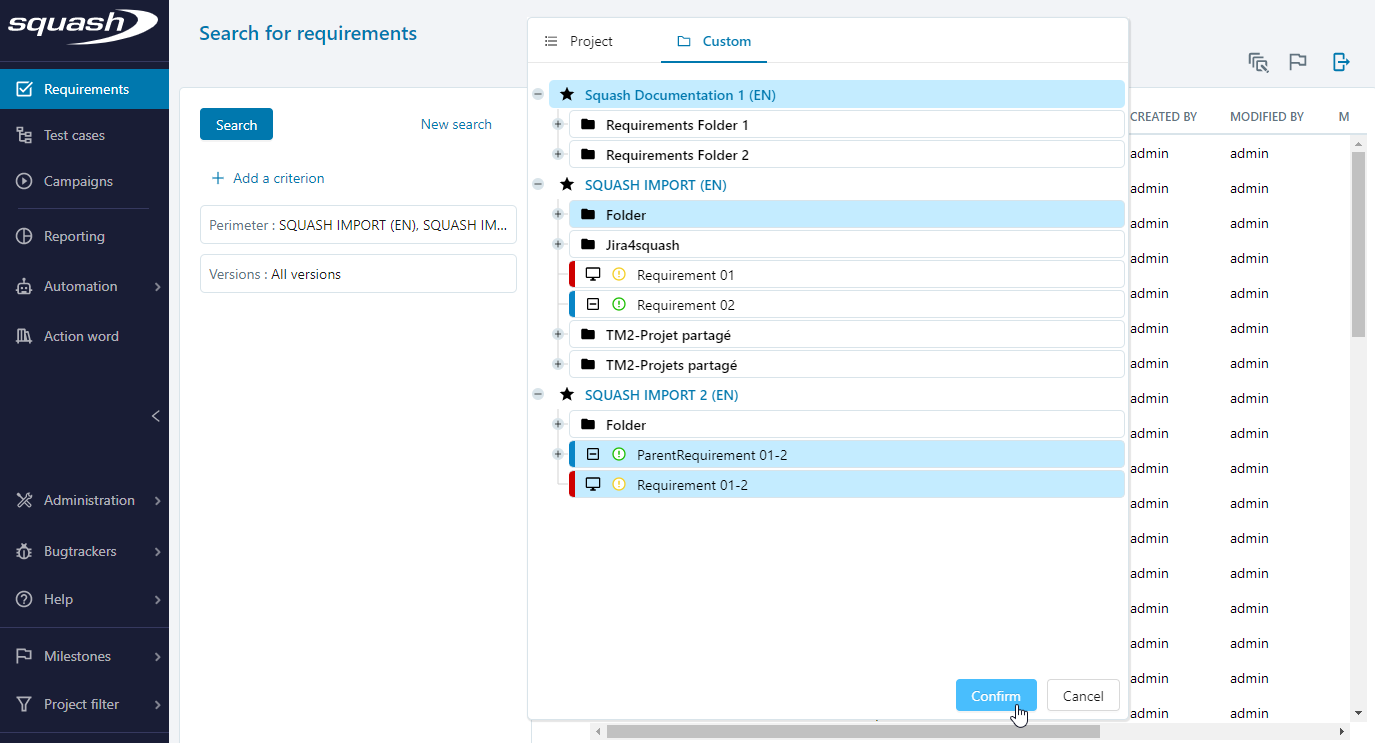
Perimeter
In the perimeter criteria's Project tab, you can select the projects you want to include or exclude from the perimeter.
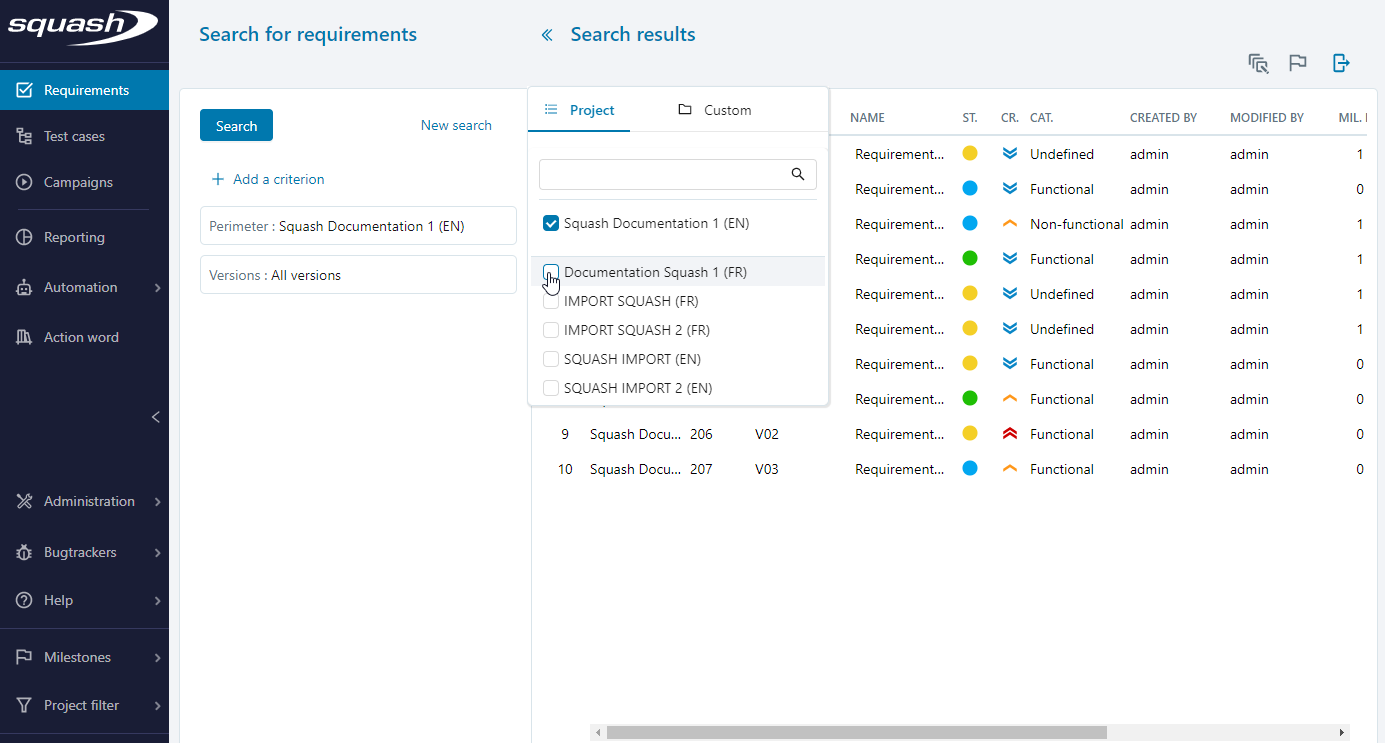
The Custom tab allows you to select one or multiple directories to define the search perimeter.
Criteria
You can add search criteria simply by selecting the attributes available for the workspace item by clicking on the button [Add a criterion]. The results list automatically updates itself when you select a criterion.
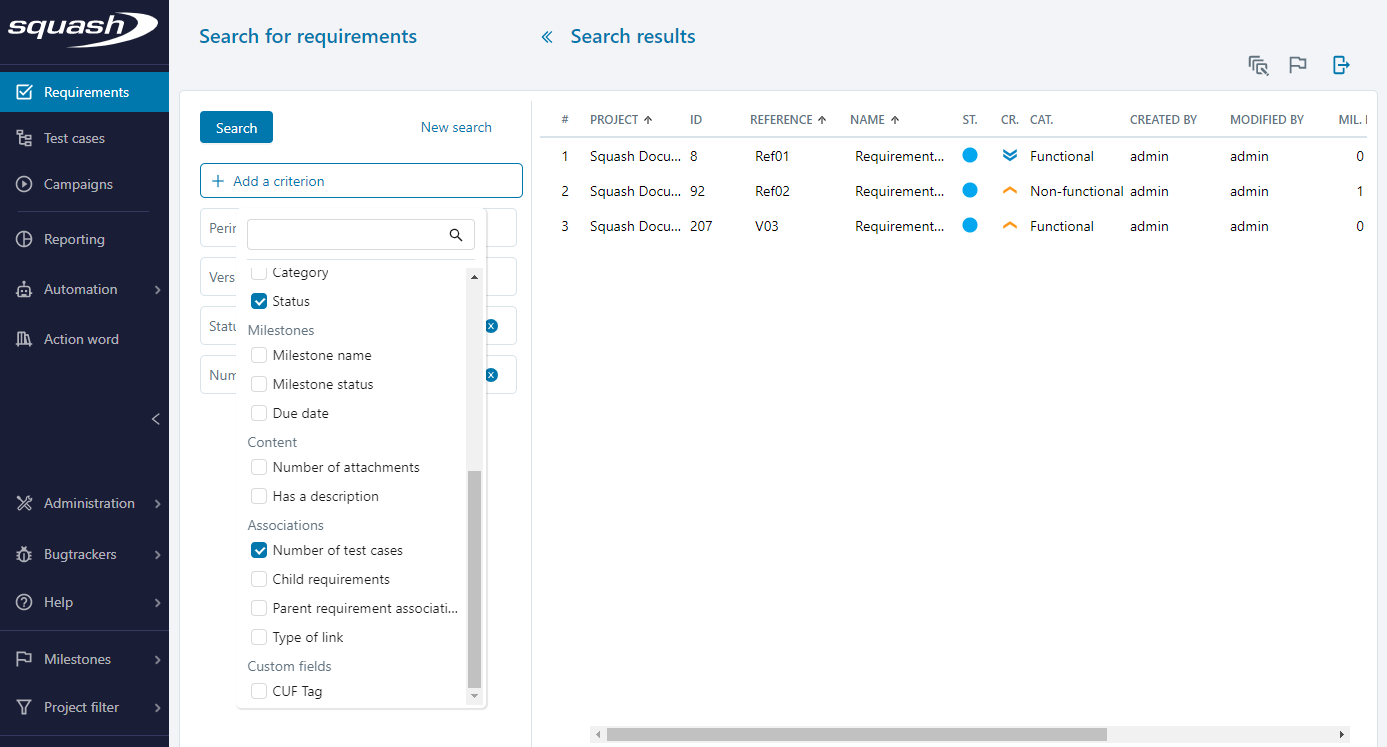
Clicking on the button [New search] reinitiates the search criteria.
Modifying attributes
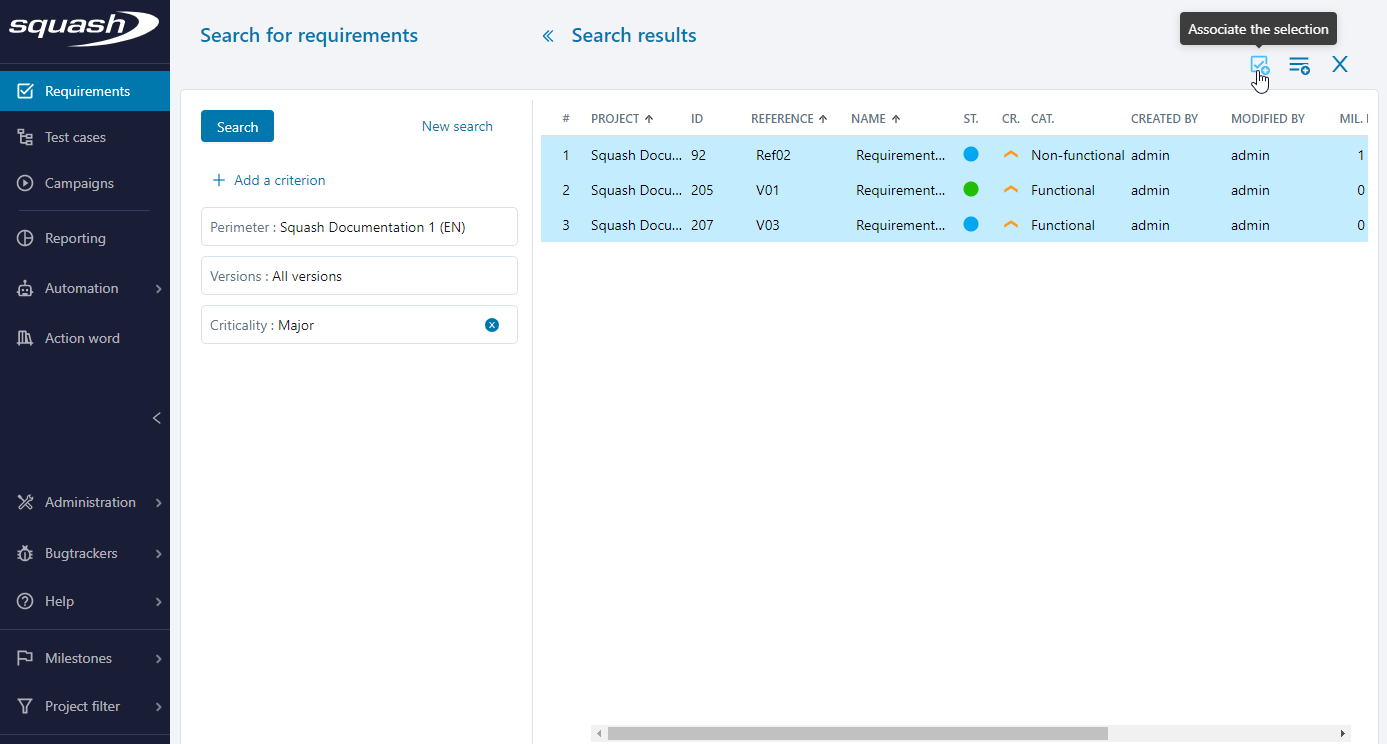
Through a simple or multiple selection, you can mass modify certain attributes by clicking on the button  :
:
- a requirement version's status, criticality, or category
- a test case's importance, status, type, nature, eligibility for automation, automated test technology and URL of the source code repository
- the execution status of a test linked to an iteration plan
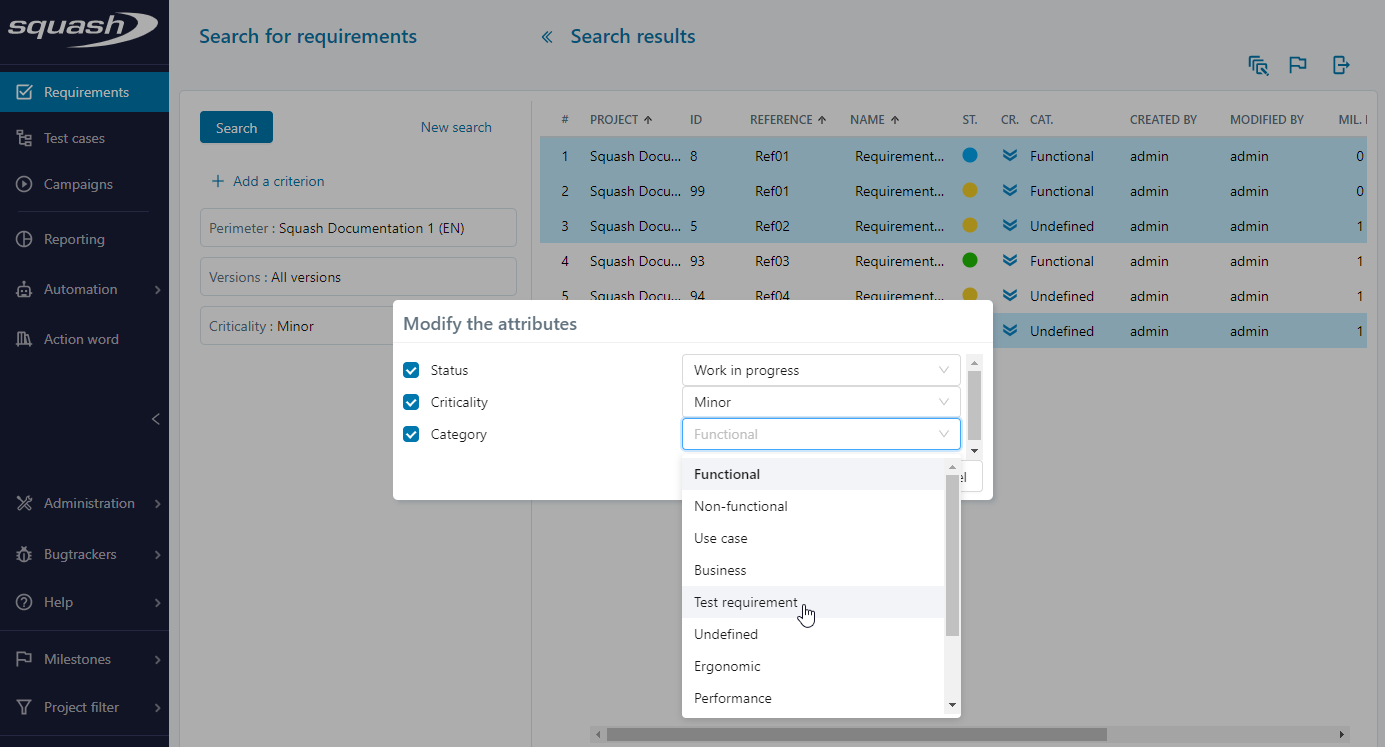
Info
You can, via this feature, apply the "Approved" status to a requirement version from any other status.
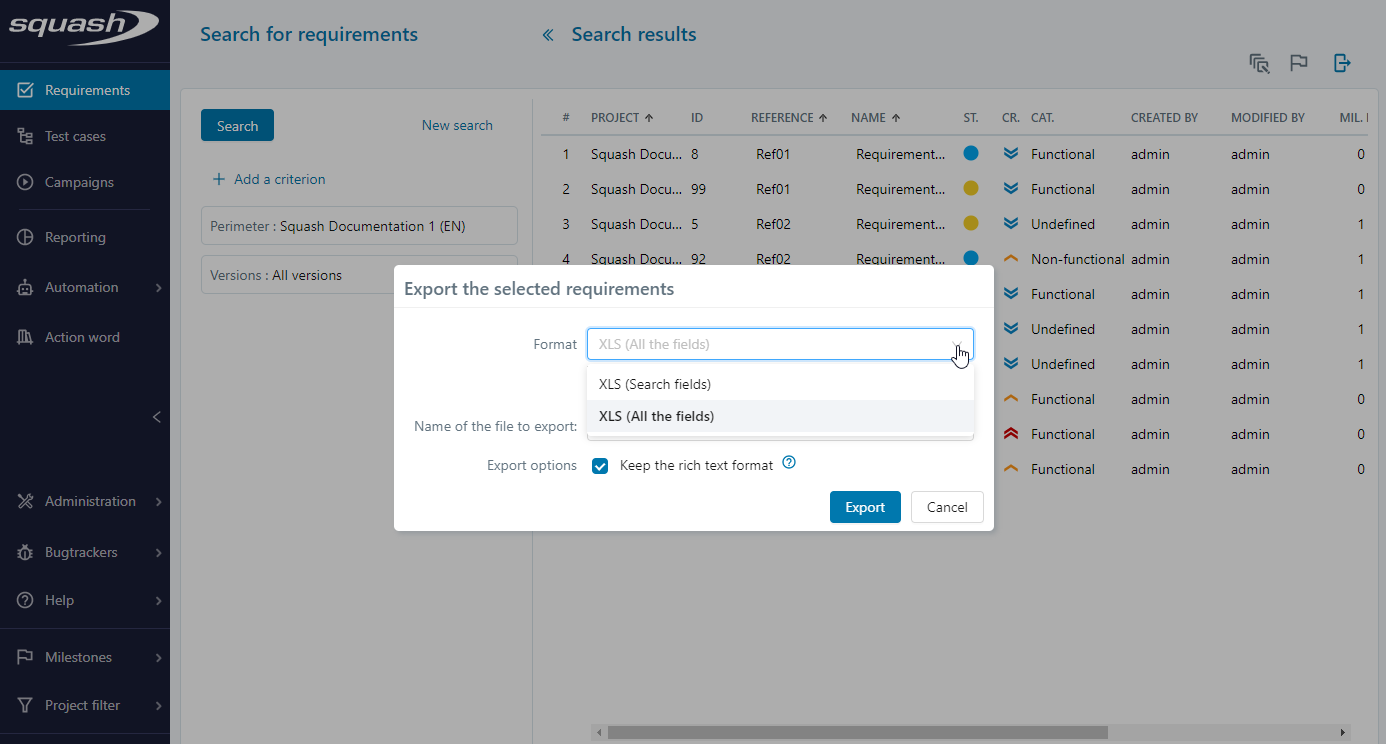
Exporting
By clicking on the button , you can export all or some of the results.
There are several options:
- the "Current fields" XLS format: allows you to recover the data from requirements or test cases by exporting it to an Excel spreadsheet with only the information displayed in the search results;
- the "All fields" XLS format allows you:
- to recover the entirety of requirements or case tests data by exporting it to an Excel spreadsheet;
- to keep rich text format: "rich text" fields are exported with their HTML tags so that they can keep their formatting during a future import. Not keeping this format allows you to facilitate the reading of fields during the export;
- to include or not include called tests (only for the Test Cases workspace).
Learn more
The results of the Campaigns workspace cannot be exported. However, it is possible to add selected results to the execution plan of an iteration.
Printing an Object
It is possible to display the content of a requirement or a test case on a html page to print it.
To do so, on a requirement and a test case consultation page, a "Print" option is available when hovering the button  . This option displays all the information about the requirement or the test case on a html page to print it or to have an overview of it.