Activate and configure Plugins for a Project
To activate and configure plugins for a project, click on the Plugins anchor  on a project's consultation page.
To configure a plugin, click on the button  in the last column of the table.
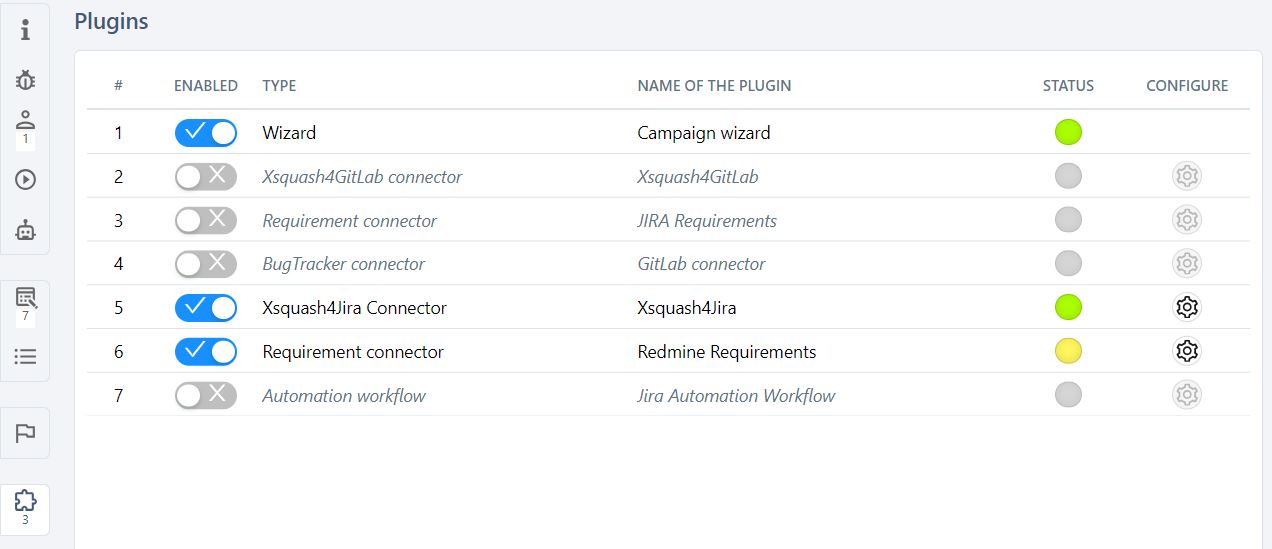
Activate and deactivate Plugins
Before it can be configured, the plugin must be activated. To activate the plugin, click on the button in the Enabled column.
To deactivate a plugin, click once more on the Enabled button. A pop-up appears, asking you whether you want to keep the plugin's configuration or not when you activate the plugin.
If you choose to not keep the plugin's configuration, all the data configured in the plugin will be permanently deleted (synchronization, field mappings, etc.)
The Status dot is:
- gray when the plugin is deactivated;
- yellow if the plugin is activated but not configured;
- green if the plugin is activated and configured. The plugins that do not need to be configured also have a green status dot.
Info
The Campaign Wizard plugin does not need to be configured. As soon as it is activated, the button  appears in the Execution workspace on top of the library, and you can use the campaign wizard.
To learn more about the Campaign Wizard, please visit the page Identify Tests to replay thanks to the Campaign Wizard.
Configure the Xsquash4Jira Plugin
Info
This plugin is available in Community version.
You must install this plugin beforehand to be able to configure it.
The Xsquash4Jira plugin enables you to synchronize Jira issues and sprints as requirements and sprints in SquashTM.
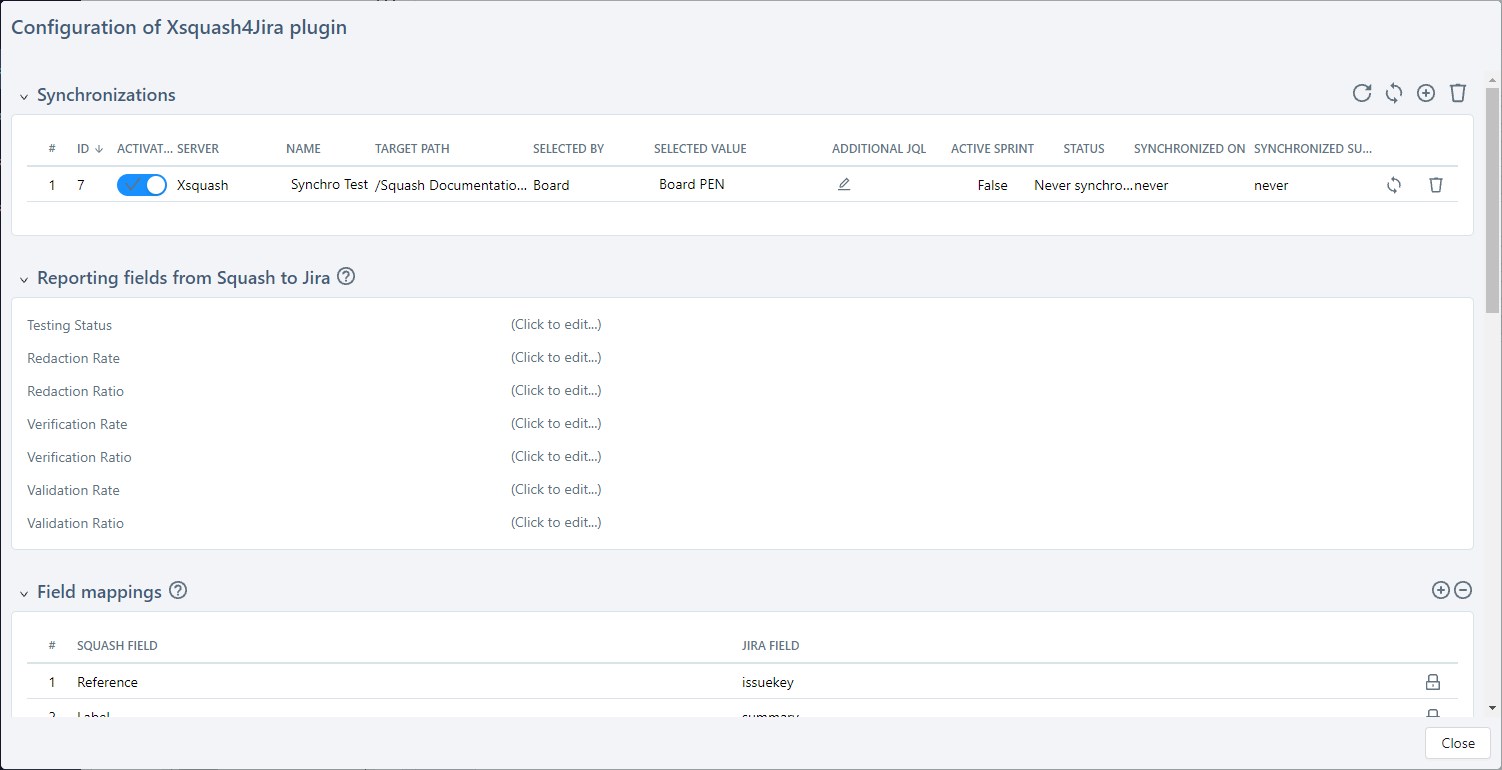
The configuration page contains five blocks:
- the Synchronizations block which enables you to configure the synchronization perimeter;
- the Reporting fields from SquashTM to Jira block which enables you to configure the reporting of the acceptance testing progress directly in Jira;
- the Field mappings block which enables you to configure SquashTM and Jira equivalence fields;
- the Field value mappings block which enables you to configure value equivalences for the fields configured in the Field mappings block that require it. These include list-type fields with Criticality, Category, and Status values;
- the Requirement link mappings block which enables you to configure the link equivalences between Jira issues as links between requirements in SquashTM.
Learn More
To learn more about the configuration of the Xsquash4Jira plugin, please read this detailed page Configure Xsquash4Jira in SquashTM.
Configure the Xsquash4GitLab Plugin
Info
This plugin is available in Community version.
You must install this plugin beforehand to be able to configure it.
The Xsquash4GitLab plugin enables you to synchronize GitLab's issues, milestones and iterations as requirements and sprints in SquashTM.
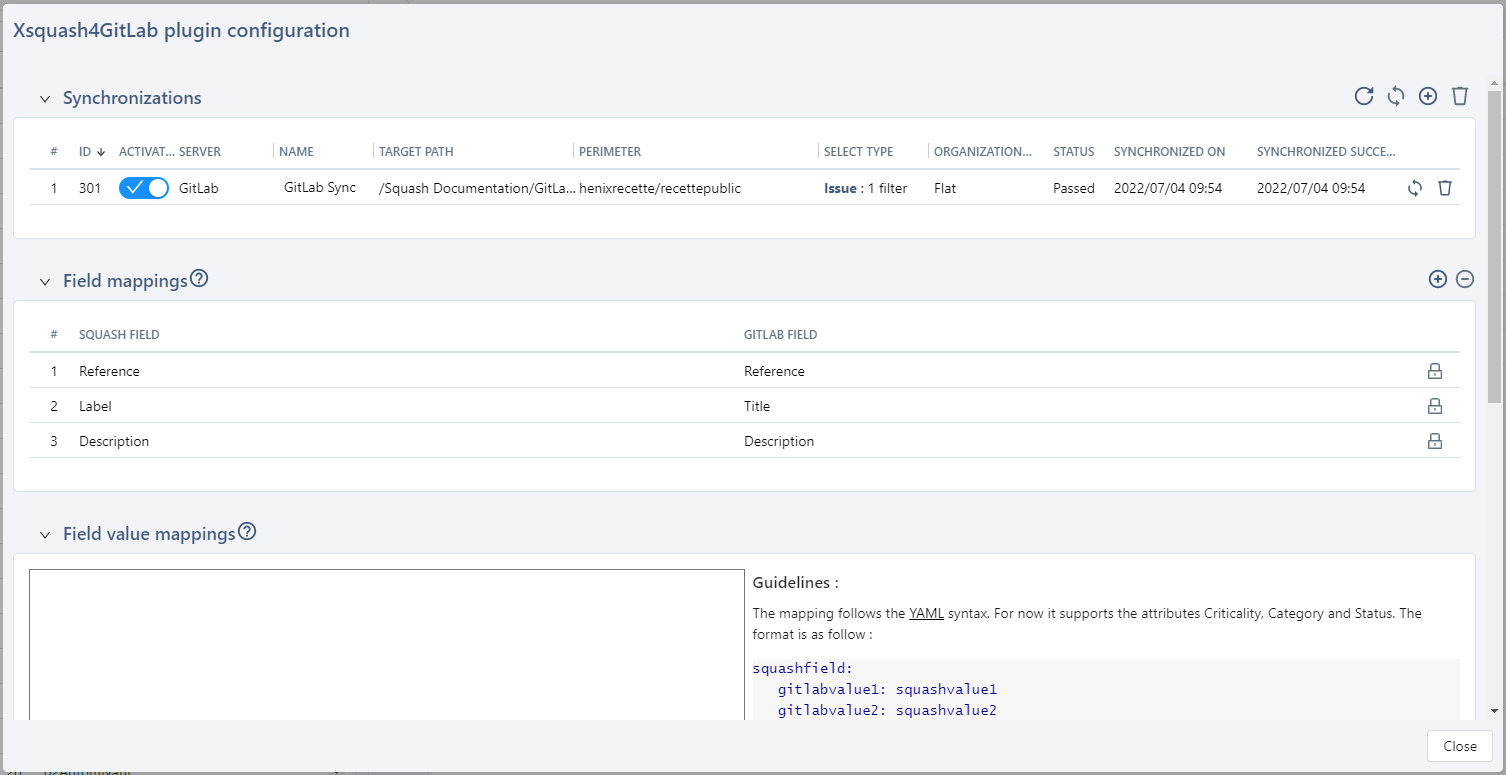
The Xsquash4GitLab configuration page has four blocks:
- the Synchronizations block enables you to configure the synchronization perimeters;
- the Field mappings block enables you to configure the mapping for GitLab and SquashTM fields;
- the Field value mappings block enables you to configure the value mapping for list-type fields: Criticality, Category, and Status;
- the TM acceptance data reporting block allows you to enable or disable the reporting to see the course of acceptance testing with GitLab issues.
Learn More
To learn more about the configuration of the Xsquash4GitLab plugin, please read this detailed page Configure Xsquash4GitLab in SquashTM
Configure the Redmine Req Plugin
Info
This plugin comes with a SquashTM Premium License 👑.
You must install this plugin beforehand to be able to configure it. Please read Redmine Bugtracker and Redmine Requirements.
The Redmine Req plugin enables you to manually synchronize Redmine tickets as requirements in SquashTM.
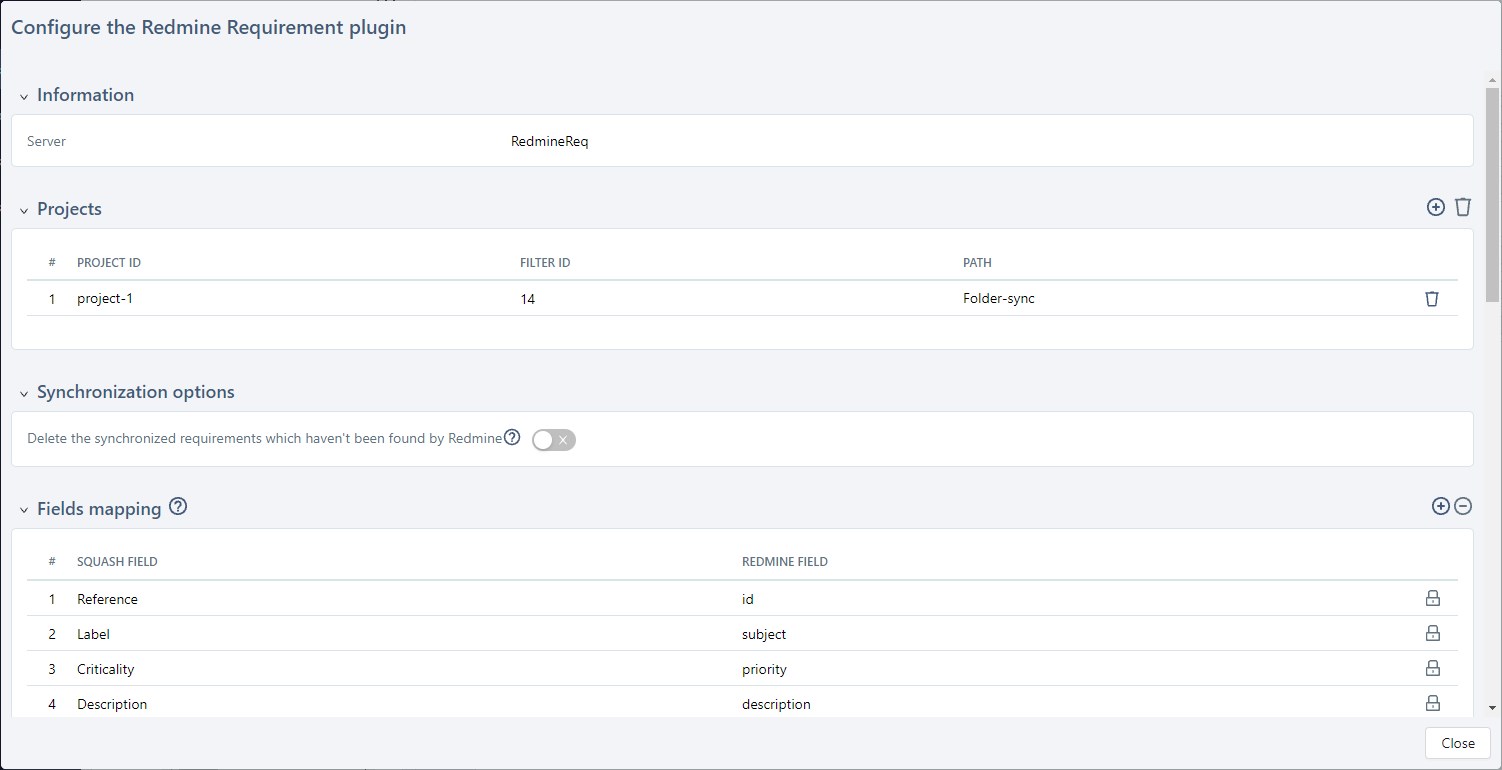
The configuration page of the Redmine Req plugin is divided into multiple blocks:
the Information block which enables you to select a "redmine3.rest" type of server.
the Projects block which enables you to add and delete Redmine projects to synchronize by entering their ID as well as the ID of an associated filter, and potentially a synchronization path;
the Synchronization options block: if this option is enabled, the synchronized requirements located in the SquashTM project that cannot be found by Redmine will be deleted. If this option is disabled, requirements will not be deleted, but their status will be "obsolete".
the Fields mapping block which enables you to add and delete equivalences between Redmine and SquashTM fields. Equivalences for main fields are already done, and cannot be edited: Reference, Label, Criticality, Description, Category, and Status. To add new equivalences, you must create custom fields in SquashTM beforehand and associate them to the project's requirements.
the Field value mappings block which contains a text field as well as a configuration help block that enables the Criticality, Category, and Status field to match the values of Redmine field's list with the values of the SquashTM field's list.
the Requirement link mappings that enables you to match links between requirements in Redmine and SquashTM thanks to a drop-down list.
Add a synchronization
In the Information block, select a "redmine3.rest" type bugtracker previously created in Administration > Servers
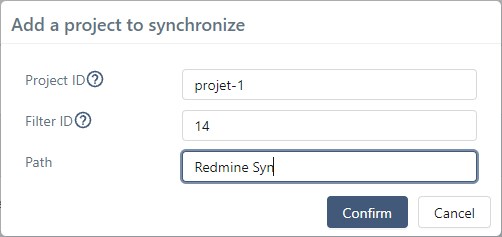
Click on  in the Projects block to open a pop-up window to configure a Redmine project to synchronize. Fill the following fields:
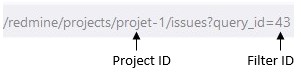
- Project ID: the project ID can be found in the project URL;
- Filter ID: the filter ID can be found in the filter URL, it is a number;
- Path: SquashTM requirement folder's name that will contain synchronized requirements from Redmine.
Project ID and Filter ID are mandatory to add a synchronization. If the Path field is empty, the requirements will be synchronized at the project's root.
It is possible to add several project/filter pairs.
Focus
"Key/value" Redmine fields type are not supported by the plugin and are ignored during the synchronization.
Learn More
To learn more about how to synchronize the requirement repository with Redmine Req, please visit the page Synchronize using Redmine Req.
Configure the Jira Automation Workflow Plugin
Info
This plugin comes with a SquashTM Ultimate license 💎.
You must install this plugin beforehand to be able to configure it. Please read Xsquash4Jira and Jira Automation Workflow.
When the plugin is activated, the field Automation workflow in the Automation block of the project's consultation page is automatically prefilled with the value "Remote server".
Prerequisites
- The Jira Bugtracker plugin (Data Center or Cloud) must be installed for the Jira Automation Workflow plugin (JAW) to work;
- A Jira bugtracker must be created in SquashTM (in the Administration workspace > Servers > Bugtrackers and Synchronization servers).
If a Jira bugtracker is already in the SquashTM instance, we highly recommend that you Create a New Bugtracker for the same Jira server. This new bugtracker will exclusively be dedicated to the Jira Automation Workflow plugin and should not be used as a standard bugtracker in SquashTM projects; - To work, the plugin must be able to connect to a Jira user account that has reading and writing permissions on all the projects involved in the plugin's synchronizations. As a good practice, we recommend that you create a technical account dedicated to the plugin in Jira, with the required permissions only on the Jira projects you want.
How the Plugin works
The Jira Automation Workflow plugin enables the automation test writer to know when they have to automate test cases in Jira. The automation test writer can then show the progress of their work via a custom workflow. Thus, they can say when the automation is over without having to edit the test case's data in SquashTM. When the issue is at the final stage of its automation, a test case can then be automatically executed in a test plan (as long as the automated execution server is configured for the project).
Some of the plugin's features are automatic and automatically start on their own once their configuration is complete.
| Name | Start | Direction |
|---|---|---|
| Create a Jira issue | Manual from the [Transmit] button | From SquashTM to Jira |
| Update a test case | Automatic once the configuration is complete | From Jira to SquashTM |
| Issue update | Automatic once the configuration is complete | From SquashTM to Jira |
| Automatable execution | Automatic when the issue is at its final stage | From Jira to SquashTM, then from SquashTM to SquashTM |
Info
During automatic operations, the plugin never erases test cases in SquashTM, or issues synchronized in Jira. If test cases were to disappear from SquashTM, the corresponding issues would remain in Jira and would potentially have to be manually deleted by Jira users if needed.
Create a configuration
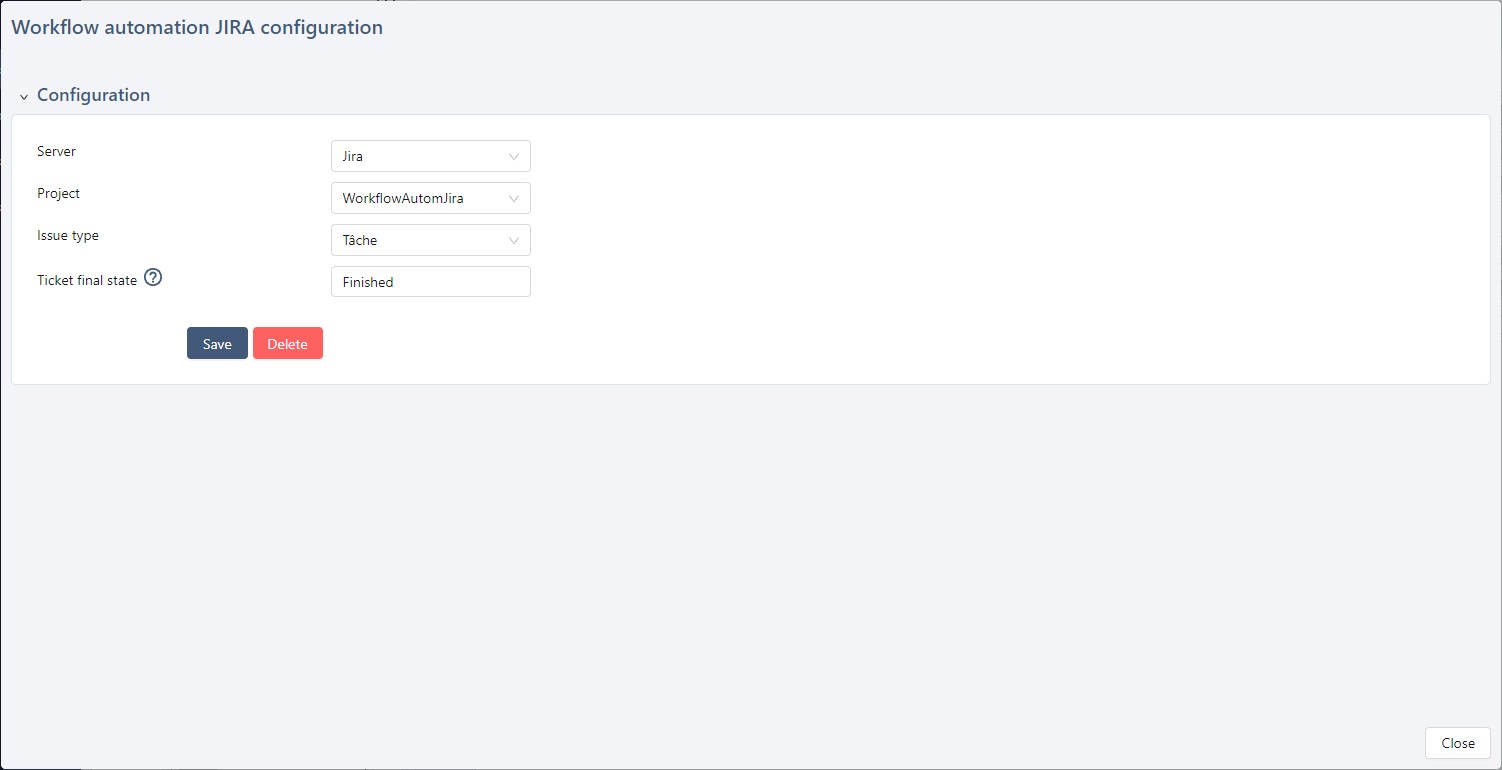
The configuration items are as follows:
- Server: choose in the drop-down list the Jira bugtracker you have previously created;
- Project: the Jira project that will contain the created issues;
- Issue type: type of the issue created in Jira and for which a workflow was configured;
- Ticket final state: state of the workflow for which automation is over and for which a test case can be automatically executed in a SquashTM test plan. (We advise you to use a final state of the Jira workflow).
If mandatory fields were configured for the type of issue selected, they will appear on the configuration page and will have to be completed.
Learn More
To learn more about how to transmit test cases to Jira, please visit the page Track the Automation Process in Jira.
Configure the GitLab Bugtracker Plugin
Info
This plugin is available in a Community version.
You must install this plugin beforehand to be able to configure it.
GitLab Bugtracker plugin allows to report issues from SquashTM to GitLab and to track these issues in SquashTM.
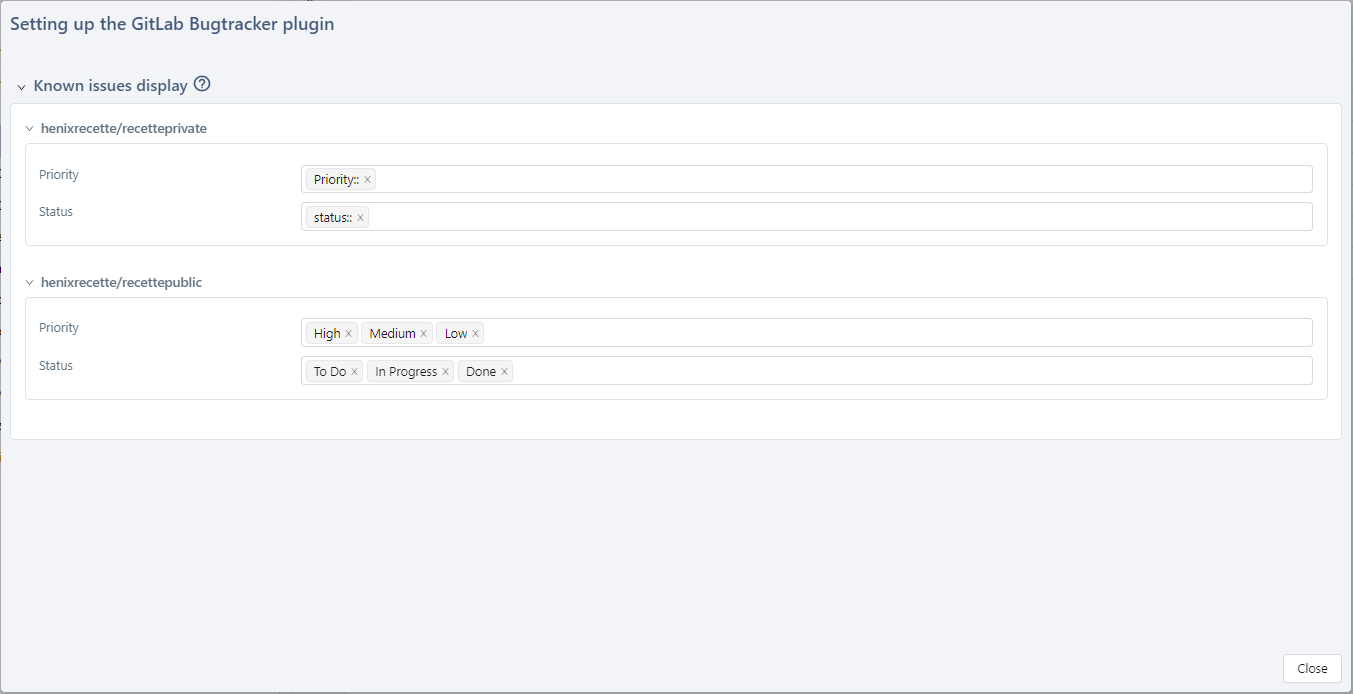
Unlike the other bugtracking plugins, it has a configuration page. This page allows to define the information that is displayed in the Priority and Status columns of the SquashTM Known issues tables.
Indeed, in GitLab, issues status and priority are defined as labels in a single field. In GitLab Premium version, they can be defined as scoped labels, that allow labels to have mutually exclusives values.
To configure GitLab bugtracker plugin, it is necessary to first configure the link with a GitLab bugtracker on a SquashTM project.
Once the link is set, the plugin configuration page allows, for each GitLab projects linked to the SquashTM project, to define the GitLab label or scoped labels values to display in the Priority and Status columns of the SquashTM Issues and Known issues tables.
A checkbox allows to choose whether to display the Issue state (opened or closed) in the Status column for known issues tables. If an equivalence is configured for Status, the display will be in the form <value of the label(s)>, <state>.
If the GitLab issues reported from SquashTM (or linked to a SquashTM execution) have at least one configured label, it is displayed in the corresponding column. If the mapping is not defined or if the plugin is not activated, these columns are empty.