Conceiving the scenario of a Classic Test case
The minimum goal of each test is to verify the expected result specified by a requirement. To reach this goal, you must conceive a test scenario. This scenario is composed of a series of actions to carry out in the tested tool to verify its expected behavior. In SquashTM, you can manage the test scenario of a classic test case in the anchor Prerequisites and test steps.
Prerequisites and Test steps of a Classic Test case
The anchor Prerequisites and test steps  of a Classic test case contains two parts:
- a prerequisite:
In this field you can find the test's preconditions, such as the details of the actions to perform or the conditions to be met before beginning the execution of the test steps;
- test steps:
Test steps are a series of steps. They are composed of two fields: an Action field, which contains the instructions for the actions to perform; and an Expected results field, which contains the expected behaviors of the tool.
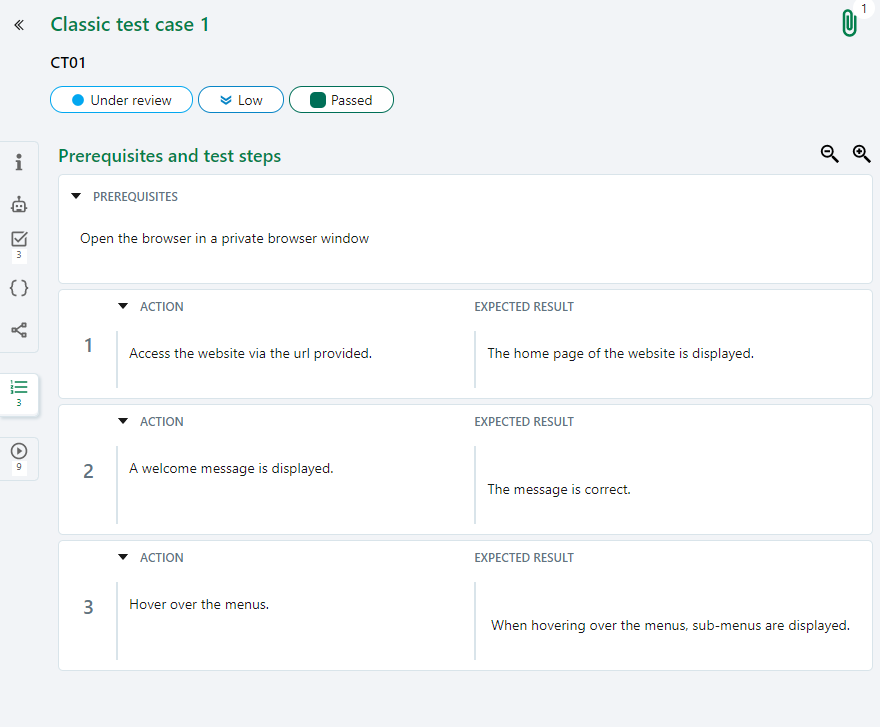
The fields Prerequisites, Action, and Expected Result are rich text fields in which you can add formatting, tables, URLs, and/or images.
Focus
We highly encourage you not to copy and paste images in the different rich text fields within SquashTM. To learn how to add images in the fields Prerequisites, Action, and Expected Result, please visit the page Inserting an image in a rich field.
When hovering on the test steps, an icon bar appears on the top right of the block. Using these icons allows you:
- to add
 a test step (will directly be added under the selected test step);
 - to delete
 a test step;
 - to copy
 and paste
  a test step;
 - to link requirements;
- to call a test case;
- to show details of the test step;
- to add an attachment. You can also directly drag and drop an attachment on the test step.

If the test step contains custom fields, attachments or linked requirements, these items are displayed under the Action and Expected Result fields.
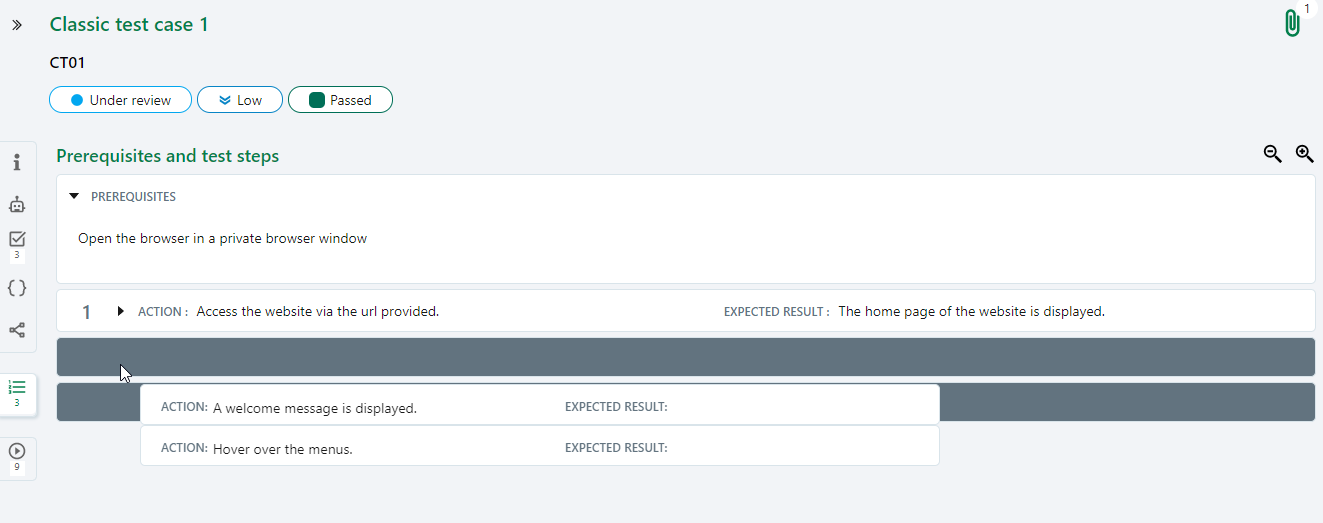
The button  allows you to minimize the display and to have an overall view of the redacted test steps. The button
  allows you to expand the test steps display. To reduce or maximize the display of the prerequisite or test step, use the following arrows:
  and
and  .
.

Info
To copy/paste or delete several test steps at once, select all the test steps you want to delete by clicking on their position number using Ctrl + click then click on the corresponding button.
Reordering Test steps
To reorder one or several test steps:
- Select the test steps to order by clicking on their position number using Ctrl + click;
- Click on the two dotted vertical lines before one of the position numbers;
- Drag and drop to the destination location.
Info
To make reordering test steps easier, we recommend that you use reduced display.
In full view, you can also move a test step one step up or down using the arrows ![]() and
and ![]() which appear when you hover on the test step.
which appear when you hover on the test step.
Linking a Requirement to a Test step
Linking a requirement to a test step allows you to obtain a more precise requirement coverage by the tests.
There are two ways to link a requirement to a test step:
Using the option Linking requirements:
- Click on the button
 which appears when you hover on a test step;
 - Select the option Linking requirements;
- The requirements repository tree appears on the right and allows you to link requirements to test steps by using drag and drop.
- Click on the button
Using the option Test steps details:
- Click on the button ;
- Select the option Test steps details;
- On the Test steps details page, click on the button
 or
or  to add requirements to the table Requirements verified by this test case;
 - When a requirement is linked to the test case, the Step checkbox is checked by default. This indicates that the requirement is also linked to the test step.
- Click on the button
Once the requirement is linked to the test step, it appears in several locations:
- in the test step, after the fields Action and Expected Result;

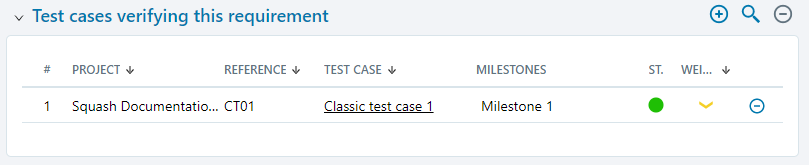
- in the table Requirements verified by this test case of the test case with its assigned number in the column Verified by;

- in the requirement's table Test case verifying this requirement.
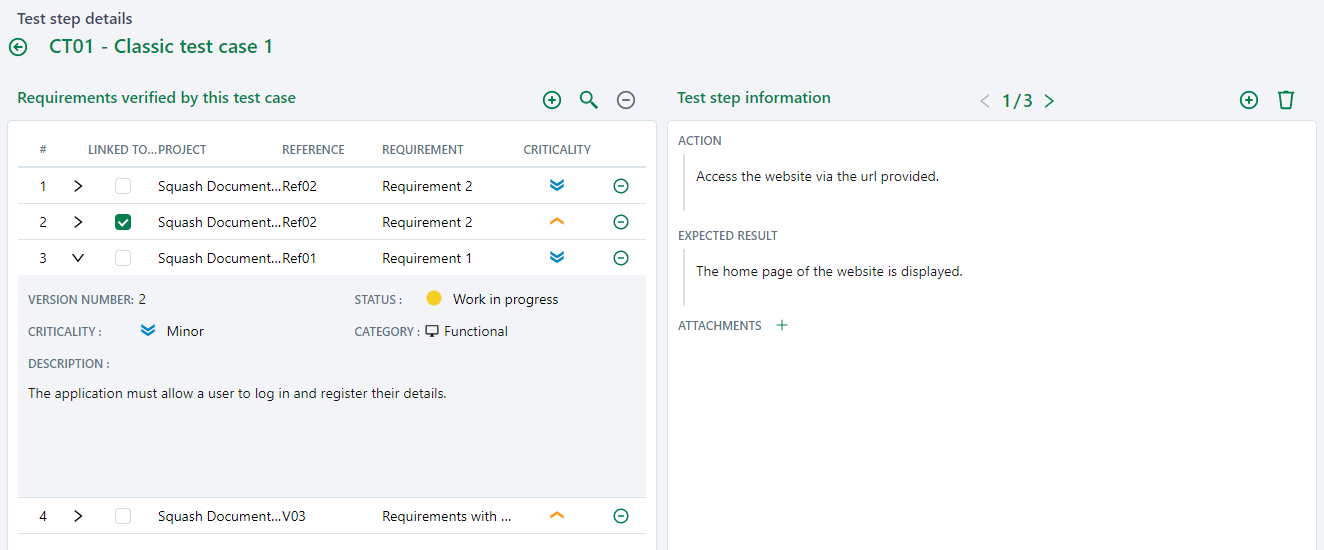
Conceiving a test step by viewing requirements
You can create, modify, and delete a test case's steps while viewing its linked requirements on the same page:
- Click on the button by hovering on the test step;
- Select the option Test step details;
- The page Test Step Details appears with a viewing space of the linked requirements on the left, and the test step's information on the right;
- Click on the button [>] to view the requirement's details.
The fields Action and Expected Result can be edited. You can add a test step using the button and delete it with the button .