Validate sprint requirements
Create and organize sprints
Create a sprint
From the Executions workspace, when you select a project, you have the option to add a sprint using the  button.
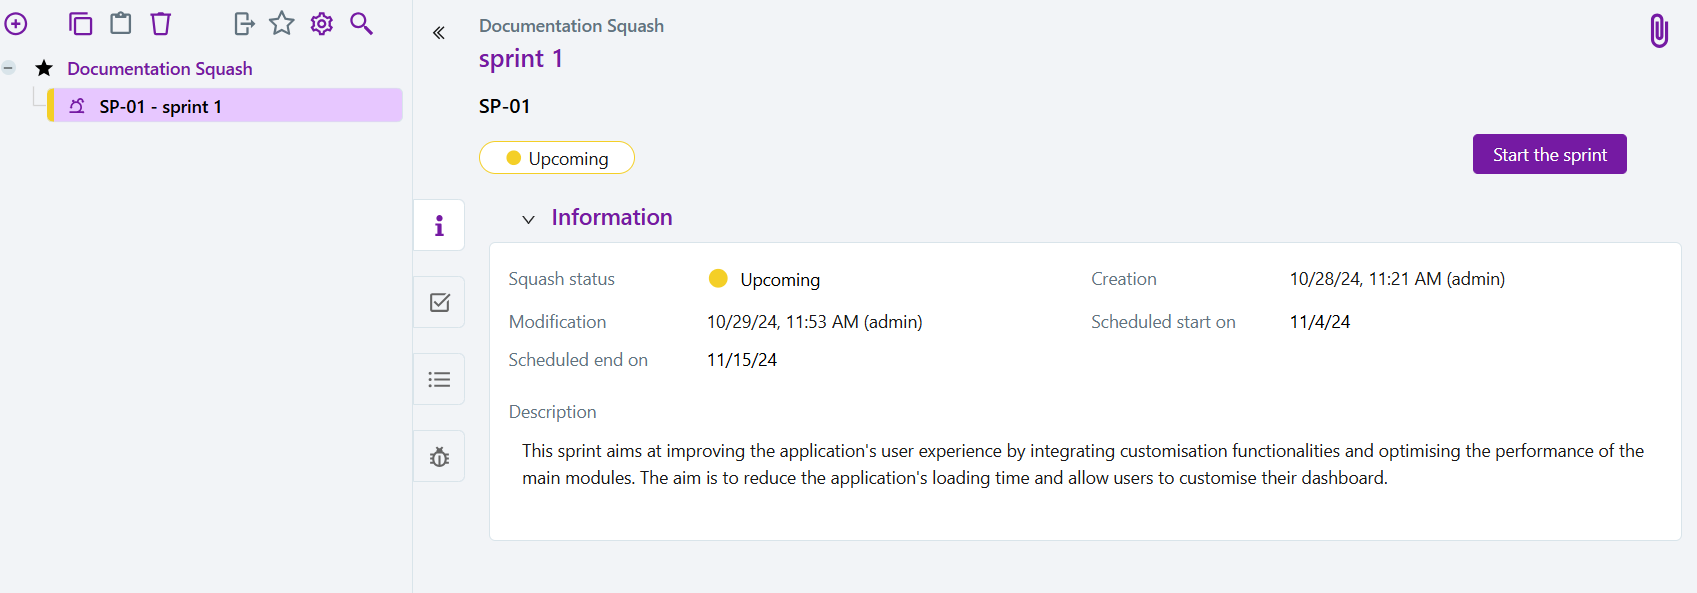
Only the name is required, but it is recommended to fill in the following fields:
- Reference: this is useful for organizing the tree structure;
- Start and End dates: these are indicative and do not affect the state of the sprint;
- Description: this helps communicate the sprint goals specifically for testers.
When a sprint is created, it is initially in the "Upcoming" state. The state can be changed when the sprint is started and when it is closed.
Organize sprints
A sprint can be created:
- directly at the root of a project;
- in a folder;
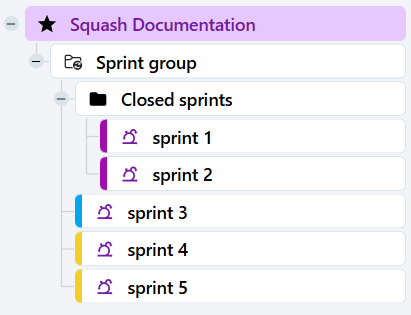
- in a sprint group. A sprint group allows sprints to be organized and grouped together. Sprint groups can themselves contain folders, for example to store completed sprints.
Focus
A sprint group can only contain sprints and folders that do not contain campaigns.
There can only be one sprint group per path in the tree.
In the tree structure, a colored tab over the name of a sprint indicates its status. This makes it easy to see which sprints are upcoming, open and closed.
Add requirements to a sprint
The Sprint requirements block is used to manage the content of a sprint, in particular by adding requirements to it.
There are two ways to do this:
- Via the drag and drop of requirements from the Requirements linking library to the sprint requirements table (button
 );
); - Via the requirement search to identify and add requirements based on specific criteria (button
 ).
).
Learn more
For more information on the association mechanism, see Linking two Objects using the Linking Library and Linking two Objects using the Search Function.
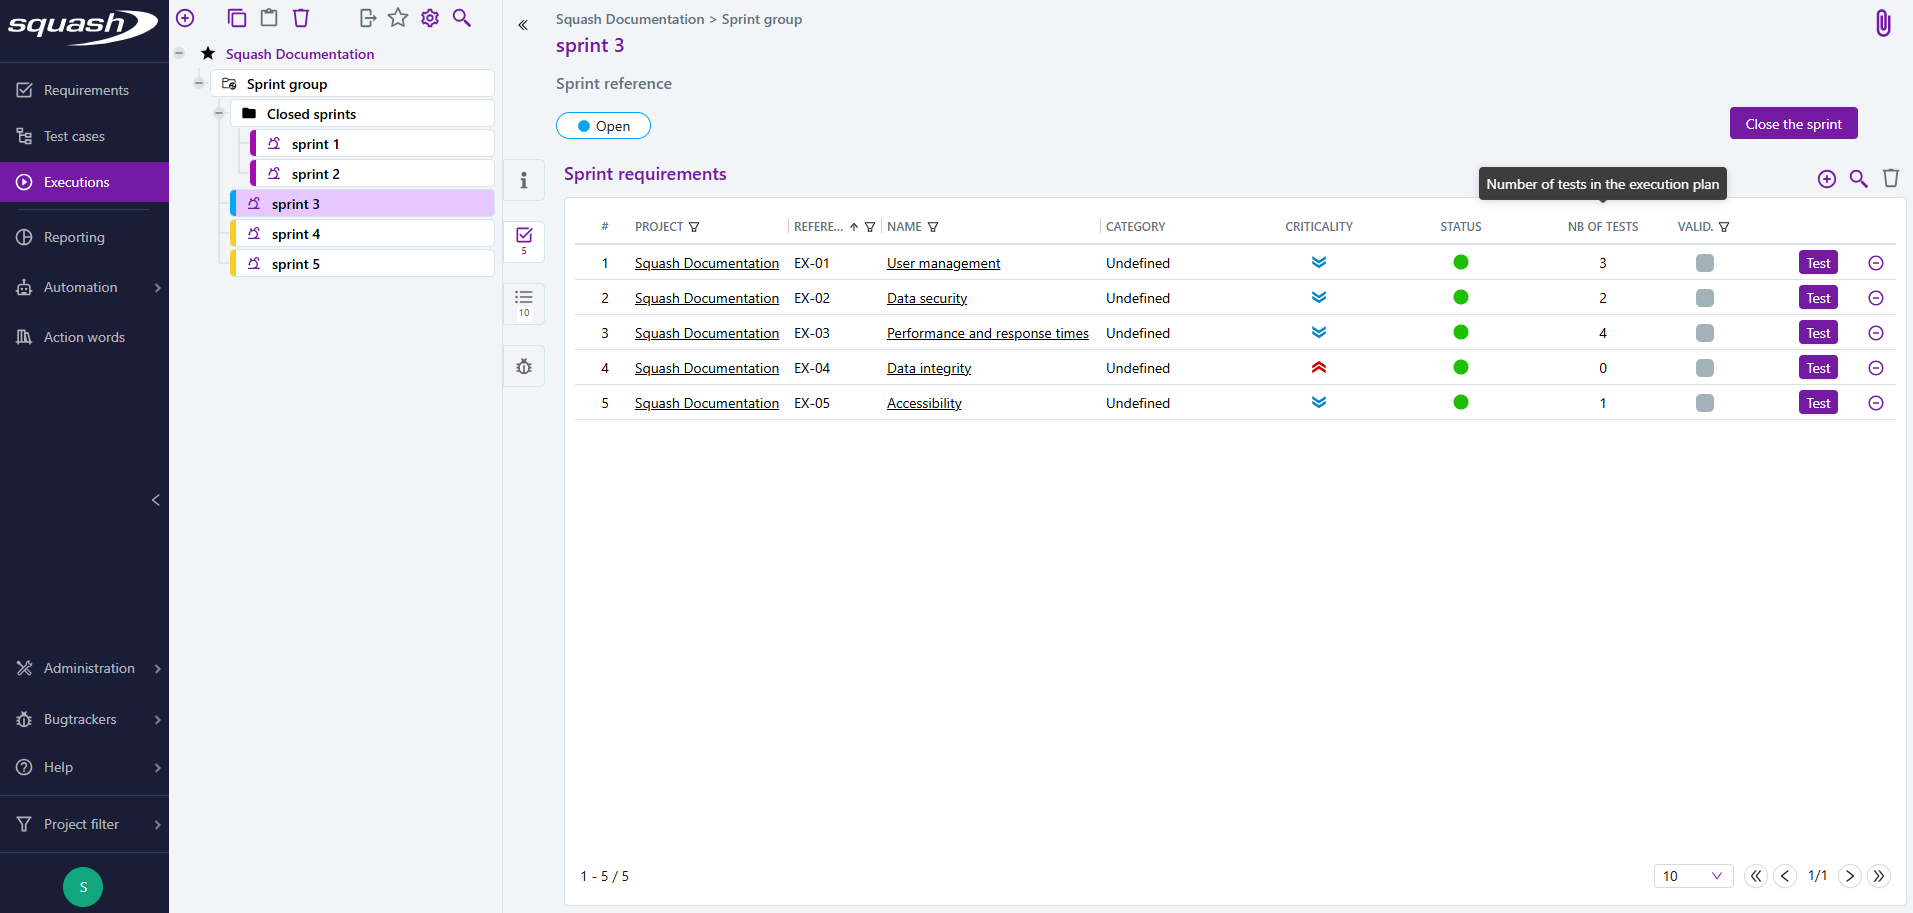
Once linked to the sprint, the requirements and their attributes (category, criticality, status) appear in the sprint requirements table.
The Number of tests in the execution plan column shows the number of tests to be run to validate each requirement.
Start a sprint
Once the sprint content is ready and depending on its start date, you can begin the sprint by clicking [Start the sprint].
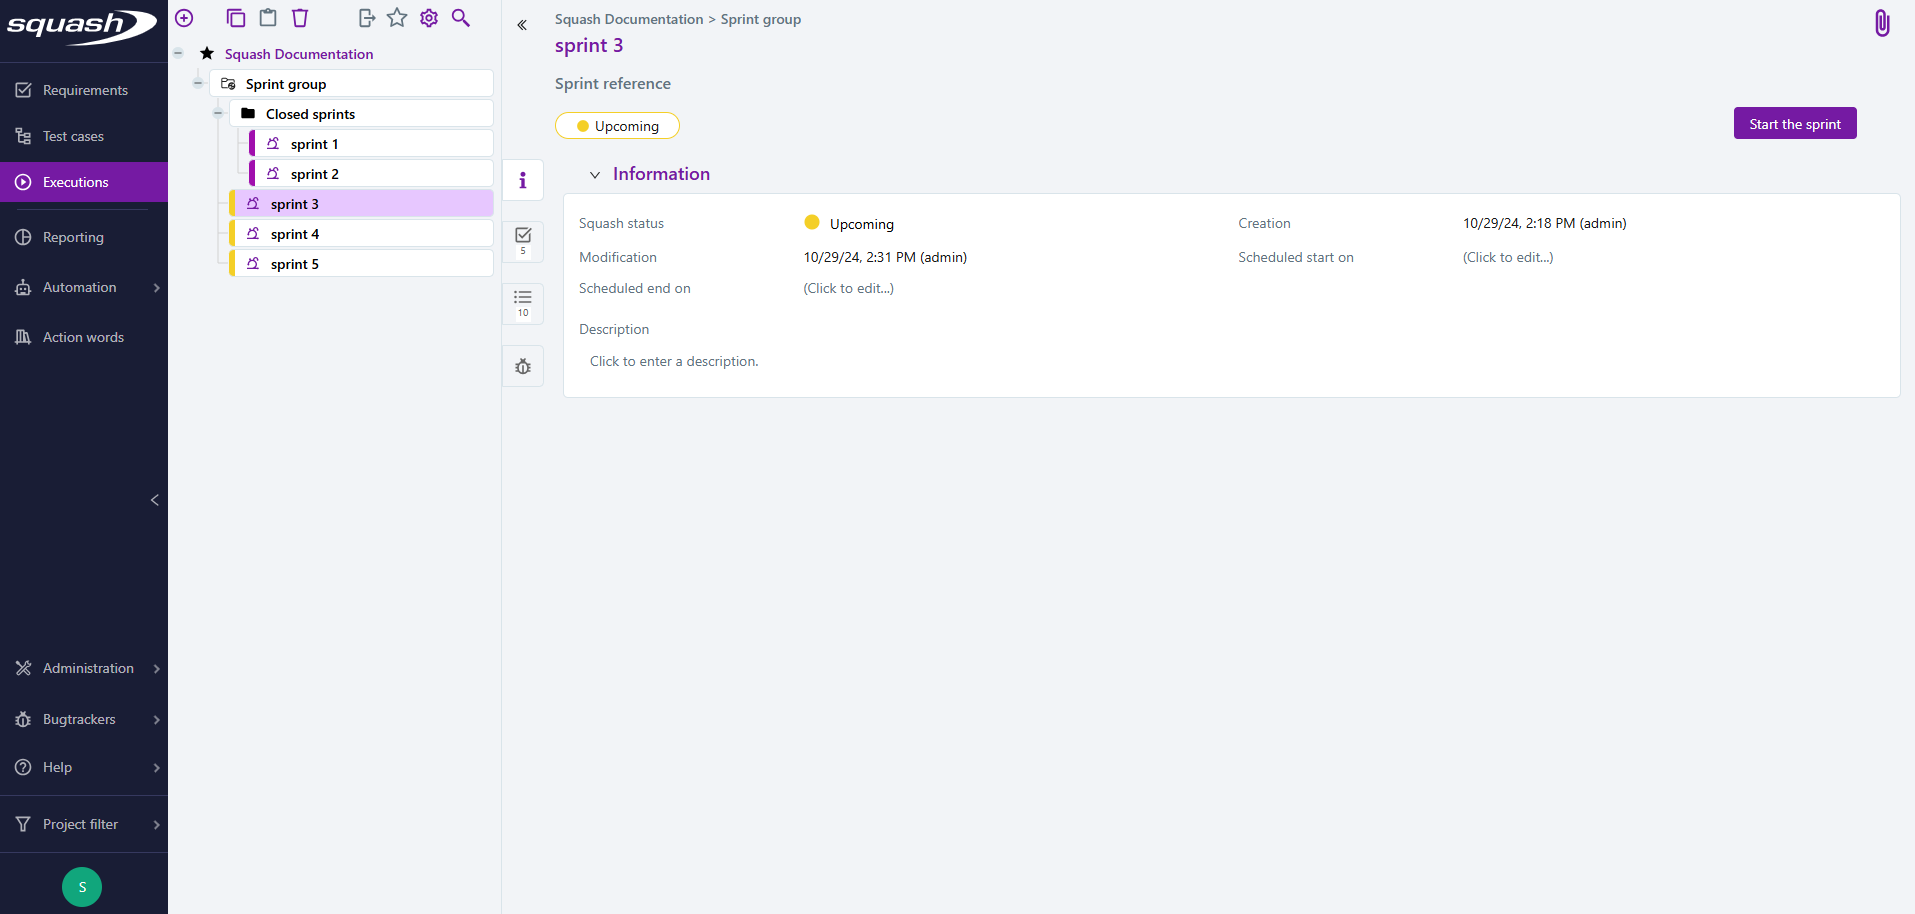
The status of the sprint changes from Upcoming to Open. Requirements validation can then begin.
Test and validate sprint requirements
Access the requirement testing page
To test a requirement in a sprint, you need to click on the corresponding [Test] button in the Sprint Requirements table, which will take you to the requirement's test page.
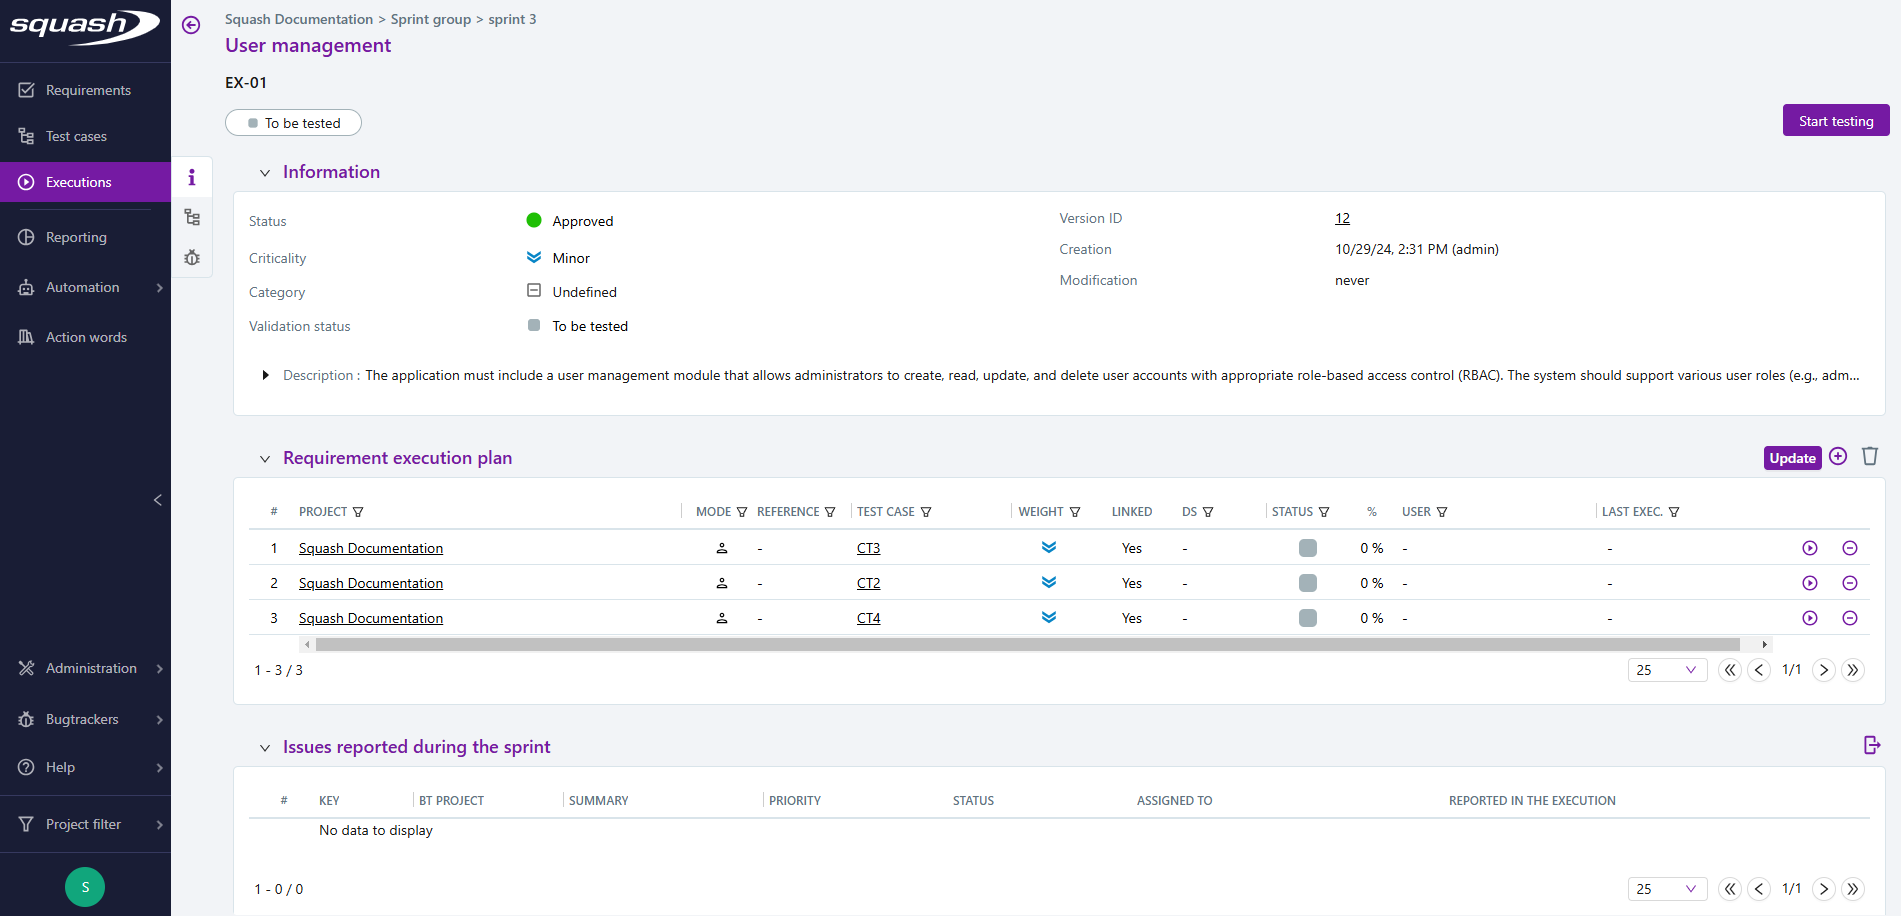
From this page, you can:
- view the main information about the requirement, including its description, in the Information block;
- manage the requirement execution plan and run tests in the Requirement Execution Plan block;
- view issues associated with the requirement for this sprint in the Issues reported during the sprint block.
Manage the requirement execution plan
When a requirement is added to a sprint, its execution plan is automatically populated with the test cases that verify the requirement.
It is then possible to modify the execution plan in two ways:
- by adding test cases using drag & drop from the
 button;
 - by using the [Update] button, which allows you to view and, if necessary, add any test cases which may have been associated with the requirement after it was added to the sprint.
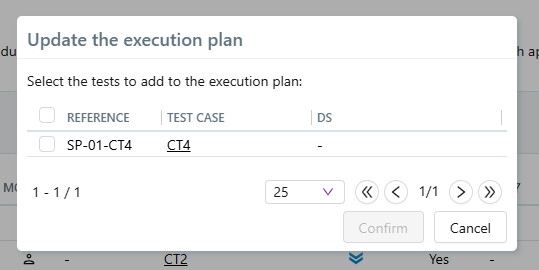
Focus
When a test case that is not associated with the requirement is added to its execution plan, there is no automatic association between the test case and the requirement. This association must be made from the requirement or test case consultation page.
The [Update] button is only used to add tests to the execution plan; it does not delete tests from the execution plan, even if they are no longer associated with the requirement. In particular, this avoids unwanted deletions of executions which may have been carried out during the sprint.
The Linked column indicates whether the test is associated with the requirement.
Start testing
When the requirement is ready to be tested, the [Start testing] button (at the top right of the screen) changes the validation status of the requirement to Test in progress.
The test cases in the execution plan can be launched using the button  .
.
Tip
To find out more about executing test cases, refer to the Manually execute tests page.
The Issues reported during the sprint grid is automatically updated with the issues reported during the executions.
Validate the requirement
At the end of testing, based on the results and at the tester's judgement, the requirement can either be validated or invalidated using the [Mark as validated] and [Mark as to be corrected] buttons, which update the requirement's validation status.

Track the validation of sprint requirements
The data entered by the tester for a requirement within a sprint is reflected at the sprint level, providing an overview of the sprint's progress:
- When a tester validates or invalidates a requirement, the status is updated in the Validation status column in the requirements table for the sprint. This table allows for a quick distinction between requirements that need correction and those that need validation or further testing.

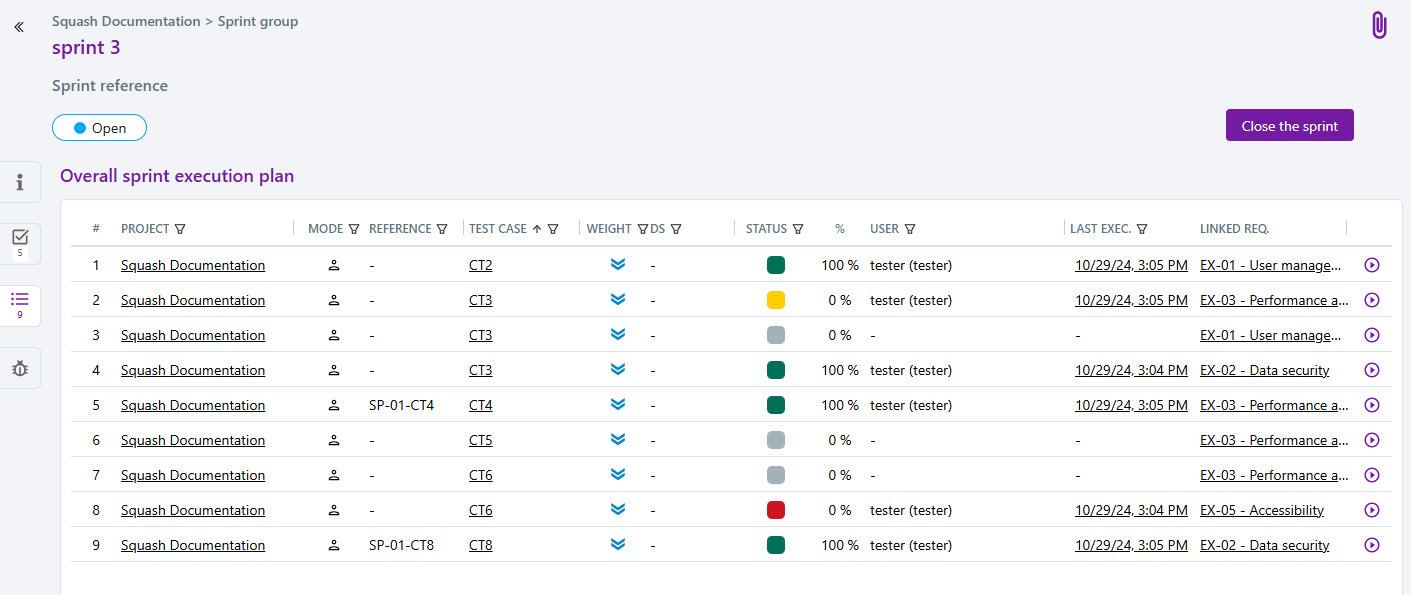
- The overall sprint execution plan consolidates all tests from each requirement's execution plan within the sprint. As tests progress, the overall plan updates to provide an overview of completed tests and those still pending for the sprint.
Focus
From the overall sprint execution plan, it is also possible to launch executions, view the execution history and change the status and assignment of each test.
Finally, any issues detected during the sprint are recorded in the issues reported during the sprint table. This table consolidates all issues reported during the execution of each test case within the sprint.
Close a sprint
Based on the sprint's end date or once testing is complete, an open sprint can be closed by clicking [Close the sprint]. The sprint's status will then update to Closed.

When a sprint is closed, it is no longer possible to:
- add or remove requirements;
- modify the sprint requirements' execution plan;
- launch or modify executions;
- modify the requirements' validation status.
Closing a sprint effectively locks the state of its requirements at the time of closure. If a requirement associated with a closed sprint is altered or removed, these changes will not be reflected in the sprint's requirements table.
After a sprint has been closed, the [Reopen the sprint] button can be used, if needed, to return the sprint to an open state. Upon reopening the sprint, the requirements linked to it will be updated to reflect the most recent changes made to those requirements.
